I am glad to welcome you again, dear reader of my blog. I’m in touch with you, Timur Mustaev. Today I want to touch in more detail on another element of the exhibition – exposure. Surely you know that your camera has such a parameter. Surely you've heard of him? Many photographers often leave its settings to the will of “autopilot”, simply not knowing how to set it up.
Today I will tell you about shutter speed, how to manage it, give several historical facts, personal examples, and tell you why it is needed in general.
Before proceeding, I would advise you to familiarize yourself with parameters such as aperture and ISO. Since these parameters depend on each other, they make up the exposure.
So, let's begin.
Classification.
So, the camera shutter speed can be short or long. A short parameter is considered to be from 1/60 to 1/8000 of a second, while a long one is from 0.5 seconds to 30 seconds. The first type allows you to obtain an image almost instantly, which is beneficial for use in dynamic scenes. The second type is more convenient for obtaining a beautiful image, getting rid of unnecessary details and drawing with light.
Officially speaking, there are many meanings for shutter speed. There is a standard among camera manufacturers according to which a fraction of a second is indicated in the parameter value (for example, 1/1000), but due to inconvenient recording, the denominator is taken as an indicator and the numerator is omitted, that is, simply 1000. This designation is relevant for the parameter if it is less than a second, and if it is larger, the number of seconds is simply recorded.
However, no matter how wide the range of acceptable values covered, it was not sufficient. Therefore, we created unique modes for adjusting shutter speed.
It is not possible to activate them on every camera, but if there is an opportunity, then it can be activated by setting a special parameter on the mode selection wheel.
This is B or Bulb. It allows the shutter to remain open while the shutter button is pressed. This can be convenient for shooting “light photography”.
Shutter speed, or the exposure time of a photo, is the time it takes the camera to take a photo. At first, everything here seems simple, but the deeper you dive into the topic, the more complex and interesting it becomes.
Exposure of a photo on a DSLR camera. The mirror rises, the shutter opens for the duration of the exposure, then closes.
NIKON D850 / 70-300 mm f/4.5-5.6 settings: ISO 64, F7.1, 1/50 s, 70.0 mm equiv.
In modern cameras, the exposure time is determined by the shutter. Before shooting begins, the matrix is covered with opaque curtains (lamellas), and is only opened for a short time to take a shot. The shutter is a very precise mechanism that can open for a given shutter speed with an accuracy of thousandths of a second. We have already prepared a separate lesson in more detail about the operation of the shutter.
Shutter speed is measured in seconds and, more often, in fractions of a second. Even the most affordable models of modern DSLRs and mirrorless cameras operate at shutter speeds from 1/4000 to 30 seconds.
The current shutter speed is always displayed on the screen and in the camera viewfinder, even if you are shooting in Auto mode.
Most often, shutter speed is indicated by a fraction. The higher the number in the denominator, the shorter the shutter speed. For example, 1/100 s (one hundredth of a second) is longer than 1/1000 s (one thousandth of a second).
Shutter speed 1/60 s is displayed on the display of the Nikon Z 7 camera
Keep in mind that on some devices, when indicating shutter speed, the numerator of the fraction is discarded, and, for example, the same 1/100 is displayed on the screen simply as 100. This still means a hundredth of a second. This is exactly how, without a numerator, shutter speed is indicated in the optical viewfinder of a SLR camera and on the top information display of advanced cameras
When shutter speeds are lengthened and whole seconds are counted, this is indicated by the sign “. For example, 2 is 1/2s, and 2” is two seconds.
What does exposure affect?
The amount of light falling on the sensor. The longer the camera shutter is open, the more light will hit the matrix and the brighter the frame will be. If we are shooting outdoors on a clear day, enough light for a good shot will hit the sensor in a short time. And in low light it will take a long time to collect the same amount of light - the shutter speed needs to be lengthened. But at the same time, blurry frames when shooting in a city at night, in low light conditions, are precisely the result of shooting at too long a shutter speed.
Transferring moving objects to photos. The faster an object moves in the frame, the shorter the shutter speed is needed to “freeze” its movements in the photo. We are not talking specifically about specific excerpts yet - it is important to understand the principle itself. Sometimes, for artistic purposes, it is worth blurring moving objects in order to separate static and dynamic models in a still picture. A classic example is blurring water or sky in landscape photos.
In automatic modes, scene programs, modes P and A, the shutter speed is adjusted automatically by the camera. In this case, the device is guided by its internal algorithms. Sometimes the machine works better than the user who just picked up the camera. But in complex plots it may not work satisfactorily.
Risk factors include shooting fast movement and working in low light (and for a photographer, this can be considered anything other than a sunny summer afternoon). A simple example: in the “Sports” subject program, the automation sets the shutter speed shorter than usual in order to achieve clear transmission of movement. But the machine does not know all the features of our shooting. It is necessary to take into account the type of sport, the level of training of the athletes, and many other specific factors. As a result, the automation may not guess with the shutter speed, resulting in blurry photos.
NIKON D810 / 18.0-35.0 mm f/3.5-4.5 settings: ISO 50, F16, 1/4 s, 18.0 mm equiv.
Grit is also a creative tool. At different values you can get completely different frames. This is easy to verify by filming, for example, the surf. Place your camera on a tripod and try shooting rolling waves at shutter speeds from 1/1000 to 30 seconds. All shots will be different!
The skill of a photographer is the ability to adjust shutter speed in accordance with shooting conditions and creative tasks.
Shooting mode dial on the Nikon Z 50 camera
Modes in which shutter speed is adjusted
Mode S - “Shutter Priority”. In this mode, the photographer controls the shutter speed, and the automation selects the appropriate aperture value. A convenient mode when you don’t have time to monitor all the exposure parameters, but you need to control the shutter speed. This is most often required when shooting motion. This mode can also be used when working in low light: by fixing the shutter speed at the desired value, we will not allow the automation to lengthen it unnecessarily and thereby avoid the appearance of movement (more on that below).
On cameras with two parameter adjustment wheels in modes S and M, by default the shutter speed is adjusted in the rear.
A classic beginner mistake: shooting in S mode results in dark images. This means that the shutter speed is set too short and the automation that controls the aperture in this mode cannot collect the required amount of light in such a short time, even by opening the aperture to the limit. In this case, the aperture value will blink in the display and viewfinder. Don't miss this moment! In order for the frames to be bright in such a situation, it is worth increasing the light sensitivity (ISO) or even giving this parameter under automatic control (Auto-ISO) and still slightly lengthen the shutter speed if the scene allows.
NIKON Z 7 / 70.0-300.0 mm f/4.5-5.6 settings: ISO 200, F5, 1/500 s, 140.0 mm equiv.
Mode M - manual mode. Here the photographer himself controls three exposure parameters. Having set a certain shutter speed, you need to select the appropriate aperture and ISO values. In many cases, you will have to tightly control all three parameters. Landscape, interior, architecture, studio shooting with pulsed light - these are examples of areas where manual mode is indispensable. M mode requires experience and dexterity and is not suitable for dynamic work - the lighting can change constantly, which means you will have to constantly adjust the exposure parameters. To adapt M mode for dynamic reportage shooting, just activate Auto ISO. On modern Nikon cameras, Auto ISO is a real salvation when you need to control both shutter speed and aperture and still shoot quickly. A simple example is a portrait photo walk: the model will not wait while you fiddle with the camera. In such a scene, you need a shutter speed fast enough to avoid blur, and an open aperture to blur the background. And the automation will select the brightness of the frame itself, flexibly and accurately adjusting the light sensitivity.
NIKON D810 settings: ISO 450, F3, 1/400 sec, 90.0 mm equiv.
Error in setting shutter speed: shake
So, shutter speed is responsible for transmitting movement. The faster the movement, the shorter the shutter speed is needed to make it clear. But it happens that when shooting an absolutely motionless scene, the frame is still blurry. The reason for this is our own movement: the camera in our hands always moves a little, trembles. This needs to be taken into account. Blurring due to camera shake is called camera shake in photographers' slang. The bad thing about the hair is that it cannot be eliminated during processing. Occasionally, image blur can be perceived as an artistic effect, but more often it is simply a technical defect.
How to shoot without moving. If you have a camera with a kit lens, just don’t set the shutter speed longer than 1/60 s. And if the shutter speed was set automatically at a longer time (in auto mode, P or A mode), activate the built-in flash, improve the lighting conditions or raise the ISO.
If you have lenses with a large zoom in your arsenal, you may have noticed that the larger the zoom, the more the image in the viewfinder shakes. Therefore, with long lenses the advice not to use shutter speeds faster than 1/60 s does not work. It turns out that a safe shutter speed for handheld photography also depends on the viewing angle of the lens and its focal length. To find out the safe shutter speed for a specific focal length, photographers, based on their experience, derived the formula:
Max. shutter speed = 1/focal length x2
That is, with a focal length of 50 mm, the maximum safe shutter speed will be 1/100 s. And with a focal length of 200 mm - already 1/400 s. Note that some photographers substitute x3 into the formula instead of the x2 factor. This is necessary when working with cameras that have more than 30 megapixels. After all, the higher the detail of the images, the more noticeable are all the flaws.
Tip: don't move the camera. A beginner's mistake is the inability to press the shutter button correctly. If you reflexively jerk the camera while shooting, the movement will follow you even at very short shutter speeds, such as 1/250 and even 1/1000 s. Learn to smoothly and calmly press the shutter button, control yourself at the moment of pressing, develop a stable position for photographing. Conduct appropriate training to be fully prepared at the time of important shooting.
Thanks to optical stabilization and some skill, you can shoot on Nikon Z 6 and Nikon Z 7 even at shutter speeds around 1/2 s NIKON Z 7 / 14.0-24.0 mm f/2.8 settings: ISO 220, F2.8, 1/2 s , 20.0 mm eq.
Optical stabilization - insurance against movement
Optical stabilization is designed to compensate for camera shake in the photographer’s hands and protect the image from blur.
The stabilization system can be located in the lens or directly on the camera sensor. The Nikon Z 6 and Nikon Z 7 cameras use on-camera stabilization. It works with any lens mounted on the camera. Even lenses that do not have stabilization receive it on these devices.
The stabilization efficiency of Nikon Z 6 and Nikon Z 7 is estimated at 5 exposure stops. This means that if without stabilization you get sharp pictures at a shutter speed of 1/60 when shooting handheld, then with it you can shoot even at ⅕! You shouldn’t overuse stabilization, because it only compensates for camera shake in your hands, but not for the movements of your subjects. Therefore, when setting the shutter speed, you need to proceed specifically from the dynamics of movement in the frame, and not from the stabilization capabilities of the device. And yet stabilization is a real lifesaver. On Nikon Z 7, the number of frames with movement in my hands became almost zero, and in addition, new possibilities in shooting opened up.
The greenhouse is a great place to take pictures in winter. But even there the winter sun provides very little illumination. If I were shooting with a camera without stabilization on an 85 mm lens, I would set the shutter speed around 1/500 to ensure there are no blurs. And if so, then we would have to increase the ISO to approximately 3200 units! Digital noise at such a high ISO is unacceptable for me - it will noticeably reduce the quality of the images. Without exaggeration, stabilization in the camera saved this shoot! I was able to consistently get sharp shots with the portrait lens at 1/160s and keep the ISO at an adequate level. At ISO 1000 the Nikon Z7 produces very little noise.
NIKON Z 7 / 85.0 mm f/1.4 settings: ISO 1000, F1.4, 1/160 s, 85.0 mm equiv.
The new, affordable Nikon Z 50 model does not have on-camera stabilization. However, there is effective stabilization in the Nikon NIKKOR Z DX 16–50mm f/3.5–6.3 VR kit lens and the Nikon NIKKOR Z DX 50–250mm f/4.5–6.3 VR compact telephoto lens. This made it possible to make the camera lighter and more affordable, without limiting the user.
Nikon Z50 with NIKKOR Z DX 16–50mm f/3.5–6.3 VR kit lens
How to shoot at long exposures. Tripod
Let's figure out why the camera even needs shutter speeds longer than 1/60 s, if they always result in movement when shooting handheld. The fact is that to work with such shutter speeds, the camera must be placed on a support. Of course, a table, a border or a stack of books can serve as a support, but there is also a special device - a tripod. It is necessary to guarantee a clear frame at long shutter speeds. In addition, a tripod will ensure a constant shooting point, which, for example, is important when shooting catalogs (all products will be shot from the same angle), or panoramic shooting. You can also use super-telephoto lenses, which bring the picture very close, only with a tripod - otherwise you won’t even be able to compose the frame due to the shaking of the image in the viewfinder. A tripod is the simplest and most reliable option for stabilizing a camera when recording video. It’s easier to say where a tripod is not used - in reportage and wedding photography, when it is important to move quickly with the camera.
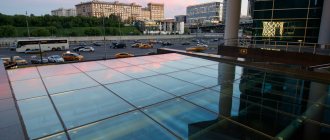
Traces from car headlights, long exposure. Shooting from a tripod. NIKON D850 / 70-300 mm f/4.5-5.6 settings: ISO 64, F8, 120 s, 135.0 mm equiv.
How to set shutter speed correctly
Often culinary recipes end with the phrase “add salt to taste,” which always confuses a person without cooking experience. Unfortunately, working with aging is the same “salt to taste”; There will be no universal advice or accurate, always working numbers here. The best way to learn how to adjust shutter speed is to gain experience while shooting. However, we will try to give advice on setting shutter speed in different shooting situations. It is clear that these are far from the only options for action, but this is the basis from which a novice photographer can start.
To achieve a short shutter speed in low light, you will have to greatly increase the light sensitivity. Modern cameras have low levels of digital noise even at high ISOs, but noise is still present. Therefore, when shooting at short shutter speeds, it is better to choose good lighting conditions - this will significantly facilitate your shooting task.
NIKON D810 / 70.0-200.0 mm f/4.0 settings: ISO 3200, F4, 1/500 s, 180.0 mm equiv.
NIKON D850 settings: ISO 250, F1.6, 1/1000 s, 105.0 mm equiv.
The most important thing is to learn how to adjust shutter speed when shooting moving objects. Let us remind you that without using a tripod, all objects will move relative to the camera due to the inevitable shaking of the camera in your hands.
Let's give a short cheat sheet on specific types of moving objects. The values given here are not an axiom, but a starting point for setting up the camera.
- a person standing motionless - 1/60 s or shorter. - walking, talking person - 1/125 s or shorter. - a person jogging, actively gesticulating, small children in a sports section, pets on a walk - 1/500 or shorter. - athletics, wrestling, figure skating, football, hockey, birds in flight, frolicking animals - 1/1000 and shorter.
If you are using a long lens (with a large zoom), calculate the shutter speed using the formula given in the article.
A fairly short shutter speed: the hero of the photo turned out to be sharp. NIKON D850 / 85.0 mm f/1.8 settings: ISO 320, F3.2, 1/500 s, 85.0 mm equiv.
In order to get high-quality shots at an important event (a child’s performance at a matinee or competition), it is necessary to take a series of test shots before starting shooting, carefully examine the resulting images for blur in full scale and understand what shutter speed is suitable for our case. There is no need to set an excessively short shutter speed - this will lead to dark frames, shooting at high ISO values and reduced image quality. Therefore, the most important thing in setting shutter speed is to find the golden mean.
Shooting with a telephoto lens on a tripod. NIKON D850 / 70-300 mm f/4.5-5.6 settings: ISO 200, F6.3, 1/160 s, 300.0 mm equiv.
Knowing how to adjust shutter speed is one of the main steps in mastering a camera. And you can only learn this through practice. First, look at how the shutter speed is adjusted automatically, but then start acting on your own - this is the only way you will learn to take clear and expressive photographs in any conditions!
Source: prophotos.ru
An example from life.
During photo practice, our group was given several Canon 550D and Nikon D3100 devices to work with exposure time. On the first camera, I practiced the Freezelight technique, called light painting in Russian. It was decided to set the value to 30 seconds (the maximum for this device). The quality of the pictures was quite pleasing.
On the second Japanese we decided to practice working with a super short value. For comfortable work without a tripod, we used the 1/1000 parameter, written as 1000 in the camera interface.
In the end, I was right. Canon showed the best quality of shooting in low light using long shutter speeds. Compared to Nikon, its frames were less noisy. But with “instant” shooting, the results surprised me. The pictures were difficult to distinguish from each other, except that the Canon showed better detail due to the larger number of pixels on the matrix.
Short and long exposures, why are photographs “blurry”?
In addition to illumination, shutter speed also affects the image itself and the objects in it. These properties are often used as an artistic element. A very telling example is when fast-moving objects turn out blurry. Using shutter speed, you can also “freeze” fast-moving objects, for example, a drop of water in the air, a bird in flight.
Here are examples:
“Frozen” movement of the wings, shot at a fast shutter speed.
By the way, when I was writing this article, the news came that I won the SAILING PHOTO AWARDS 2014 photo competition in the “Landscape of the Season” category! The photo was taken at a long shutter speed (about 2 seconds), due to which the moving background was blurred (since the yacht was moving at a certain speed), while stationary objects (the yacht itself) remained sharp.
SAILING PHOTO AWARDS 2014 - “Landscape of the Season”
So, let’s remember:
Short shutter speeds are needed to “freeze” fast moving objects (race cars, birds, drops, children, etc.)
Long shutter speeds are needed to blur moving objects, such as water in a river or passing cars.
If you get blurry shots, then you need to reduce the shutter speed. Its meaning must be selected based on the specific situation and lighting,
Historical information about exposure.
As you know, the first cameras were far from modern ones in terms of the principle of obtaining a frame. Previously, there were no automated mechanisms to adjust camera parameters. The setting discussed was no exception. Because of this, it could be called a highly “human-dependent” parameter, because it was the photographer who adjusted this setting.
It was carried out by opening and closing the chamber lid, and the time for which the lid was removed is considered to be exposure. Often the parameter was calculated in minutes, since previously the light sensitivity of the fixing layers was too low. At that time, long shooting was a necessary measure, and this problem could only be overcome with the invention of photographic film.
Since those times, little has changed in the operating principles of this mechanism. The most important innovation is the movement of the element covering the photosensitive mechanism inside the camera body. Initially, it was just an internal damper, but now these are special curtains controlled by a shutter mechanism.
In all devices it works according to a roughly comparable scheme: when you press the shutter button, the curtains are pulled apart for a previously specified amount of time. The latter can be determined automatically or set by the user with shutter priority mode enabled ( S on Nikon cameras and TV on Canon).
Shutter speed units and terminology
Measured in seconds. Cameras display a number, for example, 50. This means the shutter speed is 1/50 s. Those. The camera shutter will open, the matrix will receive light for 1/50 s, the shutter will close and exposure will stop. If the camera displays, for example, 5”, then this means that the shutter speed = 5 s.
Distinguish between short and long exposure
Examples of fast shutter speed values: 1/1000 s, 1/2500 s (will be marked on the screen and in the camera viewfinder as 1000 and 2500, respectively). Example of a long shutter speed: 3 s (marked as 3 on the camera).
The boundaries of the classification of short and long exposures are very arbitrary, including depending on the subject. For example, when shooting a fast bird, a shutter speed of 1/500 s may turn out to be long - the bird will turn out blurry. It is important to understand the principle that terminology depends on the plot. If somewhere you come across a phrase like “make the shutter speed shorter/longer,” you’ll know what I’m talking about.
The shortest shutter speeds on modern DSLRs are 1/4000 or 1/8000 (in more advanced models). On mirrorless cameras in electronic shutter mode they can be set up to 1/32000 s. Such short shutter speeds may be necessary when shooting very fast objects or when using open apertures on high-aperture optics in bright sun. Long exposure is limited to 30 seconds, but there is a BULB mode in which the first press of the shutter button opens the shutter, and the second press closes it. To avoid movement, use remote controls. In other words, the long shutter speed is not limited in any way, and you can expose the matrix for at least hours. Such long shutter speeds are used for evening/night photography and special transmission of motion.
We haven’t looked at exposure yet, but I’ll still mention that shutter speed affects the amount of light received in direct proportion. The longer the shutter speed, the more light falls on the matrix; the shorter the shutter speed, the less light. When you increase/decrease the shutter speed by 2 times, the amount of light received increases/decreases by 2 times. For example, changing the shutter speed from 1/400 s to 1/200 s will double the amount of light received. This change is called an exposure stop. At this stage, it is important to understand that with a shorter shutter speed, the resulting photo will be darker, and with a longer shutter speed, it will be lighter.
What depends on shutter speed besides the time it takes to receive light?
As a rule, when the “P” mode is turned on - program mode, the camera aperture is fixed in a certain position. It follows from this that the brightness of the frame also depends on the time of shooting. Moreover, the shorter the capture time, the darker the frame. Exposure, otherwise called the amount of illumination, also depends on it. It is determined by the product of shutter speed and illumination.
It is the parameter discussed today that can cause the so-called time parallax. The fact is that in older devices the shutter curtains did not open the entire photosensitive layer at once. They were opened in a certain part of the frame for a set time. Because of this, when shooting a moving object, the latter could be distorted.
The dependence of this phenomenon is as follows: the greater the difference between shutter speed and shutter time, the more noticeable the time parallax.
How to shoot with long exposure
Share this article:
Long exposure in photography is a technique that allows you to achieve an amazing effect in the frame. Novice photographers often neglect this technique, monitoring the aperture and giving preference to a short shutter speed, which is responsible for the sharpness of the image. Landscapes, portraits, water compositions, night photography - all this can be effectively captured in long exposure photography.
In this article we will introduce you to professional techniques with which you can create various lighting and dynamic effects, reflect the glare of a night city in motion, experiment with waves and sunsets. First, let's look at the main types of shutter speeds that are used in photography.
5 speeds for long and short exposure photography
We stop the dynamics at a shutter speed of 1/250 s.
These shutter speeds are used by professionals to photograph a fast-moving subject. The technique is in demand by sports correspondents, whose task is to freeze a moment and capture a motorcycle racer, cyclist, or skier in the frame. A short shutter speed allows you to take a clear photo and achieve perfect sharpness. But this method has one drawback - the frame turns out flat, static, and the photographer’s task is to depict the athlete in motion, to give the picture dynamics. The side tilt of the camera or the use of wiring will enliven the composition.
3 rules for short shutter speed:
- Rapid movement developing high speed (auto racing, running animal) - shoot at 1/1000 s. Track and field athletes, skiers, cyclists - 1/500 s. Waves, waterfalls, tides, headlights, floating clouds - 1/250 sec.
When choosing the appropriate settings for your photography, you need to take into account the complex dynamics in the frame. If we are talking about a running girl, take into account not only the movement of the body, but also the hair blowing in the wind. To ensure that all the details of the frame are clear, focus on the fastest moving element.
Tip to help avoid blurry footage:
When hunting for a clear shot, consider the maximum and minimum speed of the subject. The shutter should drop at the peak point - the moment at which there is a second stop and then the movement begins to decline. Here's an example. When photographing a motorcyclist participating in off-road racing, a spectacular shot will be of him taking off on one of the hills of the track. How to stop this movement - visually calculate the trajectory and be ready for the right moment. Use a shutter speed of 1/1000 sec and burst mode. Several frames per second, following one after another, will guarantee that you will catch the exciting takeoff of a sports motorcycle.
Shooting with wiring from 1/15 to 1/250 s.
This technique allows you to track dynamics, record the movement of an object at different periods of time. The method allows you to combine static and swiftness in the frame, enliven the photograph, and bring it closer to the real perception of the image. When you are driving a car and look at a bug sitting on the glass, what do you see and how? The insect is clear, but the trees and the track are blurred. How to achieve the same effect in a photo is to use wiring.
3 shutter speed settings for different speeds:
- 1/125 - this indicator is used when shooting with wiring of cars, motorcycles, fast running animals; 1/60 - a moving subject located close to the lens (cyclist, runner, hockey player, etc.); 1/30 - a person or animal performing some action, the flight of a bird.
Shooting at long shutter speeds from 1/15 to 1 s.
This method is also called creative blur, with the help of which a long-exposure photo appears as if it was drawn, creative, effective, and sometimes amazing. And only the photographer knows that this amazing shot was born without Photoshop or superimposition, but with the help of simple secrets of long exposure photography.
The most rewarding time for such experiments is an hour before sunset, when the lighting allows you to create the most beautiful shots, reflect reflections on the water, contrasting clouds in the sky, and a fiery horizon.
Night is the ideal time for long-exposure photography of city landscapes: bridges, streets with glowing shop windows, roads with hurrying cars, a starry sky that lends itself to photo experiments.
To help beginners, we introduce the parameters of successful long-exposure photos:
- If you want to beautifully capture the movement of water in a waterfall, use a value of ⅛ s.
Waves caressing the shore, starry skies, children's attractions - a shutter speed of ¼ s will be enough. Don't be afraid to experiment with long exposures with your camera. Try different settings, combine them with other shooting methods. Photography requires a creative approach and a non-standard vision of composition.
Long exposure photo with values from 1 to 30 s.
Here we are talking about artistic photographs that depict urban landscapes of a city at night, with the lights of lanterns, shop windows, and car headlights. Everything that moved behind the scenes takes on calm and beautiful static in the picture. The lights have a unique glow that leaves an expressive reflection on the water. If you want to achieve a similar effect, you cannot do without a tripod. The key task of the photographer is to ensure that the camera is in a stable position. Wind, road vibrations and other possible interference should not affect the birth of a long exposure photograph.
Professional life hack: to make the tripod more stable, weigh it down with a backpack containing your camera equipment.
Useful tips on how to make a long exposure:
- In windy conditions, shoot at 30 sec. Calm sea - 15 s. Clouds floating in the sky - 8 s. If you want to capture waves while maintaining partial sharpness, 1 sec.
- Consider the shooting time. The ideal option is to choose hours during which the lighting does not change. Otherwise, you will have to adjust the aperture or keep your shutter alert, catching the appropriate speed.
Very long shutter speed from 30 s.
These values are used by professionals when photographing the night sky - when the photographer wants to create an imitation of a starfall or sparkling compositions from a kaleidoscope of lights. The shutter speed in this case can be from 30 seconds to 10 minutes, depending on the complexity of the task, weather conditions and lighting.
Long exposure in photos with different scenes
One of the advantages of this method is the ability to create interesting effects, make the real fabulous, expressive, bright, and emphasize what is inaccessible to human vision. Let's look at the most popular genres and subjects that are ideal for long exposures on a camera.
Landscapes
For picturesque landscapes, photographers use different settings - from 30 seconds to 5.7, and sometimes 10 minutes. It all depends on what the master wants to achieve. Water and mountain compositions are especially impressive:
- The fog over the river at dawn becomes magical, in a luminous haze. Water also acquires a special shimmer; A seething mountain river turns into a water stream with soft tints; The raging sea with waves looks in the photo with a completely different mood: the sharp scallops are slightly blurred, the accents from the splashes are smoothed out and moved to a new textured feature of the movement of water - it seems to have frozen and looks artistic and unique in its statics; Clouds in the blue sky, framed at long exposure, look like a royal caravan rising above the ground.
- If you want the result to meet your expectations, take into account the lighting conditions, do not forget to monitor the aperture and be sure to use a tripod!
Portraits
A classic photographic portrait is taken clearly: the background, the object, the details - everything is in sharpness. But this is not the only way to express the model’s individuality. A long shutter speed in this case becomes a sure way to give the frame uniqueness and make it special. Let's move away from the standards, consider options for a creative portrait:
- Girl on the subway. It is enough to catch the desired composition and set the shutter speed to allow you to capture the face in sharp focus, while the train in the background is blurred and in motion. The frame will be lively and expressive. A man in the bustle of the city. Modern people are accustomed to city noise, but sometimes there comes a moment of fatigue when you want to stop time and relax. An urban, contemporary portrait - the face of a metropolitan resident against the backdrop of high-rise buildings, cars, and people. The person is in focus, the background is in blurry motion that the hero does not want to catch.
- A bright, contrasting portrait of a girl or child against the background of a blue sky with quickly moving clouds. The sun, sunflowers or golden ears of wheat are the ideal background for this composition, which will accurately reflect the mood and give the frame additional richness. Children on the rides. These photographs will turn out to be especially emotional and expressive. Choose carousels with medium speed - so that you can catch the right moment and comply with the required shutter speed parameters. Carnival. There is an extravaganza on the streets: a costumed procession, musicians in bright outfits, dancers in fluffy dresses, life-size puppets. Fun, emotions, noise. But the center of the plot is in a completely different mood - a sad, tired clown who wants to turn onto a quiet street, wash off his makeup and enjoy the peace.
Stories with movement
What is a long exposure in modern photography - the ability to combine static and movement in one scene. This technique is especially relevant for photographing places with crowds of people and their various activities. You can use in your works successful ideas of talented artists presented at international photo exhibitions:
- Station building. High arches, pompous interior, lots of light. People are waiting for their route, studying the information board, just drinking coffee, and at the same moment someone is late for the train, is in a hurry - diluting the static composition with its dynamics.
One day in the city. Noisy big street. Along the road, cars are driving in several rows, people are walking along the sidewalks, on the open terrace of a cafe, a man and a woman are eating ice cream and having a nice conversation. The axis of the composition is a boy with a bright balloon. He seems to stand out from the surrounding chaos and draws attention to himself. The movement around is semi-blurred (at a shutter speed of 3 s), the face is in focus. Beach party. Summer, sand, warm night and a cheerful company of friends. The background is bright and dynamic. In the center of the composition - he and she, opposite each other, looking into the eyes. They want silence and surf. Blurred background lights with a soft glow give the frame a romantic mood.
Think about what moment you would like to capture, who should be the hero of your ideal shot, and try to do it with a long shutter speed.
Tips for setting a slow shutter speed
In conclusion, we will give recommendations that will help you create beautiful artistic shots:
- Consider the speed of your subject. Rapid dynamics will be too blurred. Select the correct shutter speed settings. Taking a photo of a walking person at 3 seconds will result in a semi-blurred silhouette. By increasing the shutter speed to 10 seconds, the object will be changed beyond recognition. When shooting at long distances (5 to 10 minutes), use a tripod. The slightest vibration can ruin the shot. Don't forget about the photosensitivity settings - you can use it to adjust sharpness. Choose a time of day with soft lighting. Avoid bright, direct sunlight. The ideal time is two hours before sunset. If you are shooting at the edge of twilight, watch the aperture. Shoot not only landscapes, but also people. These shots take on a special character and emotion. If you want the frame to turn out creative, artistically distorting reality, use light filters. Photos can be given different color temperatures and shades: warm and cold, pastel and contrast.
The photographer’s mission is to express the world around him, seen with his own eyes through the lens, to give the moment frozen in the frame an idea and uniqueness. Experiment boldly - this is one of the driving forces of photography.
Share this article:
I liked the article
Discuss the article
Controlling exposure – improving the quality of photos.
“How to set the shutter speed?” you ask. This can be done in several ways at once. The first is to set the “M” parameter on the camera mode wheel - manual, and directly change the required parameter or set of parameters. You can also set the “A or Av” mode - shutter priority, in which, as the aperture changes, the frame capture time will also change. It is also possible to adjust using light sensitivity (ISO). It can be changed even in automatic mode.
On older cameras, which did not have a large number of electronic mechanisms, a special drum was allocated to adjust the shutter speed. He cocked the camera shutter and pulled back the curtains. Thanks to this element, simultaneous rewinding of the film and cocking of the shutter occurred, which is why, when released, the opening curtain was ahead of the closing one. A gap was formed through which additional exposure of the frame passed.
This was the so-called “additional exposure”; it could serve both positive and negative service. Due to incorrect settings, the photo could be overexposed, important details could be blurred. The most important thing here is to choose the right parameter, and here I can only help you with advice: do not photograph dynamics at a long shutter speed, and static images at too short a shutter speed.
Advice. At short shutter speeds, in poorly lit places, always, remember, always use a tripod to avoid getting blurry shots!
How to adjust shutter speed in camera?
The camera sets shutter speed in two modes: manual (M) and shutter priority (S).
In other cases, it is calculated automatically by the camera. It is displayed on the camera:
- in the viewfinder;
- on the main screen;
- on the top screen
Shutter speed 1/320 on main screen
Shutter speed 1/320 in the viewfinder
Let me remind you that an integer number will be displayed, for example: 50, 640. This means that the shutter speed is set to 1/50 or 1/640. Or, if the number is displayed with a “seconds” icon, then the number is the shutter speed in seconds.
To learn how to change the shutter speed on your camera, refer to the manual. For example, on Nikon cameras, it is changed by turning the wheel under the thumb of the right hand.
Those. set the mode to M or S and turn this wheel to change the shutter speed. In S (shutter priority) mode, the camera will select the aperture automatically. In M mode, all parameters must be set manually.
If you scroll the wheel all the way to the left, the last value will be BULB mode, in case 30 seconds is not enough.
Examples of the use of shutter speed by famous photographers.
Example 1. Photo by Joel Tjintjelaar.
In this photo we can see what a long shutter speed can be used for:
- First, look at the sky. It can be seen that it is heterogeneous, there are brighter zones, but at the same time, specific details of the clouds are not visible, and this gives the photograph the greatest expressiveness.
- Secondly, look around the water. It turned into an absolutely smooth surface, without a single wave.
In real life, this phenomenon is impossible to see; it appears only when shooting with a long shutter speed.
Example 2.
One of the most famous examples of working with time is capturing light. Authorship, unfortunately, is not indicated. Here we can see how shutter speed affects the clarity of the resulting frame. The first quarter shows an example of more or less great significance. It is this photograph that is considered among the masters to be the most successful photograph of a waterfall, since it does not show unnecessary details.
The most unsuccessful shots will be those from the second and third quarters. The pictures here turned out both blurry and not blurry at the same time. There are little things that should be visible, but due to the blur, it is very difficult to see them. The last frame can also be considered successful. Sharpness and clarity are enough to see all the little details.
Types of aging and their application
Now that you have memorized how to adjust shutter speed, let's look at 10 different situations in which you need to master it to get good results.
Freeze motion
There are many situations in which you will need to freeze motion. Photographing an animal running, jumping, or water drops from a fountain or waterfall are prime examples of this situation.
To do this, you need to increase the shutter speed so that the camera shoots fast enough to stop the subject from moving and prevent it from moving. Obviously, each subject will have a different shutter speed, so it's best to do some tests to determine what shutter speed is needed to stop motion.
To give you an idea, we typically use speeds like 1/1000 sec. for fast cars or running animals, 1/500 sec. for bicycles and 1/250 sec. for sea waves. However, these are indicative speeds as the speed of any of these types of photographic objects can vary greatly.
That's why the best you can do is run some tests, and if you don't have the option, it's best to use a high enough speed, even if it's too fast, so that you don't risk losing the photo. Think that it will always be better to take a well-taken photo with little noise from having to compensate for an excessive shutter speed, than to take a photo that loses the center of interest.
Long exposure
Freezing movement multiple times is not enough for us. Sometimes completely freezing motion can result in a photo that doesn't convey what we're looking for. For example, if we freeze the movement of a racing motorcycle, it will appear as if it has stopped, it will not give us a dizzying sensation of speed.
For these types of photographs, where we want a moving subject to be captured without losing the effect of speed, we usually use a slow shutter speed. Long exposure on a camera is a technique that costs a little money to get the hang of it, but once the controls are in place you see how easy it is to get good results.
To scan, you need to use a slow shutter speed and follow your subject at the same speed while the shutter is open. The subject will appear static and the background will be magnified three times, creating a sense of speed. If you prefer, you can use a tripod to follow your subject in a straight line.