Advantage
“Podolsk” is an integral attribute of tailoring high-quality and modern things. The main advantage of the device is its performance characteristics. In addition, this machine is durable and hardy. Thanks to the aluminum case, internal mechanisms are not damaged. All parts in it are made of durable metal. If necessary, it is very easy to repair and adjust their operation.
Sewing machine
All fasteners are accurate and reliable. Another advantage of such a device is that many malfunctions are associated with the fact that the needle was installed incorrectly or the upper thread was threaded. That is, it is not difficult to repair Podolsk sewing machines with your own hands. You just need to carry out a preventive inspection with lubrication at home.
Ease of operation is an advantage
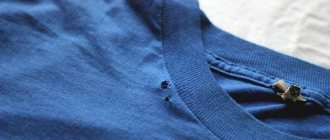
An incorrectly selected needle number leads to thread breakage
Correct selection of a needle is one of the conditions for good operation of a sewing machine. Unfortunately, this is what is least paid attention to. A needle that is too thin “fractures” the thread and it breaks; a needle that is too thick destroys the fibers of thin fabrics and leads to seams “unraveling” after washing. For knitted fabrics, elastic fabrics (stretch), denim fabrics, especially for leather, it is advisable to use special needles with a specific blade and point shape. For more information, see Sewing machine needles.
Any instruction contains recommendations for selecting a needle, depending on the type and thickness of the fabric and the selected threads. Here is a list of recommendations for the Chaika, Podolskaya sewing machine: Silk, cambric - No. 70; chintz, satin, cambric, linen fabrics - No. 80; cotton fabrics, calico, flannel, thin woolen fabrics - No. 90; woolen, suiting fabrics - No. 100; thick woolen fabrics, cloth - No. 110.
The needle must be set up all the way and tightened well with the screw so that it does not jump out during operation. The flat (sawed-off) side of the bulb on the needle should be facing away from you. And do not install industrial-style needles with a round flask. Such needles lead to skips and even serious damage, in particular the breakage of a sewing machine needle.
Main characteristics
“Podolsk” is a common model, despite the fact that electronic and electrochemical machines are gaining popularity today. As a rule, “Podolsk” is a simple and old model with a manual or foot drive. It has a swinging shuttle, a large number of operations, semi-automatic buttonhole processing, overlock stitching, blind and elastic stitching, and a sleeve platform.
Equipped with a reverse button and high-quality lighting. Supplied with paws for sewing in zippers and buttons. It has a warranty period and a long service life, so setting up the Podolsk sewing machine is practically not required. Supplemented with a compartment for an accessory and a soft case.
The sewing machine has a screw for adjusting the presser foot. There is also a front cover, adjusting nut, thread guide washer, thread cutter washer, presser foot rod and screw and much more. These parts can be adjusted and lubricated for more efficient operation as desired.
You might be interested in this: The procedure for sewing sundresses without patterns with your own hands
Specifications
Instructions for use, setup and adjustment
The manufacturer's instructions contain a basic list of recommendations for operating, setting up and adjusting the machine. To prepare the device, it is necessary to place the needle upward in the needle holder and secure it with a screw. The flat must go in the direction opposite to the master.
User manual
Needle installation
In almost all of the company’s models, the needle must be installed as indicated in the instruction manual: the needle blade with a passing shuttle nose must be on the left side, and the thread groove must be on the opposite side. However, in the company's first samples, the needle is installed in reverse.
To properly install the needle in the machine, you need to remove the plate, turn the flywheel and look at the shuttle nose. Where the nose goes through the needle is where the blade will be located. Threading is necessary where the long needle groove is located.
Note! Next, use tape to paste a small diagram of how the needle should be positioned. This way you can install it quickly and correctly next time.
Removing the bobbin case and bobbin
To remove these items, you must first move the sliding type of plate that closes the shuttle, and then use a few fingers to grasp the latch and remove the machine cap. It falls when the latch is released and the bobbin is turned down.
Removing the bobbin case
Bobbin winding
To wind the thread onto the bobbin structure, you need to use a special winder, which is attached to the machine sleeve near the flywheel. Before winding, the flywheel must be released so that it rotates freely and does not cause movement of the entire machine mechanism. To do this, the friction type of the screw should be turned by the knurled head, put the bobbin on the spindle, move it to the shoulder element and turn so that the shoulder spindle pin goes into the hole near the bobbin. This way the bobbin will be secured to the spindle and rotated when winding.
You need to put a spool on the platform spool, pull the thread under the washer, and then lift it up onto the bobbin through the left slot.
Push the winding frame with the bobbin down so that the rubber pulley rim at the spindle end touches the flywheel and begins winding, rotating the flywheel, as with machine sewing.
You may be interested in everything about the shuttle in sewing machines and its types
The free end of the thread on the bobbin must be held with your hand until it is wound enough to secure the threads. After that the end breaks off. When the bobbin is filled with thread, the winder will automatically turn off.
Note! If there is not enough friction to make the rubber rim of the winder pulley rotate, it is necessary to adjust the pressure of the winder. To do this, unscrew the adjusting screw, press the winder against part of the flywheel, hold it in this position and re-fasten the screw using a screwdriver.
Threading the bobbin case
To thread the bobbin case, you need to take a bobbin with thread wound from right to left and a bobbin case with thread in an oblique slot. Next, connect the two elements so that the slot is on top and the thread is at the end of the cap.
Threading the bobbin case
Installing the bobbin case
After the bobbin case is installed, you need to put the shuttle center rod on it. To do this, insert the cap into the slot of the plate and lower the latch until it is locked in the shuttle. The free end of the thread remains hanging.
Upper threading
To thread the upper thread, you need to turn the handwheel clockwise until the thread take-up lever with the thread eye comes to the up position. Then place a spool of thread on the rod. Insert the thread between the washers, tongue and needle remover. Then leave the hanging end of the thread free.
Preparing to sew
To prepare the machine for sewing, you need to turn the handwheel until the needle drops into the plate, grabs the bobbin thread and returns it up.
Preparing to sew
Working with a manual machine
To start working on a manual machine, you need to install the manual drive on the protrusion, which is located under the flywheel, turn it up, insert it into the tide socket on the gear, removing the locking latch and fix the position with the friction screw.
Working with a foot sewing machine
The foot-operated machine is driven by the legs, namely by the uniform movement of the drive wheel towards the working one.
Working on a foot-operated PMZ
Finishing sewing
To finish sewing, you need to turn off the sewing machine, put the thread take-up lever and needle up and raise the presser foot. Trim the threads in the thread cutter.
Modification of stitch length
To change the stitch length, you need to raise or lower the adjustment lever. In the first case, the stitch length will be shorter and the line will be longer and vice versa.
You might be interested in: Ways to widen trousers at waistbands and sides
Changing the stitch length of a PMZ sewing machine
Reverse feed direction
When the adjustment lever is above the line of the scale line, the fabric is fed in the opposite direction. To switch the machine to reverse, you need to move the control lever up.
Presser foot pressure adjustment
The amount of presser foot pressure rarely changes. To do this, you need to turn the head rod screw counterclockwise.
Manual sewing machine "Podolsk" setting and adjusting the presser foot pressure of the material
Thread winder
To remove the thread winder, you need to turn the handwheel to bring the needle to a high position. Then remove the bobbin cap, remove the screw and remove the spring with the front ring.
Needle bar position
To change the position of the sewing machine needle bar, you need to turn the nose of the shuttle towards the needle and make the eye 1.5 millimeters higher. After this, you can tighten the screw and continue doing your job.
Position of the needle bar of the PMZ sewing machine
In general, the Podolsk sewing machine is a modern electrical equipment that has a large number of functions for sewing clothes, creating patterns, repairing products, and more. It has high-quality technical characteristics and corresponding advantages.
Note! In order to be able to use it for a long time for your own purposes, it is necessary to read the instructions for use, setup and adjustment.
You definitely need to learn how to install needles, remove bobbin cases, wind bobbins, thread bobbin cases, prepare the machine for sewing, change the length of stitches, guide the material back, adjust the presser foot of the material, check connections and repair the device.
Sewing machine Podolsk does not turn
The most difficult and unfortunately not uncommon case is when the sewing machine does not turn at all, causing bewilderment and a lot of fantasies about such a “breakdown.” In fact, this is not a breakdown, it’s just that the sewing machine was lubricated with the wrong oil, and sometimes even sunflower oil, confusing the sewing machine with a frying pan.
While they are working on it, it will rotate even on sunflower oil, but after standing for a long time it turns out that the machine does not turn, it is jammed. Sunflower oil just doesn't dry easily into glue. Since this is far from a rare case, we give advice on how to remove dried grease. Remove all possible covers and parts and fill all accessible and inaccessible places with oil. After this, when little has penetrated into all the nodes and connections, pour kerosene into the same places and leave the car for at least a day.
After a day or more, remove the flywheel, just pay attention to how the petals (L) of the friction washer are installed (up). Then take a screwdriver and insert it into the main shaft slot (Z), and very carefully try to wiggle the main shaft. It is very important not to break the slot of the shaft, since it is cast iron and with excessive force its edges can easily break off. If the shaft does not even move, repeat the lubrication procedure with kerosene again; oil is no longer needed. And so on until he begins to move slightly. When the shaft is already turning, install the drive and idle the machine, constantly adding lubricant and kerosene until it moves smoothly.
Of course, this is not a complete list of all the adjustments and settings that the Podolsk sewing machine , but it is quite sufficient to independently correct many problems.
In this video you will see how easy it is to sew leather on a Podolsk type sewing machine by installing a Teflon foot on it.