Can I charge from another laptop?
Of course you can, but there are a couple of problems. First, we will need exactly the same computer in which our battery worked. And exactly the same - the same manufacturer, the same model. Even an outwardly similar battery with a similar connector will not only not work in a “foreign” beech, but will most likely fail itself or burn out the machine’s controller. Do you have many friends who have a similar device, and are also ready to conduct a similar experiment?
The second problem is that the computer, having received almost all the data about the installed energy source, may simply refuse to work with a “foreign” battery. In addition, the battery itself may make a similar decision, refusing to work with someone else’s car. This doesn't happen often, but it won't be an exception. Otherwise, we will either not be able to charge our battery, or we will get a new problem - a blocked battery controller.
Use a different battery
Another fail-safe option that has a right to exist is to buy a new one or find a charged battery of the desired model. But, firstly, a battery purchased for a lot of money will most likely not be fully charged; it still needs to be recharged somehow. And, secondly, such methods do not answer the question of how to charge the battery directly from a laptop.
Special charger
The following is an absolutely safe method, but the problem here is that you will have to buy a proper device to charge our type of battery. It costs a lot, but finding what you need is not easy. Consists of an adapter and a cable with a plug that matches the socket of our battery. We connect, guided by the LED indicator on the adapter, and charge our battery.
Directly from the power supply
Now we have come to the most unsafe method, but it most fully corresponds to the topic of the article and is ideal for extreme sports enthusiasts. To work, we need a multimeter, a power source, and a current-limiting resistor. We can adapt any multimeter capable of measuring DC voltages up to 20 V.
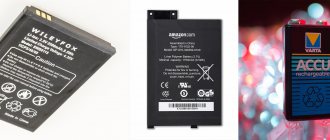
Power unit. A good option is a standard laptop charger whose battery we are going to charge. As an alternative, any stabilized energy source with an output voltage 1–5 V higher than the output voltage of a fully charged battery, capable of delivering a current of at least 2 A to the load. The operating voltage is usually indicated on the battery case.
For the battery shown in the photo above, you will need a power supply with an output voltage of 12–16 V. If we use a power supply for a laptop (not necessarily ours), then its output voltage and current can be read on the case.
Now the current limiting resistor. Its rating and power will depend on the output voltages of the battery and power supply. Suppose we have an 11.1 V battery and a 12 V unit. We will charge with an initial current of 1.5 A. This is not much, but it is the safest for the battery, although the process will take longer. We calculate the voltage that should drop across the resistor. In this case, we take the battery voltage to be 10.2 V (completely discharged). 12 – 10.2 = 1.8 V. Using Ohm’s formula, we calculate the resistance of the resistor based on the charging current of 1.5 A. R = U: I = 1.8: 1.5 = 1.2 Ohm. It remains to calculate the power dissipated by the resistor. P = U x I = 1.8 x 1.4 = 2.7 W.
Such a resistor can be removed from switching power supplies for TVs, but if this is a problem, it will be replaced by a car high beam lamp with a power of 45–55 W.
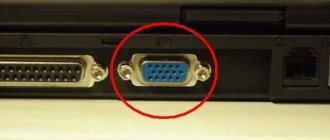
All that remains is to assemble the circuit and start charging, but first let’s look at the laptop’s power supply connector. It can be two- or three-pin. In a two-contact, tube-shaped type, the internal contact is “plus”, the external one is “minus”.
Expert opinion
Alexey Bartosh
Specialist in repair and maintenance of electrical equipment and industrial electronics.
Ask a Question
Important! It is extremely rare, but there are power supplies in which the plug is connected in reverse - “plus” on the outside, “minus” on the inside. Therefore, to accurately determine the polarity, we use a tester in voltmeter mode or check the information printed on the adapter body. Otherwise, we risk burning out the battery controller.
The pinout of the plug is often indicated on the adapter body
Now there are three-pin plugs for connecting electrical units. Their pinout is the same, but inside the tube there will be a third contact in the form of a thin pin. This is an information output that indicates to the laptop that the power supply is connected to it and voltage is coming from it.
Now let's move on to the circuit that we will have to assemble. It is relatively simple, the main thing is not to confuse the polarity of connecting the power supply to the battery.
A circuit that allows you to charge the battery without a laptop
So, using a multimeter or using a battery diagram, we find the main power buses and their polarity. If the battery has a control input, then we find out where it is and what needs to be supplied to it (see above).
We connect two wires to the plug of the unit. If the power supply is standard, then it will be convenient to use the appropriate outlet.
If there is no socket, then you can connect in an easier way - insert the positive wire inside the plug tube, wrap the negative wire around the tube and secure everything with electrical tape.
We connect the positive wire through a quenching resistor (lamp) to the positive input/output of the battery, and the negative wire to the negative one. We carefully monitor the polarity.
In parallel, connect a voltmeter (tester) to the battery power terminals (not the power supply!). We turn on the power supply and start charging, constantly monitoring the voltage and temperature of the battery pack. The voltage will begin to gradually increase, approaching the rated voltage of the battery. As soon as it exceeds the nominal value by 0.3–0.4 V, we stop charging.
Let the battery not reach 100% charge, but if the process is not stopped, then particularly “severe” types of controllers may become locked, from which it will be impossible to get out without special equipment and knowledge. We disconnect the power supply from the network, disassemble the circuit, and we can assume that the battery is charged.
Important! If the battery temperature rises noticeably, stop charging immediately. Otherwise, the batteries may catch fire or explode. Here you can’t do without a fire extinguisher and, possibly, an ambulance.
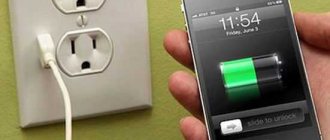
How to charge a laptop battery directly
Direct charging of the battery from a laptop means supplying direct current to the contact terminals from the external unit. Please note that the direct charging method is a last resort.
What you need
A set of materials needed to restore the battery capacity of a laptop:
To provide charging current, the power of the power supply must be from 50 to 100 W (depending on the capacity and voltage of the laptop battery). It is recommended to use adapters from similar equipment that support the standard voltage in the charging circuit.
- Connecting cable made of copper wire with a cross-section of 1-2 mm², single-core or multi-core cord can be used.
- A resistor with variable resistance that allows you to adjust the current in the charging circuit. The element must have the necessary power reserve and pass a current of 5-7 A.
- Soldering accessories necessary for joining copper conductors with lead-tin solders. In addition to an electric soldering iron and solder, you will need flux and a tool to remove the insulator from the patch cable.
- A test device that allows you to measure DC voltage.
Battery charging process
Before you begin restoring battery capacity without a charger, you need to find out the purpose of the contact pins in the battery connector.
Information is available in specialized literature on the repair and maintenance of computer equipment, but there is no description of the wiring of some batteries.
You can find out the purpose of the contacts using a test device or by disassembling the power supply housing. After removing the battery case cover, all lithium cells are inspected, which allows you to find the contacts responsible for charging the battery.
For example, in the battery of the Lenovo IdeaPad Z565, there are plus and minus on the sides of the 7-pin plug, and three pins in the middle are responsible for the element assemblies. Asus technology has 2 contacts that are designed to release the lock.
Before recovery begins, the power supply is discharged until the laptop is turned off. Then the battery is removed to measure the voltage at the terminals.
The battery of the IdeaPad Z565 equipment in a discharged state has a voltage of 10.5 V (with a standard value of 11.1 V when charged). For charging, it is important to find out the polarity of the connection; the location of the negative and positive contacts is determined by the test device.
On some multimeters, the diameter of the contact probe does not allow it to reach the metal plate. In this case, extensions made from sewing or medical needles are put on the probes, and additional elements are secured with insulating tape.
It must be remembered that when a standard adapter is connected to the battery, an electronic controller is activated that limits the current depending on the condition of the battery. The user calculates the required resistance value, and a digital multimeter is used to monitor the obtained parameters. The wiring is soldered to the resistor, the connection points are insulated.
Then the cables are connected to the negative and positive contacts of the battery, the conductive wires are clamped between the elastic elements of the contact.
At the same time, power cables are output from the power adapter, a resistance is included in the circuit and the possibility of switching the test device is provided.
Then the power adapter plug is inserted into the outlet and charging begins. It is recommended to periodically check the battery temperature; if it quickly heats up to 60°C or higher, charging stops.
As the battery capacity is restored, the resistance must be reduced, which increases the current in the charging circuit. Since the battery design includes a voltage limiter, the power source is charged to a fixed value.
If the battery bank device does not have a voltage regulator, then there is a risk of overcharging the battery, which leads to a rise in temperature and fire of the device. Incomplete charging of lithium cells does not have a negative impact on the capacity (the devices do not have a “memory effect”).
The described technique has been tested by single users. The battery design uses a controller with a memory in which charging errors are recorded. The slightest violation of the parameters leads to blocking of the power source.
For example, maintaining an increased voltage in the circuit after charging is completed is recorded as an error that will not allow the battery to discharge. To restore functionality, you will need to clear the drive of errors; the procedure is performed under service conditions.
What voltage and current should I set when using a laboratory power supply?
Previously, we determined that any energy source that provides a current of about 2 A and a voltage 1–5 V higher than the voltage of the charged battery is suitable for charging a laptop battery. A laboratory power supply is very convenient in this regard. It allows you not only to regulate the charging current without any current-limiting resistors, but also to set the final charging voltage. This frees us from constantly monitoring the voltage at the battery terminals. We set the voltage to 0.3–0.4 V higher than the operating voltage of the battery, the current is about 1.0–1.5 A, and charge it quietly.
Important! Even using such an automatic “charger”, it is necessary to constantly monitor the temperature of the battery.
Charging the battery directly
The laptop battery has 7 or 9 contacts , depending on the model. With the help of each of them, the operating system monitors the charging process. At first glance, charging a laptop or netbook without a charger in this way is difficult.
Each laptop battery consists of several lithium-ion batteries connected in parallel and in series. The battery has a built-in power controller, thanks to which there is no overcharging, because if it is overcharged, there is a high probability of fire.
To charge the battery you will need:
- copper wire , cross-section up to 2 mm;
- resistor , preferably a trimmer, to control the supplied power;
- soldering iron , tin and flux ;
- multimeter.
To charge the battery without a laptop, if the charger is broken or for another reason, you must first determine which contacts are responsible for the positive and negative polarity. Most often, these are the extreme left and right, and the contacts in the middle are created for control.
Be sure to set the polarity . If the measured value is displayed on the multimeter with a “-” sign, then you need to swap the probes.
You should also determine the polarity of the laptop charger and make a note.
Schematically, the device looks like this.
Let's move on to the procedure for creating a memory:
- Take the first copper wire and tuning resistor and solder it.
Important! If you don’t want to burn the battery, you need to set the maximum resistance value , then gradually adjust the current.
- Connect conductor with a resistor to the battery contact with positive polarity, and the other conductor to the contact with negative polarity. There is no need to solder anything here.
- Connect the other ends of the conductors to the required polarities of the charger, secure with insulating tape.
Connecting a wireless mouse to a computer or laptop
You need to understand that as the charge accumulated in the batteries increases, the voltage also increases. The marking indicates the nominal voltage value . During the process, you should not exceed the values specified below:
| Rated voltage | Maximum voltage |
| 7.4V | 8.2-8.4V |
| 10.8V | 12.3-12.6V |
| 14.8V | 16.4-16.8V |