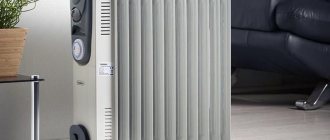
Infrared heater for ceilings and walls: pros and cons
To decide whether to opt for infrared heaters, let’s determine all the pros and cons, which are presented in the table:
| Behind | Against |
| Fast heating of the room. | When turned off, the room temperature drops quickly. |
| High fire safety. | Possibility of drying solid objects. |
| Service life from 20 to 50 years. | Uneven heating due to directional action of IR. |
| Precise temperature control. | Negative effects on humans with prolonged intense exposure (dry skin, dehydration). |
| The emitters destroy viruses harmful to humans. | A bright light that stands out strongly in dark rooms. |
| Quiet operation. | Strong heating of the bulb and reflector in high-temperature IR (dangerous for children and animals that may touch the device). |
| High efficiency. |
Installation of an infrared heater
How to properly connect an infrared heater?
Infrared panels are gaining more and more popularity every year. They are easy to use and provide quick heating of the room, and the thermostat allows you to set the desired heating temperature with one movement. Moreover, installing infrared heaters yourself is quick and easy if you follow the instructions. Other advantages of this equipment include:
-long service life; - noiselessness; -safety; -spot heating; -possibility of use in open space.
Required Tools
In order for the installation of an infrared heater to go as expected, you must have the following tools:
-screwdriver; -screwdriver; -pliers; -roulette.
If necessary, more complex equipment can be used. For example, a metal detector that will find electrical wiring and metal objects (fittings, as an example) in the ceiling or wall, which will allow them to be bypassed during installation, thereby eliminating the possibility of additional repair work.
As for additional materials, to install and connect an infrared heater you may need:
-Dismountable electrical plug.
-Three-core copper cable.
-Wall mounts (purchased as needed, as only ceiling brackets are included in the kit).
Preparatory work
The IR heating device is installed on a surface (floor, ceiling, wall) in accordance with its intended purpose: floor, wall or ceiling device. Depending on the design, the design may include an element such as a thermostat. Its main task is to control the temperature level in the room where the IR device operates.
Hanging the case
First you need to determine the installation location of the infrared heater in the house (or apartment). The first thing you need to do is mark out the mounting locations yourself. To do this, use a tape measure to measure the same distance from the ceiling to the selected area. It is also recommended to use a building level, with which you can level the brackets in a horizontal plane.
After marking, proceed to drilling. If the ceiling (or wall) is made of wood, drill holes with a drill. If you have to deal with concrete, you cannot do without a hammer drill. You need to drive dowels into the created holes and screw in the brackets, after which you can install the infrared heater in its place.
The installation process includes the following steps:
- remove the device from the packaging and place it on any flat surface with the heating plate down; - mark the installation location and make several holes; -screw in the ring screw; -hang the chains, adjusting the height (if necessary).
Electrical connection
Installation is carried out in several options depending on the equipment set:
-The thermostat-heater pair is connected. In this case, two wires are supplied from the circuit breaker (hereinafter referred to as simply a circuit breaker): “zero” and “phase”. Installation is carried out in accordance with the device markings. Next, the thermostat is connected to the heating equipment, also taking into account the markings. You must first open the socket for connection. It is usually hidden in the housing under a removable cover held in place by fasteners. -Installation and connection of more than two types of infrared heaters per room is carried out through a parallel connection. Otherwise, the installation steps will be identical: wires are connected from the machine to the thermostat, from which heating devices are already connected.
Please note the following during installation:
— It is prohibited to install infrared heaters in or near flammable and explosive objects.
— You cannot turn on the heater until installation and connection to the electrical network are completed
— The infrared heater can only be mounted through special holes in the housing.
— It is not recommended to install the heater in places where people constantly stay (above a sofa, bed, table). It needs to be moved to the side.
— The infrared heater is installed at a height of 2.5 to 3 meters. If the ceiling level is higher, then it is necessary to use suspensions on cables.
Detailed instructions for DIY installation and connection
You can enjoy all the above benefits only by installing the device correctly. The work is carried out in 5 stages and requires strict adherence to the instructions.
Preparatory stage
First, you need a set of tools so that you don’t have to be distracted during installation. Must be present:
- Roulette.
- Pyrometer.
- Screwdriver.
- Screwdriver.
- Drill (perforator).
- Pliers.
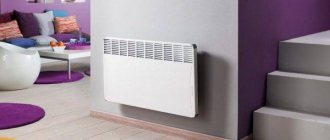
Where and how to install an IR heater?
At this stage, the location of the infrared heater is determined. It can be installed on a wall, ceiling, or with a slope.
IR with a power of up to 800 W is installed in residential premises. If we are talking about public buildings, then the power starts from 1.5 kW.
The surface must be strong to support a load of 20-30 kg.
Do not install the heater near flammable objects
Location and height from the floor
IR is recommended to be installed next to surfaces that absorb heat.
Wood, carpets, and stone surfaces work well. Reflective surfaces should be avoided, since when using the device the owner will receive a minimal effect. Electrical wiring must be laid on a non-combustible base. The location of the heater largely depends on the specifics of the premises. There is an optimal scheme for placing IR in residential buildings. It looks like this:
- A pyrometer can measure the coldest place that needs heating. In the case of installing several heaters at once, it is required.
- The height from the floor should be 1.5 m in residential areas. If a person spends a lot of time under the heater, the value should start from 1.8 m.
- If the installation of a high-temperature infrared heater is carried out in public buildings, offices, then the distance should be 2 m.
Installation of the device
You can do the installation yourself without spending a penny. The only difficulty is that it requires certain skills and knowledge, as well as knowledge of the installation process.
During installation and connection to the electrical network, it is prohibited to turn on the heater.
Progress:
- Determine the mounting height from the ceiling and floor using a tape measure.
- Tighten the bolts or drill a hole with a drill (perforator) if the wall is concrete. It is important that the distance between the attachment points is the same.
- Insert dowels into the drilled holes.
- Install fasteners.
- Secure the device into the fixing holes.
The designs of different heaters may differ slightly, so do not ignore the manufacturers' recommendations.
Electrical connection
To save energy and provide a comfortable temperature, the infrared heater is mounted together with a thermostat.
The device automatically turns off the IR when the room reaches the specified temperature. As soon as the air in the room cools down, the thermostat turns on the IR. Connecting to the network together with the thermostat takes place in 4 stages:
- Attach the thermostat to the wall at a height of 1.4 m from the floor near the infrared heater.
- Select a wire that is resistant to heavy loads. It must be laid inside the walls and ceiling from the IR to the thermostat.
- The wire is masked with plaster or special boxes.
- The heater wiring is switched parallel to the main line.
When installing heaters in several rooms at once, one thermostat will not be enough. One device is required for each room.
Connection diagram for several heaters via a thermostat
The connection involves connecting the cables of several devices to the thermostat. Next, the thermostat is connected to the junction box.
The best option is to create a separate machine in the switchboard. This will prevent the risk of overload.
Step-by-step instruction
The manufacturer must include step-by-step instructions for installation and operation in the set of heating panels. It is necessary to study it carefully, because all units are different, so recommendations for them may differ.
Heater installation
Mounting the device to the wall is quite simple. To work, you will need a screwdriver, drill and hammer drill, as well as basic knowledge of working with the listed tools.
Designs may vary between devices, so please pay attention to manufacturer's advice.
Step by step process:
- Determine the locations for fastening the product and mark them. It is recommended for these purposes to use a measuring tape to measure the height of the mount from the ceiling. You will also need a building level. You need to make sure that all points are at the same height.
- Drill holes into which to then insert dowels.
- Using the parts included in the kit, secure the structure to the wall.
To properly install an infrared heater, you must strictly follow the recommendations described above.
Electrical connection
Any device is installed with a thermostat, which is needed to maintain a constant temperature. Any network consisting of one phase is suitable for connection. The exception is high-power industrial models. In a home or apartment, you don't need to worry about this.
Using a thermostat, the room temperature is monitored. This is necessary to ensure and maintain specified modes. If the values are higher than the specified level, the device automatically turns off, and the supply of electricity to the unit is resumed after the air has cooled.
Installation requires minimal preliminary preparation, no additional communications required
When installing the unit in several rooms at the same time, one thermostat will not be enough. It is necessary to install a separate one for each room. You don’t have to use them at all, but in this case the panels will consume significantly more electricity. In addition, it will be less comfortable to be in the room.
Step-by-step instructions for connecting the product:
- A high load resistant conductor should be used and installed in the ceiling or walls.
- Cover the cable with a layer of plaster. An alternative option is to use special boxes that can be used to hide electrical wires.
- The heater wiring must be connected in parallel to the main line.
- Then you should install a thermostat in each room at a height of 1.5 m.
Installing an infrared heater is not as difficult as it seems at first glance. Today, these designs are the most economical for heating homes. The devices can be used both as the main and additional heat sources.
Recommendations for installing a ceiling device and basic mistakes
To mount and hang the heater from the ceiling, it is advisable to use the fittings that come with the device.
To prevent cable routing from being noticeable, a U-shaped profile is used along the wall and ceiling.
Thermostat
When installing, owners often make the same mistake, forgetting that when installing several devices at once in one room, it is necessary to take into account the total power. This applies to units that are connected to one thermostat.
Failure to comply with this rule will result in device failure and electrical failures.
It is recommended to install the thermostat near a door or window.
How to connect to the network securely
To ensure safety, you can ensure that the device is grounded. To do this, the yellow-green cable is connected to the appropriate terminal.
Installation price
Installation of an electric infrared heater up to 3 kW costs the owner 2,500 rubles.
The gas model will cost 3,000 rubles. Installing an infrared heater is a simple task that can be handled by someone who understands the basic principles of how the tools work. The main thing is to pay attention to safety measures and strictly follow the instructions.