A washing machine is an integral attribute of the home, which simplifies life and helps maintain cleanliness. Sometimes cases arise that indicate the device is not working properly or the possibility of an imminent accident. A cause for concern may be a situation when the drum in the washing machine dangles during washing, making loud noises. You can deal with this problem yourself by inspecting and fixing the problem.
Causes and signs of breakdowns
If the washing machine drum is loose, this is a reason to inspect and identify the reasons. This way you can avoid more severe damage, which cannot be removed without a specialist, and you will not allow the part to become loose even more.
Additional signs that the washing machine drum is loose may include:
- loud sounds that the unit makes during spinning;
- the machine begins to vibrate or jump;
- The drive belt periodically falls off;
- the machine leaks or jams the laundry;
- the unit drum is skewed or loosened and has fallen to the bottom of the tank;
- The laundry is stained with oil stains after washing.
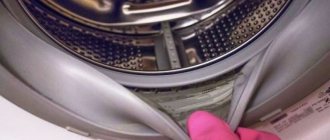
Sometimes the drum rubs against the cuff of the loading door, knocks against the hatch of the machine or its body, squeezing out the wash.
To find out the reasons, you need to conduct a diagnosis.
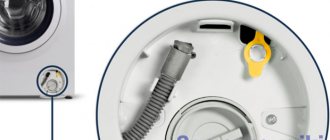
Look under the unit body. If the cause of the failure is in the bearings and seals, there will be water under the device, because. when these parts fail, it begins to leak through the moving element, which is attached to the back of the machine. If there is no puddle, continue inspection.
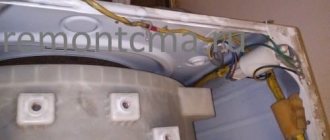
Remove the top cover, most often it is attached to the clips at the back wall, and pull it up. After getting rid of the fasteners, find the shock absorbers and suspensions. Inspect them for cracks and breakages; perhaps here you will notice a broken element that needs to be repaired.
Without further unwinding the tank, it will not be possible to check anything else, and in this case it is better to seek the help of a specialist.
How causes are identified in machines from various companies
Minor drum chatter in Ariston, Kandy, Bosch, LG or Samsung washing machines is provided for by the manufacturer from the very beginning. Backlash is necessary for the normal functioning of the device. But such rocking of the drum does not cause the formation of extraneous knocks during the washing process. But when they are heard during the spin cycle, it is recommended to take a number of actions:
- open the loading door, grab the drum with your hands, and twist it. If you hear a grinding sound, look for the problem;
- Indesit starts with an empty drum at maximum. If during rotation there is a feeling of large vibrations accompanied by noise, then it is necessary to inspect the bearings or shock-absorbing devices;
- pay attention to water that may leak from the machine;
- If you hear a grinding noise but cannot find a leak, replace the shock absorbers.
How to check play
Some factory play in the washing machine drum is present in every unit. However, it should not interfere with loud sound or vibration. The washing machine tank and the drum attached to it are normally suspended on springs and supported by shock absorbers, so the entire structure can be loosened in three directions.
To check the play, perform several sequential steps.
Open the loading door and grasp the drum. Shake it slightly and then twist it clockwise and counterclockwise.
If at the same time the machine begins to wobble, knock or creak, then the drum is loose and needs to be repaired.
Then start the wash cycle with maximum spin. If you see that the drum is wobbling and knocking on the body and hatch, the problem is that the bearings or shock absorbers are broken.
There is a foreign object in the drum
During the washing process you can hear knocking and rumbling noises. Sometimes the cause of this is an object that accidentally ends up in the drum. Often this phenomenon is caused by a break in the shock absorber or spring from the main frame.
During vibration and rocking, the broken element begins to knock on the body and tank quite rhythmically. It may appear that there is an object in the drum. If the element has completely fallen off, the roar will not be very rhythmic, and the drum will sway in a certain direction.
A distinctive sign of suspension problems is the drum swaying at low speeds during washing. Deviation from the axial will immediately catch the eye, and a strong knock will be heard on the body part. It is possible to identify problems with such negative manifestations only through a serious inspection of the device.
What to do
Having established the cause, which may be a faulty shock absorber or bearing, proceed with the repair to put the loose drum in its place.
Prepare your tools and clear your workspace so you can easily reach the back of the device. Disconnect the machine from the network and other communications, move it so that you can enter from any side. Drain the water from the filter under the bottom panel.
What tool will you need?
If the drum in your washing machine has fallen off, you will need several tools to repair it.
To replace shock absorbers and springs you need an awl, keys, a pair of repair kits and screwdrivers.
If you need to change the bearings, then additionally stock up on a copper hammer, pliers, a set of keys and sockets, silicone sealant and a hacksaw. If the tank of the machine cannot be disassembled, then use lubricant and a repair kit for bearings and seals. The parts must be original; unsuitable parts will quickly wear out and allow the drum to become loose again.
How to replace a bearing
To replace, you need to disassemble the case. Manufacturers offer to do this in several ways:
- dismantling the top cover (Zanussi);
- through the front panel (Samsung, Bosch, Siemens, Indesit, LG).
Remove the top cover by unscrewing the screws on the back panel and remove it.
Remove the back panel by unscrewing the bolts around the perimeter.
Remove the front panel. To do this, you need to remove the powder tray, unscrew the screws on the control panel, and then remove it by releasing the plastic latches. Unscrew the bolts and remove the panel.
Unscrew the door and remove the seal clamp.
Disconnect all wires and parts that are attached to the tank. Remove the drive belt, heating element and motor.
Unscrew the shock absorber screws and remove the tank from the hooks.
If the tank is collapsible, just unscrew the bolts and remove 1 half. If not, you need to cut it.
Remove the oil seal by prying it with a screwdriver and knock the bearing out of the race using a chisel.
Install the new bearing, lubricating it before installation, into the seat, and then into the oil seal.
After this, work to return the drum to its place is carried out in the reverse order.
If sawing was carried out, the tank must first be glued with sealant and bolts must be inserted around the perimeter into the holes drilled for this purpose.
How to fix a washing machine drum if it's loose
Before you fix a machine with a loose drum, gather your tools. If the repair consists only of replacing springs or shock absorbers, then you will need a little:
- flat and Phillips screwdrivers;
- awl;
- keys;
- repair pair kit.
But to replace bearings you need more tools:
- Repair kit (bearings, seals).
- Hammer with copper striking part. You will need it to delicately remove the shaft and not damage fragile parts.
- Metal pin. With its help you can knock out the bearings. A steel rod or any similar device will do.
- “Cold welding” or silicone sealant. You will need them if your SM model has a non-separable tank - then it will have to be glued together.
- A hacksaw will be needed for the same reason as the sealant.
- An awl will help you pry and remove the old seals.
- Two screwdrivers: negative and positive will unscrew the fasteners, of which you will find many during disassembly of the washing machine.
- For the same purpose, you will need a set of keys and sockets.
- Pliers.
- Lubricant for new elements.
Attention! Change both bearings at once so that after a while you don’t have to disassemble the machine again.
Replace bearings
To correctly replace parts, you need to properly disassemble the housing. The catch is that washing machines from different manufacturers are disassembled differently. You can get the tank through the top panel in the following brands: Zanussi, Atlant.
Through the front panel we take out the tank in SM Samsung, Ariston, LG, Indesit, Bosch and Siemens. Some machines (for example, Electrolux) are disassembled into two parts, but the tank is also removed through the front cover.
Read more about disassembling a washing machine to replace bearings in the following articles: How to replace a bearing in a washing machine drum, in a Bosch, Electrolux, Zanussi machine.
Causes of failure and how to determine them?
Some play in the washing machine drum is provided by the manufacturer , so if you grab its walls and shake it, it will sway a little from side to side - this is normal. In this case, no loud knocking sounds will be heard. It’s another matter if we are talking about a breakdown, to find out, do the following first.
- Open the hatch cover of the washing machine, grasp the drum with your hands and move it from side to side without any extra effort, and then rotate the drum clockwise and counterclockwise. If you hear a fairly loud knock or grinding noise, this is the first sign of a breakdown.
- Turn on the washing machine and set the spin program to the highest possible speed (usually 1000, 1200, 1400 rpm). If, during rapid rotation, the drum dangles a lot, there is a feeling that it has flown off the axis and all this is again accompanied by pronounced loud sounds - this is either a breakdown of the bearing or shock absorber.
- To check for damage, look under the bottom of the washing machine. Typically, bearing problems are accompanied by water leaking through a moving element located on the rear wall of the tank. There is a high probability that a puddle will accumulate under the machine after washing; this will mean only one thing - you need to change the seals and drum bearings.
- If there is a strong knocking sound, but no water is leaking, it is better not to go to the bearings for now, but check the shock absorbers. They are much easier to reach.
Note! When rotating the washing machine drum, pay attention to how easily or hard it turns. If the drum rotates clearly hard, it seems that it has fallen off - this is an indirect sign of bearing failure.
At the initial stage, without disassembling the washing machine, it is impossible to find out anything more. It is impossible to determine exactly what is broken in the car without opening the case, so to clarify the problem, we will remove its top cover and take a look.
Faulty spring suspensions or shock absorbers are usually easy to recognize. It is enough to examine them carefully, or even better, shake them slightly. If at least one faulty spring suspension or shock absorber is found, then consider that the breakdown has been found and there is no need to disassemble the tank to repair the bearings. If the suspensions and shock absorbers are in good working order, then you will have to climb further into the car and remove the tank from it.
What is required for DIY repairs?
The set of tools and components for repairing a loose drum will depend purely on the nature of the breakdown. If you need to replace shock absorbers or springs, then it is enough to get a flat-head and Phillips screwdriver, an awl, a set of keys and, accordingly, a set of shock absorbers or springs suitable for this model of “washer”. But if you need to change the bearings, then you will need a few more tools and components:
- hammer with copper striker;
- steel rod or pin;
- cold welding or sealant;
- awl, flathead and Phillips screwdrivers;
- set of heads and open-end wrenches;
- pliers;
- specialized lubricant for washing machine mechanisms;
- a set of bearings and seals for a specific model of washing machine.
We will need a hammer with a copper striker to more delicately remove the shaft from the washing machine drum pin, since it is precisely such a striker that allows us to avoid damaging delicate parts. A steel rod or pin or other suitable device is needed to knock the bearings out of their seat. In essence, it does not matter what the device will be, the main thing is that it is suitable in length, thickness and consists of metal.
Cold welding or sealant may be required if a certain model of washing machine has a non-separable tank. In this case, in order to disassemble the tank, it is sawed across the seam and then connected using self-tapping screws and cold welding. Using an awl, it is convenient to pry up the oil seals and pull out old oil seals , and screwdrivers are useful for unscrewing fasteners, as is a set of sockets and open-end wrenches. Special lubricant will be required to fill the oil seals and lubricate the shock absorbers.
Important! If you decide to change bearings, don’t skimp, change them all as a set. Then you will have less to climb into the body of the car and do it.
Replacing the part itself
Now you can proceed directly to solving the problem when the drum in the washing machine is hanging loose.
The disassembly process and bearing replacement may look like this:
- Unscrew the pulley bolts and remove it.
- Carefully knock out the shaft using a rubber hammer.
- Next you should deal with the bolts connecting the parts of the tank.
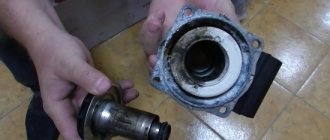
- Now you can see the bearing - it is knocked out with a chisel. After this, you need to remove the seals.
- At this stage, it is necessary to prepare a place for installing a new part by lubricating it with the selected product.
- Install new seals and bearings.
- This completes the repair procedure; all that remains is to reassemble everything in reverse order.
If the work seems simple, then you should not think for a long time and it is better to get down to business right away. Otherwise, if you have questions, it is better to call a specialist at home.
In addition, in some models the tank may not be dismountable, which significantly complicates the entire operation. In this case, if the drum of the Indesit washing machine is loose, then you should definitely seek professional help.
Cause Detection
It should be noted that the presence of a certain backlash is provided directly by the manufacturer. When the washing machine rocks, the drum will also rock, but not much. This phenomenon is normal.
At the same time, you should open the door and twist the drum with your hands; if you hear grinding, knocking and other unpleasant extraneous sounds, this clearly indicates a breakdown. Why does the LG washing machine drum hang loose? Typically, this may be due to problems of the following nature:
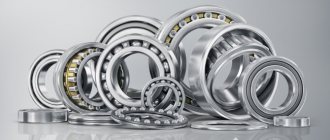
- bearing failure;
- shock absorber wear;
- presence of foreign objects;
- failure of seals.
You can feel the “bumpiness” of the drum by moving it a little from side to side. But how can we determine what exactly caused the uncharacteristic behavior of household appliances?
Features of repair and replacement of fasteners
All installation work on connecting water must be carried out with the supply to the apartment (house) shut off. There is an inlet tap in most residential premises. Where it is absent, a cut-off is made for the entire riser or in the well.
No repair work can be carried out while the machine is plugged in.
When going for new door mounting parts, you should take the old unit with you. Even on machines of the same type from different series, discrepancies occur. Sometimes it’s millimeters, but it’s impossible to replace it.
When repairing a drum or door, you need to check, at least superficially, the remaining components, open and clean the pump filter, and check the heating element for scale.
Installation, connection, fastening and ongoing minor repairs of components can be done even by a not very experienced person. As a rule, all it takes is a wrench, a screwdriver and some care. Here, as elsewhere, it is important not to overestimate your strength. If the breakdown is obviously related to the electrical part or electronics, it is better to seek the services of a specialist.
Did you manage to solve your problem using the recommendations from the article?
Yes!
51.85%
No. More answers required. I'll ask in the comments now.
29.63%
Partially. There are still questions. I'll write in the comments now.
18.52%
Voted: 27
We change shock-absorbing elements
It is quite difficult to replace the bearings of an automatic machine with your own hands. Especially in the case when the washing machine tank is non-separable. Practice shows that only a few take on such work at home. It is easier for ordinary users to call a specialist and entrust him with complex equipment repairs.
When the drum “swings” occurs due to a defect in the shock-absorbing elements, you can fix the problem yourself. Replacing springs and dampers is much easier than disassembling the tank and tapping out the bearings. The repair algorithm will vary depending on your LG AGR model. In some washing machines you can “climb” up to the shock absorbers from below, in others - only through the front wall of the case.
If the automatic machine model allows repairs from the bottom, then replacement will not take much time. You just need to lay the machine on its side, having previously de-energized it and disconnected it from communications, unscrew the worn shock absorbers and install new elements.
If only one shock absorber is defective, both elements must be replaced.
When dismantling shock-absorbing elements is carried out from the front side, it is necessary:
- unplug the SM power cord from the outlet;
- turn off the water supply tap;
- remove the top cover of the case by unscrewing the fixing fasteners;
- pull out the detergent tray;
- remove the false panel behind which the drain filter is hidden;
- Unscrew the bolts holding the control panel. Carefully, so as not to break the wires, place it on top of the washer. You can also disconnect the wiring, but do not forget to take a photo of the connection diagram before doing so, so as not to make a mistake when reassembling it;
- open the hatch and unscrew the screws securing the UBL. Disconnect the wires and remove the hatch locking device;
- pick up the cuff clamp fastener. Remove the metal ring from the body and tuck the rubber seal inside the drum;
- remove the front panel; to do this, unscrew all the screws holding it (behind the powder receptacle, under the control panel, in the upper right and left corners).
This will give you free access to the shock absorbers. Removing worn-out elements and installing new ones is not difficult. Reassembling the LG washing machine occurs in the reverse order. If the drum of your machine “dances” in different directions, you should not delay the repair. The reason the drum is loose is due to worn bearings or shock absorbers. In both cases, it is advisable to replace faulty components as soon as possible.
Interesting:
- Error codes for AEG washing machines
- Changing the belt on an Ariston washing machine
- Ariston washing machine makes noise when spinning
- Malfunctions of Hotpoint Ariston washing machines
- Reviews of Atlant washing machines
- LG washing machine is leaking from below
Reader comments
- Share your opinion - leave a comment
Drum
The most troublesome task is to understand the fastening of the washing machine drum and get to the drum.
- Disconnect the washing machine from the network.
- Remove the cover. It is attached with self-tapping screws to the rear stack. Having twisted the screws, we move the cover towards the wall and remove it to the side.
- Remove the control panel. The panel is held on by several self-tapping screws, which can be found by carefully inspecting it. The electronics are attached through connectors; they must be carefully disconnected.
Drum machine
ATTENTION! It is better to move the control panel higher and away from the sink, bathtub, electrifying objects, dust, children and animals.
- To detach the front panel, you need to remove the bottom panel by releasing the latches.
- Remove the cuff. Let's find the spring with our fingers at the junction of the clamp. We press on it and pull out the clamp.
- We unscrew the screws at the top and bottom that hold the front panel.
- Disconnect the hatch lock.
- Lift the panel so that it is removed from the holders.
- To unscrew the back wall, you will need to unscrew the mounting bolts; they are visible to the naked eye.
- Having previously twisted the clamps, disconnect all the hoses attached to it from the tank (from the powder receiver, drain hose, and pressure switch hose). Don't forget about the photo! If some hoses seem similar in appearance, it makes sense to mark them with different markers, stickers, or simply number them with a pen before photographing.
- The electric heater (TEH) is located at the bottom of the drum, it can be either on the front or rear side. Wires are connected to it. We take a photo and disconnect the heating element completely by unscrewing the nut and removing it, or unscrew the wires from it.
- Unscrew the wires from the engine.
- If other wires are also secured to the tank with ties, they must also be disconnected.
- There are counterweights on the top and bottom of the tank. They are quite heavy and can be removed to lighten the tank before removal. To do this, unscrew the bolts on the counterweights.
- Using a wrench, unscrew the bolts that secure the shock absorbers to the car body and remove them.
- We carefully remove the tank, having first removed it from the springs.
- Remove the belt, unscrew the engine and shock absorbers.
- Now we disassemble the tank to get to the drum. To do this, unscrew the bolts or unlock the latches around the perimeter of the tank and remove the front part of the tank.
Securing the drum in the washing machine
ATTENTION! Many modern models have tanks that are not detachable, but monolithic. In this case, it will need to be completely replaced or cut and then fixed with sealant.
- To disconnect the drum from the tank, you need to remove the pulley from the back of it. We unscrew the bolt that secures it to the drum and remove the pulley from the axle. Screw the bolt back in.
- Using light blows of a hammer, knock out the shaft. When only the bolt head remains, unscrew it and remove the drum from the tank.
