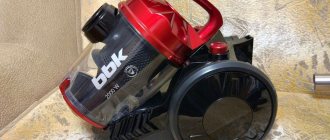
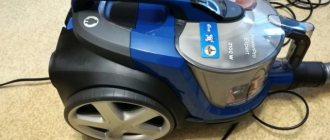
The principle and design of the vacuum cleaner
The choice of vacuum cleaners is expanding. Main options:
- For dry cleaning;
- with aquafilter;
- washing vacuum cleaner.
The most common and lightweight is a dry cleaning vacuum cleaner. The operating principle of modern vacuum cleaners and old ones is the same.
After starting, all debris is sucked out using a vacuum fan. Once inside, the garbage goes through several stages of filtration. Often, this is: at the debris inlet, in the engine part, and at the outlet. Each stage protects the vacuum cleaner from damage by large particles.
The first sign that the filter is clogged is that the suction power drops.
All dust and dirt are collected in a special bag. They can be reusable and replaceable from paper. There are models of vacuum cleaners that use a container system instead of a bag. All the dirt settles on the walls of the container, and then purified air also comes out.
Vacuum cleaner device
The vast majority of vacuum cleaner models are built according to 3 design types:
- With a dry dust bag;
- With aquafilter (with air-water mist filter);
- With non-replaceable cyclone dust collector.
Design of household vacuum cleaners with a dry dust bag, with an aquafilter and with a cyclone
Any of the vacuum cleaners of these types can be equipped with attachments (brushes) for wet and dry cleaning. Nozzles have their own characteristic malfunctions, which we will also deal with further.
With a bag
In a vacuum cleaner with a dry dust collector (on the left in the figure), the air passes first through the dust bag, then through the fine filter and the fan motor compartment. T. called. The HEPA filter traps particles with a size of about 1 micron. The HEPA filter only works under pressure, and dust particles less than 3-5 microns do not affect the operation and durability of the motor, so the HEPA filter is placed after the fan motor, which in this case also works as a compressor.
Vacuum cleaners with a dry dust collector are the least prone to breakdowns, but their main drawback is disposable filters. The dust collector is made of propylene or silicone fiber and cannot be regenerated - once the bag is full, throw it away and replace it with a new one. If you try to clean it, rinse it, or sew a fabric one from an old vacuum cleaner onto the old neck, the formation of microdust increases so much that the thin and HEPA filters instantly become clogged. If you “cheat” them in a similar way, it soon turns out that engine repair is necessary, expensive and/or complicated.
The fine filter and HEPA filter also cannot be restored, but in some cases this is still possible, see below. A characteristic sign of clogged filters is that the vacuum cleaner does not pull well, makes a loud noise (without clanging or rattling), and gets hot. If there is automation, 1-15 minutes after switching on it switches to reduced power or stops. Eg.
Read more: Textured wall painting or textured plaster
, over 65% of calls to warranty service for inexpensive LG vacuum cleaners regarding such a “breakdown” are caused by a clogged HEPA filter. The user is shown where it is printed in small print that this is a non-warranty case and is explained in a friendly manner how much to pay. Meanwhile, replacing the filter in an LG vacuum cleaner is a completely nonsense matter, see next. video.
The most common malfunctions
If it is not possible to take the vacuum cleaner to a specialist to disassemble and assess its condition, you can find out what you need to pay attention to in the event of a malfunction. After problems arise, the first thing to check is the bearings, which help the engine operate.
A specialist can quickly determine the problem of a vacuum cleaner breakdown.
The sound that is characteristic of them: a sharp hum, roar, burning, overheating of the body. In addition to them, attention is paid to the armature and motor brush. A common problem is that the hose does not draw in contaminants.
Vacuum cleaner hoses often fray.
The reason may be a clogged hose, an overfilled dust bag, or a problem with the HEPA filter. A problem that often arises is when the unit draws air, but the debris is not removed properly. The problem may be a worn brush or a broken roller position.
Motor failure is a serious problem.
If the equipment does not turn on and the electricity does not disappear, then the reason lies in: the overheating protection or malfunction of the power circuit, plug, wire, internal wires, or a snag in the switch itself. If the problem occurs with the electronics, it is better to entrust this matter to a professional.
Only a professional service center will quickly repair your vacuum cleaner.
An indicator of this lies in the fact that during operation they discovered smoke, knocked out plugs, and short circuits. This all suggests that the problem is centered on a short circuit inside the device. And frequent problems with collector sparking lead to rapid wear of the device.
Use the drawings to disassemble the vacuum cleaner.
Trouble-shooting
There aren't many of them. As a rule, they are quite trivial, but if they occur, they require disassembling the vacuum cleaner. You can’t do without it when diagnosing faults. The main reasons for vacuum cleaner failure are the following:
- bearing failure;
- engine failure;
- malfunctions in the electronic system.
Along with those listed, other deviations in work may occur, but, as they say, they lie on the surface. For example, a fuse has blown. In this case, it is enough to replace it with a new one, and the vacuum cleaner will work again.
Sometimes it happens that a vacuum cleaner suddenly stops performing its main function. Everything seems to work, but dust is not sucked in. In this case, first of all, you need to remove and inspect the filters. If the filters are clogged with dust, they need to be removed. If cleaning does not work, the filters need to be replaced. Before replacing, you need to turn on the vacuum cleaner without filters and make sure that the suction power is at the proper level. If it is still small, you will have to inspect the impeller. It may happen that it is completely clogged with small debris.
At the same time, check the condition of the brushes and commutator of the engine. Worn brushes need to be replaced and the commutator cleaned. The tightness of the hoses may also be compromised, especially in the places where they are attached to the nozzles. You also need to pay attention to this.
The next common malfunction is. There are three main reasons for this:
- fuse blown;
- break in the network cable;
- There is a fault in the switch.
The fuse has already been mentioned, but to check other faults you will need an ordinary tester. With its help, you can easily ring the wires and locate the break point. Then a soldering iron is connected to the case and the problem is eliminated.
This happens when the vacuum cleaner is used for a long time. No repairs are required here. After cooling, the operation of the vacuum cleaner will be restored automatically.
If during operation the vacuum cleaner vibrates or you hear squealing or grinding noises, this means that there is a problem with the bearings. They need to be lubricated, and it is best to replace them immediately. The presence of sharp sounds in the bearing assembly indicates that its service life has expired.
And the last trouble is that the power wire is not tightened. Repair in this case is also not very difficult. Here the problem may most likely be in the spring. You need to get to the winding drum and inspect it. The spring may be weakened or, conversely, tightened. If everything is fine here, then you will have to remove the drum and unwind the wire from it (or vice versa, rewind it). This will adjust the tension force of the drum.
During inspection, it is necessary to check the functionality of the pressure roller. Vacuum cleaners of any brand are not immune to such a malfunction when the engine speed is no longer regulated. In this case, the problem must be looked for in the electronic control unit. It is simply not recommended to repair it yourself.
The process of disassembling and repairing a Samsung vacuum cleaner is not very difficult. It can be done independently with minimal knowledge of electrical engineering and the ability to handle plumbing tools.
Preparatory stage of disassembling the Samsung vacuum cleaner
You can notice the problem if you have been using the equipment for some time. You know what sound is typical of your Samsung and the smallest changes in it or in the operation of the device will be noticeable to you.
The breakdown of many parts will lead to financial problems.
A broken motor in a vacuum cleaner is noticeable by: intermittent sounds, throws out dust, smells burnt. If it is not possible to give it to a specialist, then disassembling a Samsung 1800 w vacuum cleaner with your own hands, videos and photos will be assistants.
What tools will you need?
Need to clean the dust bag or replace it? No special equipment or skills are needed. They are needed in cases of problems with the motor, wires, and board elements. They will be:
- file;
- awl;
- pliers;
- sandpaper;
- vice;
- construction knife;
- spare connectors and wiring.
Use tools to disassemble the vacuum cleaner.
In cases of replacing small parts, you won’t have to spend a lot. But to replace a large and expensive component, you can pay attention to an alternative. With the condition of good material from which it is made.
3 ways to unscrew the rotor mounting nut
Let's call them conditionally according to the technology of performing the work:
- cutting a slot;
- fixation with a noose loop;
- fastening in a vice through adapters.
Each of these methods has its own advantages and disadvantages and can be used depending on the availability of equipment and tools.
Slot on shaft
A little history
This rotor mounting technology was used on the collector motor of any vacuum cleaner produced during the Soviet era. For ease of manual assembly and subsequent repairs, a groove for the screwdriver blade was always created at the end of the shaft at the factory.
Its force fixed the position of the rotor shaft, and the torque from the wrench clamped or loosened the nut. I still have a similar engine that was used in the design of a homemade trimmer. This slot is clearly visible in the photo below.
Modern technologies
Nowadays production widely uses industrial robots and automation of all processes. In addition, the marketing policy of well-known manufacturers is designed to:
- long service life of manufactured equipment within the declared resource;
- performing repairs by block-by-block replacement of failed devices without disassembling them.
For these reasons, the manufacturer simply replaces the defective commutator motor with a new one without disassembling it: it’s faster, easier and more profitable. Well, our home handyman likes to fix everything with his own hands the old fashioned way.
How to make a slot
The vacuum cleaner motor mounting nut and rotor shaft are made of ordinary steel. You can make a cut in them. However, in our case, it is not possible to do it in the usual way due to the recess of the fan housing in which they are hidden. Therefore, you will have to use an ordinary homemade electric drill and a circular saw of the appropriate diameter at the end.
Then we place a wrench on the nut, and a screwdriver on the cut in the motor shaft. All that remains is to apply force to create the opposite torque and use it to disassemble the mount.
I did not use this technology: I did not have a small circular saw at hand for cutting metal. I tried two other methods.
And you can watch its implementation in the video by Alexander M “How to unscrew a nut.”
Loop
The method is based on holding the anchor by the collector plates using a noose assembly. I had to check two options for unscrewing the nut using:
- soft copper wire:
- plastic rope.
Wire fastening
In principle, the polyvinyl chloride insulation of the mounting wire squeezes the rotor shaft well onto the commutator plates, maintaining the integrity of their surface, and allows it to be held for unscrewing the nut.
I used copper wire with a diameter of 2.5 mm square. However, the design of the loop turned out to be loosely tightened and did not completely provide a noose. When working with the key, I felt that the shaft was turning and did not apply much force.
When I pulled my wire out of the engine, I saw frayed insulation on it. I didn't experiment with this method anymore. However, I suggest watching this technology in the HamRadio video “How to unscrew a nut on an engine.”
Fastening with cord
He took a piece of thin rope and folded it in half in length. In the middle I threaded a soft wire that acts as a needle.
With its help, it was possible to conveniently place the soft cord in a loop on the noose and pass it around the collector plates.
I tied a fastening knot around the housing window.
My attempt to unscrew the nut using this method did not work: the structure of the cord turned out to be weak - it simply broke due to the applied tension forces.
If you repeat this method, choose a stronger rope, cord or belt.
Clamp in a vice
To fix the anchor in this way, it was necessary to make two adapters in the form of rectangular blocks from wood.
Their cross-section should fit into the hole in the housing for attaching the brush, and their length should reach the collector plates and protrude slightly outward. It is better to first measure these distances using a caliper or ruler.
Moreover, the side adjacent to the rotor must be sharpened with a round file in the form of a segment for a tight fit to the motor shaft.
With the help of these adapters, it was possible to fix the engine rotor in a vice, pressing with medium force.
All that remains is to set the socket wrench to 12 mm and rotate it clockwise.
The nut is safely unscrewed. A machined factory cavity is noticeable on its inner surface.
Sequence of disassembling a vacuum cleaner using the example of Samsung 1600w
Disassembling any equipment begins with preparation. And the right sequence. We cannot reach the heart of the device until we remove everything that covers it.
You can disassemble the vacuum cleaner yourself using the instructions.
You can open it like this:
- Disconnect anything that might be in the way and unscrew the case. Use a screwdriver to unscrew all the screws, including the hidden ones that may be near the buttons. After unscrewing all the parts that can hold the shell of the vacuum cleaner, remove it. If it doesn't work, look again to see if there are hidden latches.
- Disconnect the electrical installation. You can see it on the connectors.
- We remove the engine from the entire plastic body by unscrewing it from the frame.
Correct diagnosis is the key to success.
Engine disassembly
The heart of the vacuum cleaner has a step-by-step opening process.
- First you need to remove the impeller. But for this you need to perform certain actions. Remove the front part of the casing. Use a thin screwdriver to bend the side of the casing so that the screwdriver gets inside. Pull back the top of the casing and the impeller becomes accessible.
- Unscrew the nut on the impeller.
- We remove the housing screws, but by this time the brushes need to be removed.
- Pull out the anchor.
- Use thread pullers to remove the bearing.
Filters become clogged, debris is poorly drawn in, there is additional load on the motor and eventually it breaks.
How to disassemble the vacuum cleaner
In order to disassemble the vacuum cleaner, you will need the following tools:
- screwdriver for small screws;
- screwdriver for large screws;
- pliers;
- lubricating fluid (in case you need to lubricate the engine).
Read more: Alternative energy for a private home
Remember safety precautions - be sure to disconnect the vacuum cleaner from the power supply by unplugging the cord from the outlet! After you have prepared the necessary materials and de-energized the device, you can proceed directly to disassembling the vacuum cleaner. So:
- First, remove the waste container.
- Remove the filter and also remove the rear filter.
- Take a Phillips screwdriver and unscrew all the bolts that are located under the cassette container.
- Starting from the front, carefully lift the body of the vacuum cleaner and remove it from the overall structure with a smooth upward movement.
- Pay attention to whether there is dust on the engine and the inside of the housing. If there is one, we recommend removing it with a brush and a dry cloth.
- First of all, you will need to remove the engine bolts that are located on the top.
- To remove the engine, you need to free it from the wires that are attached around the perimeter. Carefully disconnect the connectors and remove the engine from the overall structure. Note that the wires also extend from the coil and are connected using connectors to the wires attached to the motor. Before removing the engine, make sure that all connectors are disconnected and that the wires are not tangled in any protruding parts of the engine.
- Again, look for dust. Remove it if necessary.
- Now you need to remove the rubber sealing ring that is bolted to the bottom of the engine.
- To disassemble the motor housing, use a flathead screwdriver.
- Please note that the motor housing is divided into two halves.
- Carefully insert the screwdriver into the gap and, walking around the perimeter, pry up the upper half. Now you can directly remove the engine itself, which is secured in a small plastic container.
- To disassemble the engine, you again need to use a flat-head screwdriver. Place it on a flat surface with the lid facing down and pay attention to the rolling.
- Find the gap and insert a screwdriver, carefully prying up the main part of the engine.
- After removing the cover, all you have to do is disconnect the turbine using the socket head.
- After this, unscrew the two screws and the screws on the brushes, which are located at the ends.
- Finally, remove the armature from the engine.
Disassembly of the vacuum cleaner is completed.
A person gets used to good things very quickly, so anyone who has ever tried to use a vacuum cleaner is unlikely to want to pick up a broom again. However, like any equipment, vacuum cleaners tend to break down at the most inopportune moment. Not every housewife is capable of troubleshooting a Samsung, LG, Phillips or other brand vacuum cleaner alone. Nevertheless, there are breakdowns that you can fix yourself, without resorting to the help of specialists.
How to repair a vacuum cleaner with your own hands
In order to repair all the elements with your own hands on a Samsung vacuum cleaner, you need to determine the place where it formed. The motor may need to be disassembled if: there is a burning smell, poor dust suction power. Follow the sequence when removing the housing.
The hose in vacuum cleaners often gets clogged.
The cause of this breakdown is often poor performance of the brushes on the motor. You need to pay attention to them. If the hose or brush is clogged. We clean them. First, remove the brush and check how the hose pulls without it.
You can replace the vacuum cleaner tube with a new one.
If everything is fine, then you need to clean the brush. If not, you can remove the hose and do the same steps. Often, a large item can get stuck inside: a chain, a watch. Clogged filters and waste container.
You do not necessarily need to replace the filters in your Samsung vacuum cleaner if the device begins to work poorly.
To determine, we take everything out and check the draft of the vacuum cleaner. If everything is in order, clean the filters. As for replacing and repairing the motor, here you need to evaluate your skills and abilities. An example of this could be a broken motor winding. To determine problems with it, you need to have the ability to use a multimeter.
The filter must be washed regularly and replaced every two years.
Only with its help can you identify the problem. Other problems that you can solve yourself include:
- Button failure;
- Broken wire in the extension cord;
- Poor contact at brush terminals and winding.
When it comes to engine repair, then you need to evaluate your strengths and financial capabilities. It's easier to buy a new component, although buying bearings is much cheaper if they are the issue.
Check the terminals on the brush.
Checking the motherboard
The control board in a vacuum cleaner does not look the same as in a computer. This is a triac. From the part to the motor there are 2 wires on one side and on the other 2 wires are attached to the socket. The triac itself is located between them.
Only a specialist can repair the motherboard.
Remove it and connect the motor to the wires from the outlet. If everything is in order, you just need to replace the board. Some owners use a vacuum cleaner without it.
Cleaning the vacuum cleaner
The vacuum cleaner also needs to be cleaned. Starting with the lint you use to vacuum, and ending with the insides. Empty your dust bag promptly, whether it's a reusable bag or a disposable one. If you were removing construction dust and it was clogged, after removing all the parts, you can clean the insides.
An odor may occur if the dust container is full and has not been emptied for a long time.
It is convenient to do this with another vacuum cleaner, but carefully. You should be careful with the boards. Do not use the wet cleaning method.
How to disassemble a vacuum cleaner and is it worth doing it yourself?
The design of all units is identical. The difference lies in design, power and quality: filters, brushes, dust collectors, housings, hoses. Frequent causes of breakdown are wear of parts, destruction of mechanisms. In these cases, disassembling the vacuum cleaner yourself would be advisable. Components that can fail: motor windings, brushes, bearings, power cord, fuse. The next detail is the opposite. It will not be so easy to disassemble it yourself. The vacuum cleaner's electric motor is the heart that creates the vacuum. Thus, using the blades, they suck in air and small debris, from which the moving parts are protected by filters and flasks.
The positive aspect of the independent process is undoubtedly cost-effectiveness. For example, a fan motor for cheap equipment can be purchased for 1,500 rubles or less; rewinding a burnt one will cost more than 3 thousand. Changing an assembly unit does not require a complete immersion in the secrets of the equipment arrangement; it is repaired in a matter of minutes. The vacuum cleaner circuit is just as easy to change at home and the price is better. In the service, repairs of many minor breakdowns start from 500 rubles.
It follows that you can repair the device yourself. Moreover, it will be fast and not expensive. All that remains is to figure out how to disassemble the vacuum cleaner and fix the breakdown.
What is needed to disassemble a vacuum cleaner?
There are two types of disassembly: complete, when all parts are dismantled; incomplete, when some parts are removed that do not require the help of special tools (changing filters). Periodic complete disassembly can extend the service life. This means cleaning the unit from dirt and dust. It is necessary to monitor the turbine blades. Contamination affects rotation.
You will need some tools for disassembly: gloves and instruction manual. Despite the fact that the repair methods are almost the same, it should be studied at the beginning of the work. Because each device has individual characteristics. Let's see how to properly disassemble the equipment using the example of two popular models.
Let's talk about how to disassemble the LG vacuum cleaner as an example.
To begin dismantling the lg vacuum cleaner, you need to disconnect the plug from the power supply. Then remove the hose designed to suck up debris and remove the housing. These three steps are mandatory for all types of such devices. The sequence depends on the model. If all the filters and the dust collector are inside the device, thereby making it difficult to access the engine, then first remove the vacuum cleaner body. If it’s outside, then first of all we disassemble the components to clean it, and then the body. To do this, you need to unscrew all the screws. They may be hidden, so make sure you get everything out before you pull out the shell.
The next step is to separate the electrical circuit. The electrical circuit of the vacuum cleaner is connected to the connectors. The vacuum cleaner motor is hidden in a plastic shell, which must be disconnected from the frame in order to be removed. To do this, unscrew the nuts on the studs. There are models whose heart is screwed to the main body or is placed in rubber grooves (seals). Such devices are easier to disassemble. Having taken out the motor, we gain access to the power cord drum. Let's look at how to disassemble the compressor of a vacuum cleaner using the example of another company.
You can clearly see how to disassemble an LG vacuum cleaner in the video:
We disassemble Samsung
Let's take, for example, the 1800 model of a vacuum cleaner. First you need to remove the sealing front part, which is located above the fan impeller. To release the Samsung vacuum cleaner device - an electric motor. Using a screwdriver, carefully bend the impeller casing. She should go to the middle. Pull out the top part and carefully remove the casing and gain full access. Holding it, unscrew the nut. It most often has a left-hand thread, but other cases also occur. When this method fails to cope, resort to another: a stranded wire (cross-section greater than 1.5 mm) with rubber insulation so that it does not slip, we insert and wrap the collector shaft, stretching it in different directions. It will be enough 2 times. Thus, the shaft will be fixed and motionless. The method is safe for the anchor and is used during reassembly to tighten the nut. If you have an assistant, it will be more convenient: one fixes the manifold, the second unscrews it. Now you need to remove the brushes, free the housing from possible screws and carefully pull out the motor armature. Bearings can be removed using thread pullers or other available tools. Sometimes they are tightly connected to the bushing. In such cases, a special hydraulic press will help.
Next, we’ll learn how to determine if a Samsung or LG vacuum cleaner is broken by external signs and how to make repairs yourself so that all the elements work properly.
Preventive measures
It is better not to treat the problem, but to prevent it. This applies to everything and vacuum cleaners too. How does she look? Basic care: replace or empty the dust bag on time.
Each technique has its own weaknesses.
An important detail is the brush. Cleaning its lint should also not be a waste of time. If the vacuum cleaner is intended for dry cleaning, do not suck in water and other liquids, they will accumulate inside. This leads to breakdown.
Clean your vacuum cleaner more often to increase its shelf life.
Keep the warranty receipt after purchasing the vacuum cleaner, if you have one. Most types of breakdowns can be repaired by specialists. If it is missing or there is another type of breakdown, do not be afraid to use videos from the Internet, where craftsmen will tell you how to repair a broken Samsung vacuum cleaner with your own hands.