Replacing the pump in the SMA through the bottom
Before starting repairs, do not forget to turn off the power to the device and drain the remaining water from it by unscrewing the drain filter (place the tray, or place a rag under the bottom). The location of the pump may vary depending on the unit model. Thus, replacing the pump in washing machines from Indesit (Indesit), Samsung (Samsung), LG (El-G) occurs through the bottom of the unit: the bottom is not provided for by the design. A detailed algorithm for removing the pump in an Indesit washing machine is given here.
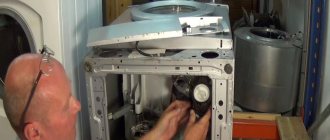
To remove the water pump, the SMA must be laid on its side and the front panel at the bottom, or the hatch door (like on an LG washing machine) opened.
Unscrew the two screws near the filter. These screws hold the entire structure (pump + volute).
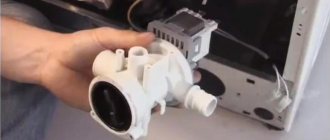
Turn the snail clockwise and remove the assembly from the body. Then you will need to disconnect all wires and hoses, remove the bolts connecting the device to the snail.
Now you can disconnect the faulty pump and replace it with a new one, bolting it on. We reconnect the electrical wires, connect the pipes, insert the volute back into the body, and fasten it with screws. Close the front bottom panel. It is recommended to pour some water into the tank to check the tightness of the hose connections.
Note: it is important to remember how the pump was installed in the volute and how the bolts were tightened (you can take a photo).
Instructions for replacing parts
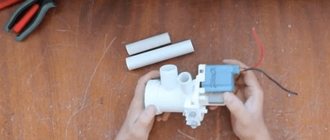
When the pump malfunction is confirmed, you need to proceed to the final stage of work. You can buy a replacement part in specialized stores or on the Internet. To do this, you need to tell the manager the brand and model of the Bosch washing machine or show the dismantled element. The algorithm for replacing the drain pump is as follows:
- disconnect both pump terminals, disconnect the power wires;
- using a screwdriver, unscrew the three screws that connect the pump to the volute;
- grab the pump, carefully “break” the part to the bottom;
- remove the element from the machine;
- prepare a new drain pump;
- put the working element in its original place;
- fix the pump with bolts;
- connect the terminals and two wires removed earlier;
- secure the bottom of the washer;
- screw the garbage filter into place;
- put the washing machine on its feet;
- reinstall the false panel.
Even a beginner can replace the drain pump; the main thing is to strictly follow the instructions for action.
Afterwards, all that remains is to run a test wash with an empty drum and observe the progress of the program. If the water drains freely, it means everything is done correctly. In fact, the process of checking, dismantling and installing a new pump takes a little time. Of course, you can invite a specialist, but then you will have to pay several thousand for diagnostics and repair of equipment.
Interesting:
- Washing machine pump repair
- Error codes for AEG washing machines
- How to repair a Bosch washing machine
- Repairs and malfunctions of various dishwashers
- DIY LG washing machine pump repair
- How does a washing machine drain pump work?
Reader comments
- Share your opinion - leave a comment
Replacing the pump in the Bosch SMA (Bosch)
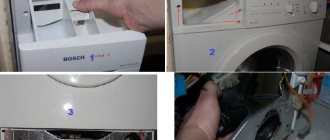
Replacing water pumps in Bosch washing machines differs from replacing such pumps in LG or Samsu ng only in the method of removing it. Namely, not through the bottom, but by removing the front wall.
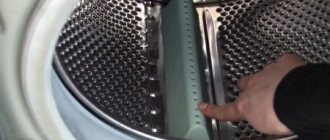
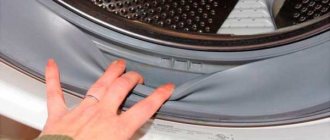
First you need to disconnect the machine from the power supply, unscrew the pump filter, and remove water from the drain system. Next, take a screwdriver, find a clamp under the hatch cuff (there should be a metal ring with a spring), pry it off and carefully remove it.
After removing the clamp, disconnect the rubber cuff, and so that it does not interfere with you, you can push it into the drum. Now you need to remove the top cover by unscrewing two screws on the back of the case and sliding it back until it stops.
After pressing the central lock, pull out the powder container.
Remove the screws from the control panel. It is attached at the top, with latches. We remove it and put it aside (up), it is not necessary to disconnect the wires.
Under the open drain filter hatch, you will see a screw that holds the bottom panel. We unscrew it and move the plastic to the left until it clicks. Then we remove the panel and gain access to two screws securing the front wall.
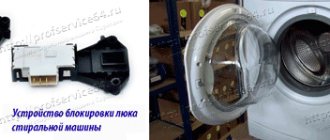
After removing the screws, pull the front wall towards you and up to remove it. We disconnect all connectors and wires on the front panel, including those from the hatch lock. We remove the front wall to the side.
Now you can begin to remove the water pump from the SMA housing.
First you need to remove the pipes from the volute by squeezing the clamp spring with pliers. First of all, the pipe coming from the tank is removed, and then the drain.
Disconnect power from the pump.
Now you need to unscrew the screws holding the snail with the filter.
We take out the device with the snail from the SMA body.
Press the latch with a screwdriver and rotate the part relative to the snail until it comes off.
Before removing the snail, make marks with a marker to remember the original position of the parts to be separated for subsequent correct assembly.
We connect the new pump to the volute and reassemble it in the reverse order. But immediately, when you install the pump in place and put on all the pipes, check the connections for leaks. To do this, pour some water into the tank. If the connections are tight, you can continue assembly.
Replacing the drain pump
The procedure for replacing a pump in a washing machine begins with dismantling the faulty device. But even before starting work, you must carefully study the documentation that comes with the machine. The fact is that cars from different manufacturers have different designs. You need to understand the location of components and assemblies and only then take up a screwdriver.
For beginning craftsmen, it would be a good idea to take photographs of each stage of work. The result will be a kind of manual with pictures that will help you avoid mistakes during the assembly process. This is not difficult because cameras are built into most modern phones.
Replacing the pump through the bottom
It is enough to simply replace the pump in washing machines that allow replacement through the bottom panel. These are most models from Samsung, Indesit, LG, Ariston and some other manufacturers.
You need to follow a sequence of simple steps:
- turn off the power
- turn off the water
- put the car on its side, with the pump on top,
- remove the bottom panel,
- unscrew or remove the drain pump from its clamps,
- place a container under it to drain the remaining water,
- loosen the clamps holding the supply hoses,
- remove the pump.
Be sure to clean the housing (snail) of accumulated debris and only then install a new device.
Replacement via front cover
Not all models allow replacing the pump using the previous method, for example, devices manufactured by Bosch, Siemens, AEG. Here you will have to proceed in a different way - to get to the engine through the front cover.
First of all, you need to unscrew the two fasteners located on the rear panel, and then remove the housing cover. Next is the crucial moment - the panel with the controls is removed. To do this, you need to remove the dispenser and unscrew two screws. Carefully remove the panel and place it on top of the machine.
After this, you should loosen the clamp holding the cuff and tuck it inside the tank. Remove the remaining fasteners that hold the front panel in place. Remove it by pulling it towards you.
Access to the engine is open. All that remains is to disconnect the power wires, unscrew the pump (in some models, remove it from the latches) and replace it with a new one.
Access to the pump after removing the bottom bar
Perhaps the easiest way to replace the pump was offered by the manufacturers of Hansa washing machines. Access to the pump is extremely easy. There is no need to disassemble the machine; moreover, it does not even need to be moved. Simply remove the bottom strip of the front cover, behind which the pump is located. Further replacement actions will not cause any difficulties.
Through the back or side cover
In most cases, replacing the pump in top-loading washing machines requires removing one side panel. Electrolux and Zanussi models allow you to access the pump by removing the back panel. Similar steps should be taken to repair machines from some less common manufacturers.
You can replace the pump in any washing machine; it is important to prepare, study its structure, and understand the principle of operation. Machines from different manufacturers are different, and there are no universal methods. But in any case, it is important not to forget to turn off the power and remove water from the machine before starting work.
Replacing the pump through the back wall
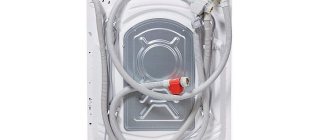
In the SMA models from Zanussi and Electrolux, you can get to the water pump only by removing the back wall.
As usual, before starting, you need to turn off the power to the unit and drain the remaining water. Then unscrew the screws to remove the cover: they are located on the back of the unit. Pull the cover towards you and remove it. There are screws on the back and on both sides of the case that need to be removed. Also free the intake valve casing from the screws.
Now pull the back wall towards you and disconnect it from the body.
Removing the washing machine pump itself and replacing it was described above, and differs little in different models of machines. Perhaps there may be a difference in the attachment to the cochlea (with bolts or latches).
How to find the right pump
The SMA marking can be found in the passport or seen on the unit body. Selecting the right water pump model for it will not be difficult: this can be done through the service center employees. Once you know which pump is suitable for this machine and approximately how much it costs, you can search for it on the Internet to find the optimal price (including delivery).
As you can see, there is nothing difficult about replacing a washing machine pump. It is enough to carefully read the instructions described above, follow all the recommendations step by step - and the repair will not take much time and effort.
