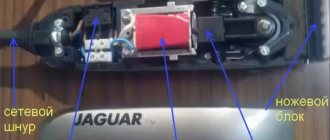
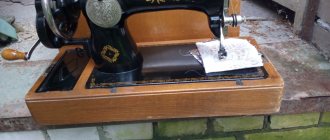
Sewing devices can be divided into modern models and old-style machines. The latter can still be used today, especially if you need to sew a product from thick and rough fabric.
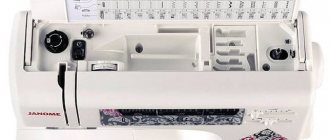
Old-style machines are distinguished by manual controls (photo: nsfabrika.ru)
To work, you need to understand the settings of the device and learn how to thread the thread correctly.
Which bobbin should you choose for your sewing machine?
As the stitch is being formed, the upper thread pulls the bobbin thread out of the bobbin case. Both threads are intertwined inside the pieces being sewn, and a stitch is formed, from which a stitch is formed. An important factor influencing the uniform and smooth pulling of the lower thread is its weight and the material from which the bobbin is cast. By the way, do not confuse the bobbin with the bobbin case, the bobbins are shown in this photo, and the bobbin case is the device where the bobbin is inserted. Naturally, a plastic bobbin will slide much easier inside the bobbin case, ensuring uniform and smooth pulling of the thread, and its weight will be noticeably lower compared to a metal one.
Also, not all bobbins are interchangeable. This photo shows three types of bobbins. The one on the far left is for most household sewing machines. The bobbin in the center is used in an old-style household Japanese sewing machine called Brother. The rightmost bobbin is for industrial sewing machines such as the 1022 class sewing machine. When purchasing a new bobbin, always take a sample with you.
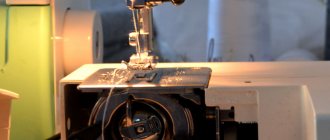
How to thread a shuttle on a sewing machine
Before you start working on a sewing machine, you need to positively thread the upper and lower threads, adjust the thread tension, set the step size and stitch type. One of the significant actions in this algorithm is refueling the shuttle.
You will need
- - sewing machine;
- – bobbin;
- – threads;
- – bobbin case.
Instructions
1. The vertical shuttle is more familiar; it is used in industrial and inexpensive household machines. To thread the shuttle on a sewing machine, you need to wind the thread onto the bobbin. To do this, pass the thread through the winder, thread the thread through the hole in the bobbin, do a few cycles by hand and install the bobbin on the pin. Switch the device to thread winder mode and turn on the sewing machine. 2. Insert the bobbin with the thread wound into the metal bobbin case so that the thread runs clockwise. Pull the thread into the slot of the cap, then pass it under the leaf spring and out into the eye, pull out the end of the thread 10 cm long. 3. If you need to strengthen or loosen the tension of the lower thread, turn the screw on the bobbin case with the support of a screwdriver and check the thread tension. It should not go too freely; pulling the thread too tightly is not allowed; on the contrary, it will tear during sewing. 4. Insert the vertical hook into the shuttle device with the tail facing up so that it fits tightly into the groove. Turn the handwheel so that the top thread catches the thread from the shuttle, pull both threads to the foot of the sewing machine. 5. The horizontal shuttle is more comfortable than the vertical one and differs from it in that the bobbin is inserted directly into the built-in shuttle. Through the transparent window you can always see how much thread is left on the bobbin. The tension of the lower thread in the horizontal shuttle occurs mechanically. 6. All you need to do to thread the shuttle on your sewing machine is open the platform cover and insert the bobbin from the top, then close the cover. Winding the thread onto the bobbin occurs without removing the fabric from under the foot and removing the thread from the needle. During the sewing process, the thread will unwind from the bobbin, which will prevent it from getting tangled and will make the machine run quieter.
Threading a sewing machine is not difficult, you just need to carefully and patiently follow the instructions
You will need
- sewing machine, a little patience
Instructions
1. Different sewing machines are threaded according to approximately the same pattern. In order to feel confident in this process, you need a little training and patience. Also, be careful that your fingers do not get caught under the needle of the sewing machine. First, you need to thread the top thread. To do this, place the thread from the spool on the bobbin holder, and then thread the thread into the bobbin holder. Thread the thread from the bobbin guide into the hole of the thread guide located on the sleeve of the machine. From the thread guide, pass the thread into the thread guide, the one located on the front of the machine. Then pass the thread through the groove behind the front board, this will bring it to the top thread tension regulator. After this, insert the thread between the tension adjuster washers and over the end of the compensation spring, and then thread it through the hook of the thread guide. Then pass the thread through the thread guide and thread it into the eye of the needle. The thread must be threaded into the eye of the machine needle from the side of the long groove. Leave a free end of the thread about 10 cm long and place it under the presser foot. 2. After this, you can start threading the lower thread. This is not a very complicated process. Wind a sufficient amount of thread onto the bobbin. This can be done manually, although some machines have a special adjustment on the side. Place the bobbin in the bobbin case. After this, thread the thread through the slot and insert the bobbin case into the hook. After this, carefully holding the upper thread, turn the handwheel one cycle. The threads must become intertwined. In the process of tensioning the end of the upper thread, it is necessary to bring the lower thread up to the top of the needle plate. Bring the ends of both threads through the presser foot. The refueling operation can be considered completed. Video on the topic
Especially often used sewing machines are double-thread ones. The stitching in them is formed by interlacing the top and bottom threads. In order for the stitching to be good and the machine to work flawlessly, the threads must be tucked into it correctly. The whims of the machine and bad stitching are more often than not the result of errors when refueling. Different types of sewing machines may differ slightly in their special threading technology, but the basic names of parts and the sequence of threading are identical in most models.
You will need
- – threads;
- - instructions for operating the sewing machine with designations of the main parts.
Instructions
1. Prepare car to work. Fasten the friction screw to set the machine's stroke. With the help of the flywheel, move the needle to its highest position. Raise the presser foot with the lift lever. Install the spool pin. 2. Select threads of the desired color and number. Remember that the top a thread should be one size larger than the bottom one. Place the spool of thread on the spool pin. Check if it unwinds freely a thread . It happens that a reel of non-standard shape slows down the free unwinding, and a thread may tear. 3. Swipe a thread from the spool to the thread guide. Carefully thread it between the tension adjuster washers. Make sure the washers click and a thread passed between them. Pass the thread through the thread guide spring and hook to the thread take-up lever. Pass it through the thread take-up hole. Thread the end of the thread into the wire thread guide (if present) and into the thread guide on the needle bar. Paste a thread into the eye of the needle. 4. Check by pulling a thread whether it clings to the machine mechanisms. Occasionally, the thread may be cut by a metal burr on shoddily polished parts. Do not pull on the tucked a thread too powerful. This may cause the needle to break. 5. Tuck the bottom a thread . To do this, pull out the sliding plate and remove the bobbin case. Remove it from the shuttle while holding the latch. Insert a bobbin with thread into the bobbin case. Pass the thread through the slot and the pressure spring on the cap. Check if it unwinds easily a thread from the bobbin. Leave a free end of the thread 10-15 cm long. Place the bobbin case on the shuttle rod until it stops. You should hear a slight click. This will indicate that the cap is locked. When installed correctly, the bobbin case latch should be slightly spring-loaded. 6. Pull out the bottom a thread onto the needle plate. To do this, lightly holding the end of the upper thread, lower the needle into the needle hole. When lifting, the needle should pull the loop of the lower (shuttle) thread behind it. Bring both threads away from you and under your foot. After this, the machine is ready to sew. Video on the topic
Note! A break in the upper thread may be due to improper threading of the machine, a bent needle, or poor thread quality. Helpful advice Check the thread tension regulators before starting work.
If the working thread is incorrectly threaded into the sewing machine, the device may tear, tangle, or pull the thread too tightly, or it may even simply refuse to sew. Follow the instructions that came with your machine model, but if you don't have one, follow the general threading guidelines.
Instructions
1. First, lift the presser foot (from the back of the machine) and use the handwheel to set the needle to the highest position. 2. Place the spool of thread on the rod on top of the machine. Occasionally there are two such rods, and it does not matter which of them you place the reel on. 3. Pull the thread from the spool through the upper thread guide (ring or hook on the top of the machine). This step is necessary in order to further a thread walked at a certain angle. After that, lay a thread through the upper thread tension regulator. The final one traditionally consists of two metal disks adjacent to each other. When laying thread between the discs, go around the regulator a thread yu below. 4. Next to the thread tension regulator there is a thread guide hook (metal or wire), which then needs to be hooked onto the thread. 5. After this enter a thread into the thread take-up hole (a vertically moving lever with an “eye”). 6. Lower a thread and pull or thread it through the two lower thread guides located closer to the needle. 7. Insert the thread into the eye of the needle from the side where the long groove is located on the needle. 8. Holding the top a thread , using the handwheel, pull out the lower a thread up and lay both threads away from you under the presser foot. The ends of both threads must lie straight and be no more than 8 - 10 centimeters. 9. If the process of threading every time causes you difficulties or you forget the sequence of steps, do not remove the one already threaded, but not suitable for you. a thread , and cut it off at the coil. Tie the necessary a thread and pull through all thread guides, adjusters and holes until it reaches the eye of the needle. Only then cut off the unwanted thread and pull the newly installed thread into the eyelet. a thread . Video on the topic
Helpful advice If you have a foot-operated sewing machine, do not keep your foot on the pedal when threading. Accidental pressing will start the machine, which can tangle or break the thread, and also lead to injury (for example, if your hands were near the needle).
For many people, the process of sewing on a sewing machine is a creative pastime, which is a pleasant way to escape from the daily hassles of everyday life. To start sewing, you need to learn not only how to make different seams, but also how to independently operate a sewing machine, including threading the threads you need into it.
Instructions
1. Look at the back of the bed, if the presser foot is down, lift it up and lock the lever in the up position. 2. Before threading the thread into the hook, you must first move the sliding plate, remove the bobbin case from the machine and remove the bobbin from it. Wind the thread of the color you need onto the bobbin using the winder located on the machine. Pass the thread through the hole of the thread guide from top to bottom, and then clockwise between the washers of the thread tension regulator and to the left, passing it stepwise through the holes of the thread guide. Hand wind a few turns of thread onto the bobbin and thread the thread onto the spindle. Lightly press the spindle and the stopper will fit between the walls of the bobbin; after this, set the machine in motion and the thread will begin to mechanically wind onto the bobbin. Once you have successfully wound the thread onto the bobbin, proceed to install the bobbin into the bobbin case. 3. Place a pin with thread wound on it onto the shuttle rod and thread the end of the thread into the slot in the shuttle away from you. Pull the thread under the leaf spring and out. 4. Turn the bobbin case at an angle of 90°, pull out the lock plate, and slide the bobbin case onto the bobbin holder rod. When inserting the bobbin case into place, hold the bobbin in it with your finger or fix the thread - on the contrary, the thread on the bobbin may unwind. 5. Check the tightness of the lock and make sure that the thread does not get under the plate. If the thread gets under the pressure plate, and you don’t notice it right away, you will immediately find it when you start sewing - the thread will feed with difficulty and may break. If you feel that the thread tension has become excessive, pull out the bobbin and tip it over so that the thread falls under the pressure plate.
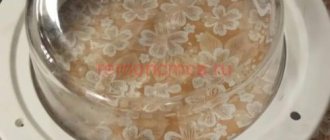
The bobbin is inserted into the bobbin case
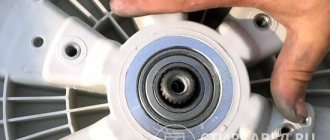
The bobbin case is the most important part of the sewing machine, which should always be in perfect condition. The surface of the bobbin case should be mirror-like, at least clean, without rusty or oxidized areas. The slightest notch on the surface of the bobbin case or a chip in the wall will lead to the appearance of many stitch defects, ranging from looping stitches and skipped stitches to thread breakage.
Please note that bobbin cases do not always have a “tail”. In addition, when purchasing a new cap, keep in mind that this tail may be turned in the other direction.
Adjusting the bobbin thread tension
Regardless of the type of sewing hook, each one has an adjustment screw. The best way to unscrew it is with a small flat screwdriver, which is included in the tool kit of any sewing machine.
It is necessary to adjust the tension of the lower thread as little as possible, since the slots of the screwdriver can “break” the screw slot and nicks will appear, which will cause thread breakage and other defects. You should also not unscrew this screw more than half a turn, since the screw may pop out and get lost.
You can check the correct tension of the lower thread as follows. Insert the bobbin into the bobbin case, pull the thread from the case and pull it as shown in the photo. When twitching, the thread should come out jerkily under the spring of the bobbin case.
Old sewing machines: characteristics, features, models
Old-style devices are easier to operate than modern analogues. They have fewer capabilities and are able to perform a minimum number of sewing operations. Old cars have manual controls. The body of the devices is metal, so they are heavy.
- Singer (has a long shuttle, a massive flywheel, and a manual drive with two gears);
- “Podolsk” (it was popular during the times of the former USSR, equipped with a hand and foot drive, and includes a central bobbin shuttle device);
- “Veritas” (features a shuttle rotating in a circle, capable of sewing buttonholes and performing a zigzag stitch);
- "Seagull" (has a swinging shuttle);
- “Tula” (a Soviet-made device, includes elements of industrial machines, difficult to repair and configure).
Additional Information! Often, instead of the name Singer, you can find Zinger. This is due to the fact that the manufacturer’s first devices were delivered to Russia by a German distributor, who used the letter Z. But the correct name for the machines is Singer
Is the process of threading old sewing machines different from modern ones?
The refueling scheme for an old car is the same as for modern devices. The difference may be in the design of the device. Not all old models are equipped with a tensioner, so the thread is passed through the thread guide and then inserted into the eye of the needle.
What do you need for refueling?
To work you need a sewing machine, a spool of thread and a bobbin. Threads are selected depending on the type and thickness of the fabric being processed. The bobbin is a small spool that feeds the thread from below.
The device's operating instructions will help you charge your car correctly. If it was lost, you can find information with diagrams and photos on the Internet.
General instructions for threading a sewing machine
Before work, you need to select threads of suitable thickness and the corresponding needle number. The choice depends on the texture and density of the material that will be used to sew the product.
The algorithm for refueling old-style cars is not much different from modern ones (photo: ay.by)
How to thread an old sewing machine:
- Rewind the thread from the spool to the bobbin.
- Place the coil on the top pin.
- Thread the top thread.
- Check thread tension.
- Thread and pull out the bottom thread.
- Place the top and bottom threads behind the foot.
Important! Thread is wound onto the bobbin from the same spool that is installed for the upper
Detailed diagram: how to thread an old-style sewing machine
Setting up an ancient sewing device, like a modern one, begins with selecting the appropriate thread and needle. Use a straight needle, without defects, with a number corresponding to the type of fabric and thread. You need to insert it into the needle holder until it stops (the large groove should be turned to the left).
The first stage is threading the upper thread:
- Raise the needle by turning the handwheel.
- Place the coil on top of the rod.
- Pull the thread through the thread guide.
- Pass the thread under the tension regulator and insert it into the spring loop.
- Pull the thread up and insert it into the eye of the thread guide.
- Place it behind the second and third thread guides (instead, there may be a hook on the needle holder; the thread is inserted into it and threaded into the eye of the needle).
- Insert thread into needle.
- Raise the thread take-up lever.
The second stage is threading the lower thread:
- Wind the thread onto the bobbin.
- Insert the bobbin into the hook (the tip of the thread should come out).
- Place the shuttle into the slot on the cavity of the machine platform (you should hear a click).
- Make a full turn of the handle to adjust the thread tension.
- Pull the thread up.
- Place the top and bottom threads under the foot.
Important! The flywheel is turned only in the “toward” direction. Rotating in the opposite direction will tangle and break the thread.
Errors in threading a sewing machine
The thread is not threaded correctly if it forms rings or the stitching begins to loop. The cause of the malfunction lies in the weak tension of the upper or lower thread. To fix the problem, you need to check whether the thread guide is working correctly. If it does not tension the thread enough, correct the mistake.
Errors during refueling will disrupt the operation of the machine and damage the product (photo: liveinternet.ru)
Causes of malfunctions during refueling:
- using threads and needles that are inappropriate for the fabric;
- incorrect needle installation;
- jamming of the spring responsible for tensioning the threads;
- damaged bobbin;
- the thickness of the bottom thread is greater than that of the top;
- The thread is too tight.
Checking the correct threading
After threading the sewing machine, turn the handwheel. The work is done correctly if, when raising and lowering the needle from the hole in the plate, a loop is formed on the upper thread from the lower thread.
Incorrectly threaded thread: possible malfunctions
If you insert the thread incorrectly, it will spoil the stitching and tear. Incorrect threading will make it impossible to sew the product and may damage the mechanisms of the sewing device.
In order for work on an old-style machine to be effective, you must thoroughly study the instructions and set the necessary settings. Threading directly affects the quality of the sewn item. This process is not much different from threading in modern devices, but has some nuances. In the video below, watch how to thread an old Singer sewing machine and how to operate it.
join the discussion
Share with your friends
Without threading, no sewing machine can start working. Thread is the component without which it is impossible to sew identical or different types of fabric: in this case, one would have to resort to other methods and technologies different from sewing.
How to improve bobbin glide inside the case
If you have an old sewing machine or your sewing machine has been sitting in the closet unused for years, the inside (bottom and walls) of the bobbin case will become rusty or oxidized. As a result, the machine will constantly tear the thread, sew with gaps, etc. To correct this defect, you can cut out a spacer from a plastic office folder and place it on the bottom of the bobbin case.
Trace the outline of the bobbin with a simple pencil and cut out the outer outline of the gasket with scissors.
The inner hole of the gasket is cut out with miniature manicure scissors.
By the way, instead of plastic, you can cut the gasket out of tissue paper, tracing paper, etc. To improve the sliding of the bobbin, it is recommended to oil the paper gasket.
The gasket should fit freely, without effort, onto the bottom of the bobbin case.