Diabetes mellitus requires a person to pay increased attention to health. In particular, the patient must keep the level of caxapa in the blood under control. The saturation of the body's cells with energy depends on this. Their starvation can lead to dangerous consequences, including diabetic coma and death.
To measure your sugar levels you no longer need to visit a clinic. There are special devices - glucometers that are suitable for home use. They do not require medical skills and allow you to track your sugar yourself. We will figure out what types of glucometers there are and what to consider when choosing.
Types of glucometers
The classification is based on the operating principle of the device. Devices for measuring blood sugar levels are divided into invasive and non-invasive. The first involves pricking a finger and collecting capillary blood. They are:
- photometric;
- electrochemical;
- coulometric.
Express test strips are considered separately from invasive glucometers. This is not a device, but rather an indicator of sugar content. Although you also need to pierce your finger to use it.
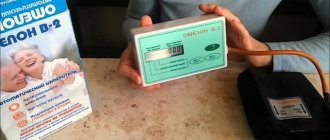
For children and elderly patients, it is more convenient to use non-invasive ones. They do not require blood for analysis, so the measurement is absolutely painless. This category includes sensor devices (or Raman devices), including laser ones. They determine glucose levels based on subjective factors, so their accuracy is somewhat lower.
How to use a glucometer correctly
As a rule, doctors recommend invasive glucometers, which have been on the market for a long time and have proven themselves in terms of price-quality ratio. The devices are very similar, differing only in details.
Let's try to take a closer look at how to use a glucometer.
First, you need to use a lancet to prick your finger shallowly until a drop of blood appears. This blood is then applied to the edge of a test strip that has been previously inserted into the analyzer (side opening) of the glucometer. The microscopic chip on the test strip will help the device calculate a quantitative indicator of blood sugar. Everything is very simple, and most importantly, very convenient. After all, owners of such a device no longer need to go to the clinic for daily blood sugar tests.
In addition, if you constantly receive insulin, then thanks to the glucometer you will easily adjust the required dose of the injection today or tomorrow. It is worth knowing that sugar levels in diabetes are not constant. From time to time, its level changes, and during the day, the concentration of blood glucose can undergo changes several times.
Do not forget that the correctness of the test results depends on the correct use of the device, so carefully read all the steps of this simple procedure, and in the future, it will not cause you any difficulties. We also suggest watching a video on how to use a glucometer.
RULES FOR USING GLUCOMETER No. 1. Before measuring blood sugar levels, you must wash your hands with soap, otherwise you can get an infection in the wound. No. 2. For better blood flow, before pricking your finger you need to do some exercise for your hands, it’s best to just clench and unclench your fingers several times. No. 3. The next step is to put the glucometer into working condition, although most devices produced today turn on automatically after the test strip is inserted into the analyzer window. No. 4. So, take the test strip and insert it into the analyzer hole. As soon as it clicks into place, you will hear a slight click. No. 5. Puncture the ring finger of either hand with the included sterile lancet, and squeeze next to the puncture site until a drop of blood appears, which is then applied to the test strip. No. 6. After applying the blood, the process of measuring sugar levels will begin. The duration of the calculation is 3 – 50 seconds, which depends on the model of the glucometer itself. When the measurement process is completed, the sugar level value will be displayed on the screen. No. 7. Once you know the test results, you need to remove the test strip from the device and discard it. No. 8. For some glucometers, after a certain number of tests performed, it is necessary to calibrate the accuracy of the device; for these purposes, calibration test strips are included, which must be inserted into the analyzer window.
It is worth remembering that measuring blood sugar levels is necessary not only for diabetics, but also for healthy people in order to detect the onset of diabetes on time. Of course, this will not help cure this complex disease, but it will help avoid many of its complications, which are sometimes much more dangerous than diabetes itself.
Photometric glucometers
These devices read the change in color of a test strip onto which the patient's blood is applied. Such strips are coated with a reagent containing glucose oxidase. It gives specific responses to a particular level of glucose concentration, coloring the strip in the appropriate color.
You don't have to compare colors yourself. The scale is already stored in the device's memory. When a test strip is inserted into it, it compares its color with the values on this scale and produces a numerical result.
Such devices are easy to use, but quickly break down. In addition, their optical system is so fragile that there is a high probability of breaking the glucometer during operation. And if the lens becomes cloudy, the results may be distorted.
History of the invention of the glucometer
For diabetic patients, the invention of the glucometer became as significant as the discovery of insulin in 1921-22. and the advent of glucose-lowering drugs in 1955. The ability to quickly measure glucose levels is often a matter of life and death, and thanks to personal glucose meters, which appeared in the late 1980s, this issue is successfully resolved in favor of life!
It all started more than 100 years ago with the discovery of the American chemist Stanley Benedict, who in 1908 was the first to measure glucose levels in urine. A solution containing copper sulfate and tartaric acid (“Benedict’s reagent”), when interacting with urine, changed its blue color to green or brown. The color depended on the glucose concentration. In 1921, the production of tablets began, and a little later - test strips with Benedict's reagent, but by that time doctors came to the conclusion that measuring glucose levels in urine gave too approximate results.
The first quantitative measurement of blood glucose was made by Danish scientists Hans Hagedorn and Johannes Jensen in 1918. This was also a color change reaction, but with different reagents. The Hagedorn-Jensen method became firmly established in medical practice and was used in laboratories until the 1950s.
In the early 1960s, Ernest Adams invented the first blood glucose test strips. The invention was patented by the Ames company and was named Dextrostix (from the English dextrose - glucose). A drop of blood was applied to the measurement area, waited exactly 1 minute, then washed off with a strong stream of water and the change in color of the test strip was assessed by eye. This was a step forward, but the measurement remained highly imprecise and was performed exclusively in clinical settings.
The man who was able to take glucose measurement beyond the laboratory was Ames engineer Anton Hubert (Tom) Clemens. On September 14, 1971, he received a patent for the first portable device that accurately measured the color intensity of Dextrostix strips by reflectometry (i.e., by the strength of reflected light). The device was called the Ames Reflectometer and became the first portable glucose meter. It weighed more than a kilogram, cost about $650, which at that time was equal to a decent monthly salary in the United States, and was sold only to licensed doctors.
So, the glucometer became portable, but it was still not available to ordinary diabetic patients. Engineer Richard Bernstein played a key role in transforming the glucometer from a doctor's tool into a personal medicine cabinet device. At the age of 12, he became diabetic and often suffered from hypoglycemia, since insulin preparations were imperfect at that time.
Since the doctors could not help Richard, he decided to act on his own. He read about the Ames reflectometer in a technical magazine and bought a new device through a doctor he knew. By measuring his glucose 5-8 times a day, Richard was able to adjust his diet and the number of insulin injections. The painstaking work of monitoring his own body allowed Richard to do what doctors thought impossible - achieve normal glucose levels, completely relieve pain in his legs and improve his vision.
In 1979, Richard Bernstein entered medical school at the age of 45 in order to become a doctor of medicine and gain the right to publish his numerous articles and books, including “Dr. Bernstein's Diabetes Solution" (Dr. Bernstein's Diabetes Treatment). All of Bernstein's articles were permeated by the idea of a personal glucometer, which allows you to constantly monitor blood glucose levels and change treatment tactics if necessary. It was these articles in the journal “Diabetes Care” that endocrinologist Michael Miller read.
In 1980, Miller met entrepreneur Ted Doan at a party and shared his ideas with him. He imagined a lightweight, compact and easy-to-use device that would be “in the pocket” of every diabetic. Doan appreciated Miller's idea, and together they formed LifeScan. In 1985, the first portable personal glucose meter, Glucoscan, was released under the LifeScan brand. In 1986, LifeScan was purchased by the giant Johnson & Johnson, and in 1992, the One Touch II blood glucose meter model appeared on the mass market. In 1993, One Touch II was approved by the Endocrinological Research Center of the Russian Academy of Medical Sciences and went on sale in Russia.
The first domestic glucometer Glukofot was developed in the mid-1980s at the Kiev scientific and production association "Orion". However, due to design imperfections and inaccuracies, it was not widely used. The Russian development of 1996, the Satellite glucometer from. Various Satellite models are still produced and successfully sold on the Russian market.
Thematic dictionary.
Electrochemical glucometers
Their action is based on the amperometric method of analysis. The test strips here are also lubricated with a reagent, but when they come into contact with blood, coloring does not occur. During the reaction, electric current is released. Its strength depends on the sugar level.
Electrochemical devices eliminate a number of disadvantages of photometric devices:
- increased strength;
- the accuracy of measurements has been increased (current strength is a specific value, as opposed to color);
- the required amount of blood for analysis has been reduced.
A child, an elderly person or simply a person with a low pain threshold will definitely prefer this type of sugar meter. The depth of the puncture depends on the required volume of blood. If less is required, the procedure is less painful.
Special conditions for testing sugar levels
Despite the technology of test strips, even the most accurate device will not be able to provide an objective result if:
- the blood is contaminated or stale;
- The test requires venous blood or serum;
- hematoctitis levels range from 20 to 55%;
- there is severe swelling;
- Oncology or infectious diseases have been identified.
In other cases, the objectivity and accuracy of blood sugar test results depends on the expiration date of the test strips used.
Coulometric glucometers
This is a type of electrochemical meters. The principle of determining glucose concentration is similar to amperometric. Only in this case, it is not the current strength that is assessed, but the electric charge. The required volume of blood for analysis is minimal compared to all other devices.
Amperometric instruments are more often used in laboratory practice, while coulometric instruments are usually used for home use.
The two subtypes differ in the price of consumables. Patients with type 1 diabetes need to measure their glucose more often. Therefore, it is more profitable for them to acquire an amperometric device with cheaper test strips. Coulometric tests are recommended for the control of type 2 diabetes.
What does the glucometer show?
Foods rich in carbohydrates are broken down into individual molecules in the gastrointestinal tract, releasing glucose. The mechanism for converting this substance under the influence of insulin into glycogen (the main supplier of energy for cells) was described in detail above. With insufficient production of the hormone, glucose is absorbed worse, so the percentage of its content in the blood remains high for a long time.
Glucometer readings
By examining a drop of biofluid, the glucometer determines the concentration of this substance. The final value (in mmol/l) appears on the display.
Normal blood sugar limits
To regularly obtain fresh data and track the dynamics of changes in sugar concentration, it is important to know the normal values. According to WHO:
- In a healthy person they should be in the range of 3.5–5.5 mmol/l.
- In a patient with prediabetes, the amount of the substance will be increased, and the device will display 5.6–6.1 mmol/l.
But to be sure of the reliability of the indicators, you need to study the rules for using the device.
You should always record readings without relying on memory
Rules for using a glucometer
Anyone can use this device at home. The main thing is to have consumables (test strips) in stock if the measurement is carried out using an invasive method. It is important to monitor their expiration date: damaged products will not provide the required accuracy.
Using a glucometer comes down to a few simple steps:
- thorough hand washing;
- disinfection of the puncture site;
- pricking the fingertip with a lancet;
- applying blood to the test strip;
- inserting the strip into the device.
The sequence of the last two steps depends on the type of device. The photometric strip is inserted with blood already applied. It is placed clean in the electrochemical one.
There is no need to insert express strips anywhere. Just wait for the color to change. With non-invasive it is even easier. It is only necessary to ensure contact with the skin (the area depends on the type of device).
Rating of glucometers
To analyze patient reviews of models, information about the characteristics is collected:
- measurement accuracy;
- price;
- ease of use;
- reliability, strength of the case;
- availability and cost of consumables;
- bag or carrying case;
- functionality.
Diacont
The Diakont glucometer is distinguished by its design and ease of use. Cheap components. The model is suitable for use by older people. Large display. The test strip indicates the required amount of blood for testing. Processing time 6 seconds. The kit includes 10 test strips, 10 lancets, a case and a handle for convenient puncture.
One Touch Select Plus
The simplest Russified model of the One Touch Select Plus glucometer. A small drop of blood is required. Processing 5 seconds. Functions: statistics, measurements before and after meals, connections to a PC. Good for travelers and athletes. Battery for 1500 measurements. Bright display and clear numbers. Auto power off. The kit includes 25 test strips, lancets, and a carrying bag.
Disadvantage: expensive consumables.
Review of the Van Touch Select Plus glucometer:
Satellite Express
Electrochemical glucometer Satellite Express is economical in price.
The device is easy to use. Large screen, clear large numbers. Affordable cost of consumables. The shelf life of the reagents on the test strip is up to 1.5 years. Result output – 7 seconds. Includes a convenient case, 25 needles, 25 test strips, and a pen. Remembers 60 measurements.
The disadvantages include the accuracy of measurements; the indicators differ from laboratory ones by 1-3 units. Encoding makes it difficult to use.
Accu-Check Active
The most convenient model to use is the Accu Chek Active glucometer. The model is preferred by more than 20 million users around the world. Photometric glucometer without coding. Result in 5 seconds. Little blood required. Memory for 500 measurements. Average indicators for 1-2 weeks, 1-2 months. Connect to PC via USB. Battery life for 1000 measurements. Automatically turns on when a test strip is applied. Automatic shutdown. Lightweight and compact device.
Bayer Contour TS
The most accurate glucometer Contour Tc.
Compact model. Convenient to use. Adjustable skin puncture depth. Remembers 250 measurements. Statistics for 14 days. Display the result in 8 seconds. Small amount of blood. The sorbent contained in the package with test strips extends the service life for an unlimited time. Includes battery, 10 lancets, puncture device. No coding required.
The disadvantage is the high cost of components. Lack of food marking function. If the test strip is not inserted centered, the result will be distorted.
Attention! Before purchasing a glucometer, you should definitely consult with your doctor. He will help you choose the appropriate calibration device based on the needs and requirements of a particular patient.
Is it possible to take blood from something other than a finger?
Traditionally, blood for testing is taken from a finger or from a vein. In the case of assessing sugar levels, venous is not very preferable. It contains more glucose than capillary, and there is a high risk of incorrect interpretation of the analysis. Therefore, blood for sugar is taken from a finger.
But there are many nerve endings in the fingertip. For many people, piercing is too painful. Therefore, there are high-quality glucometers that include the ability to analyze blood from:
- shoulder;
- forearms;
- shins;
- hips.
It's not that painful to pierce them. However, blood circulation in these parts of the body is slower than in the fingers. Therefore, changes in glucose levels do not always appear in a timely manner according to analyzes from alternative sites.
Rules for using a glucometer
There are many options for express analyzers for blood sugar testing with different operating principles. However, there are general rules that must still be adhered to.
Setting up the device before first use
After purchasing a meter, it is advisable to examine it directly at the pharmacy, so that in case of difficulty, the consultant will explain how to properly set up the glucometer and subsequently use the device.
At home, before taking the first measurement, you need to adjust the basic parameters:
- select menu language;
- set the correct time and date;
- set the unit of measurement;
- adjust the range of values (set individually).
At the same time, you will need to calibrate the meter - insert the plate into the device, apply a special liquid to it, and check the resulting combination with the code indicated on the tube.
When is the best time to measure sugar?
It is necessary to take measurements several times a day, and the frequency should be determined by the severity of endocrine pathology, individual characteristics of therapy, the presence of concomitant diseases and complications.
Sugar measurement
However, it is recommended to follow the instructions on how to use the glucometer and adhere to generally accepted intervals.
- On an empty stomach. At this time of day, the test is mandatory for every patient, since there is a risk of developing nocturnal hypoglycemia.
- Lunch, approximately 14-15 hours. The analysis is done before meals and two hours after finishing the meal.
- Dinner, approximately 20-21 hours. To obtain reliable values, you should eat no later than 18.00.
- Night, approximately 2–4 o'clock. This measurement should be performed if there is a possibility of nocturnal hypoglycemia.
Measurement frequency
Often, patients with diabetes neglect the rules and take measurements somewhat less often than required, explaining this by saving on test strips. However, this approach is fundamentally wrong, since the lack of proper control carries the risk of developing severe complications, including coma and even death. The measurement must be carried out:
- In the case of type 1 diabetes - 3-4 times within 24 hours;
- For type 2 pathology - twice a day, in the middle of the day and in the evening;
- In case of unstable indicators and a large spread of values - up to 8 measurements. The number of tests should be reduced after the condition has stabilized.
Blood collection for analysis
Why the glucometer may show incorrect data
When purchasing a meter, it is important to understand that it is intended for home use and produces values that cannot be compared with studies conducted in a laboratory. Since the meter is used in a normal environment and not in a sterile environment, such inaccuracies may be due to the following reasons:
- Incorrect handling of test plates.
The indicators will be inaccurate if the plates have expired or were stored in violation of the rules (high humidity, bright lighting). In addition, individual test strips are provided for devices of different brands.
- Blood.
The correctness of the results produced by the meter is influenced by blood parameters (pH balance, hematocrit, iron level), as well as its quantity. If you have problems with blood circulation, before starting you need to warm up your hands and ensure the flow to your fingers by hanging them down. An excess or, conversely, a lack of biofluid can affect the progress of the test.
Blood for research is traditionally taken from a finger, but if necessary, a sample can be obtained from other parts of the body: the palmar surface, the area of the forearm and shoulder, and the calf area.
- Device.
Often, unreliable readings are affected by improper operation and maintenance of the device. Some models require coding before each procedure, otherwise the result will be questionable. Once every 6–7 days, it is necessary to carry out a control check of the readings using a test plate and solution, as indicated in the instructions for use.
- Medical errors.
These are usually patient conditions that could affect the test result. These include: taking medications, changing the chemical composition of the blood and hematocrit.
To obtain reliable results, it is necessary to strictly follow the recommendations for blood collection.
To more clearly perform the procedure using a glucometer in accordance with the instructions, you need to watch the video.
Device coding
This is a procedure on which the accuracy of the results depends. It allows you to bring the device itself and the test strips that come with it into maximum compliance. Older models required manual coding. It was replaced by electronic chips.
The most advanced devices do not require coding. It occurs automatically when the test strip enters the housing. The glucometer reads the code and configures itself.
No Coding technology was developed because it became apparent that most patients were not completing the necessary adjustments. The coding procedure cannot be ignored, as this reduces the accuracy of measurements. As a result, it is not possible to accurately determine the dose of insulin that needs to be administered to the patient.
How to choose the right glucometer
You can see many models on the market. Equally high-quality devices differ in the degree of convenience for a particular user. You can understand which glucometer is best to buy for your home by answering a few questions:
- Which type of device is most convenient for you?
- Does the required blood volume matter? For the elderly, children and especially sensitive people, the depth of the puncture is important.
- Is measurement time important? Faster ones cost more, but not everyone needs them.
- What test strips are available in pharmacies near you?
- Is additional plasma calibration required? In simpler devices it is carried out through capillary blood.
- How much memory is needed? This determines how many last measurements can be recorded.
It is important to decide whether additional features are needed. Modern sugar meters can have a lot of them. But their presence is not necessary.
Additional functions of the meter
Typically, the device only measures the blood glucose concentration using a preset method. The kit includes the device itself, a set of test strips for the first time and a lancet for piercing the skin.
More expensive models come with statistical options, including separating measurements taken before and after meals. This is convenient for those who forget to fill out self-monitoring diaries.
A glucometer for an elderly or visually impaired person may have a voice assistant or a backlit display. The additional expense in this case is justified. You can also invest in an option with an auto-lancer, because not everyone has the fortitude to do it manually.
Options such as the ability to communicate with a computer or smartphone, the presence of extra control buttons and a timer are unimportant. Some sugar meters also analyze cholesterol levels.
Operating principles of glucometers
A glucometer is a device for determining blood glucose levels.
Today, glucometers designed for home use are widespread. These are compact devices that help maintain good compensation for people with diabetes. There are hundreds of different glucometers produced by different companies on the pharmaceutical market. All of these glucose meters are similar to each other in that:
- They are compact, small in size and weight. These glucometers are convenient to use for measuring sugar levels not only at home, but also on the street, at school, at work;
- In a short time (from 5 to 20-30 seconds), the glucometer takes a measurement and displays the measurement result;
- Most glucometers require test strips for analysis, which are consumables;
- Almost all glucometers have built-in memory and allow you to view past measurement results. The exact time and date of measurement is often indicated;
- Many glucometers offer the ability to transfer stored data to a computer or smartphone. This helps to more clearly see the level of compensation, evaluate the therapy being performed and eliminate errors.
But there are some points that distinguish glucometers from each other. For example, one of the main points that distinguishes glucometers is the operating principle or measurement principle.
There are two main principles of operation of invasive glucose meters. An invasive glucose meter is a device that requires a drop of blood to perform the test. The non-invasive glucometer takes measurements without punctures.
Almost 99% of glucose meters used are invasive. Since they differ in more accurate measurements. There are no accurate and commercial non-invasive glucometers on the market yet, although recently the development of non-invasive glucometers has been announced, but it has not yet come to the point of launching sales on the market, because glucometers have not been clinically tested, or their cost is very high, and the quality and measurement principle are not entirely non-invasive.
So, invasive glucometers work on two principles:
- Photometric or photoelectric principle.
- Electrochemical principle.
Rating of the best devices
A high-quality glucometer can only be purchased at a pharmacy or medical equipment store that has the appropriate license. There are numerous manufacturers on the market that receive positive reviews. Their ranking is as follows:
| Manufacturer | Popular models |
| Accu-Chek (Germany) |
|
| OneTouch (Switzerland) |
|
| Bayer (Germany) |
|
| Diamedical (Taiwan) |
|
| Bioptik (Taiwan) |
|
| 77 Elektronika Kft (Hungary) |
|
| iHealth (USA) |
|
| CareSens (South Korea) |
|
| Satellite (Russia) |
|
| AgaMatrix (Germany) |
|
Tokareva Lyudmila Georgievna, therapist, medical offices 36.6
THERE ARE CONTRAINDICATIONS, BEFORE USE YOU MUST CONSULT WITH A SPECIALIST
