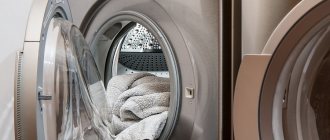
You can entrust the replacement of the hatch cuff in your washing machine either to professionals in this field or completely independently. This part of the washing machine has a sealing function, sealing the loading hatch with the body, preventing unwanted water leakage.
This part fails due to temporary wear, lack of proper maintenance of the product, its incorrect installation and careless handling. To replace the hatch cuff in a washing machine with your own hands, you will need a few tools and a new cuff. The main thing is to be patient, because repairs can take a lot of time.
What causes damage to the cuffs (hatch seals)
The causes of cuff damage can be different:
- Natural temporary wear and tear during operation of the washing machine. This is the rarest reason for replacing the cuff; this part is made of high-quality rubber, taking into account all possible impacts on it in the future during operation.
- Due to poor-quality water and detergents used, lack of prevention to remove scale and other deposits in the washing machine. Hard water and powders that do not meet the requirements negatively affect the elasticity of the cuff; it becomes hard. During operation of the washing machine, water leaks are often observed along the outer part of the body due to poor sealing of the hatch with the cuff. It’s even worse when, due to the loss of elasticity of the polymer, cracks begin to appear, damaging the rubber. For the same reason, other rubber parts of machines - oil seals, hoses and gaskets - fail prematurely.
- To prevent scale and other deposits, special products will be required.
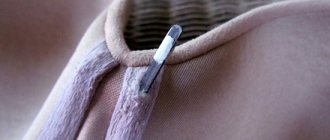
- When loading laundry incorrectly and inattentively. When loading laundry, the user is often guided only by the maximum permissible weight of things, but not by their total volume. When washing, a large volume of laundry rubs against the rubber, and if there are metal objects on it, it can tear it. Frequent failure of the cuff is associated with the presence of foreign objects (chewing gum, keys, coins, etc.) in the pockets of loaded laundry. It is not uncommon for a part of an object to become undesirably clamped between the hatch and the cuff; at the very first rotation of the drum, the rubber breaks and the seal with the hatch is lost.
- If the washing machine is installed incorrectly, namely the exact level.
Tilt of the machine when installing it forward or backward will result in either rubbing or stretching of the cuff. Very often, it is for this reason that this breakdown occurs in narrow washing machines, where there is less space for the free movement of parts moving during operation.
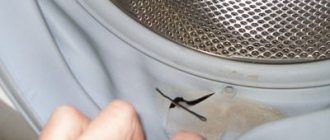
After discovering damage to the rubber, many users wonder how to seal the cuff of the washing machine hatch and what glue to use for this.
At the same time, repairing the cuff is practically impossible, since it is difficult to glue due to the properties of rubber.
As a rule, after damage to the hatch cuff, only installing a new part will help. But if the owner of the machine set himself the task of doing without replacing the part, removed it, found something to seal the damaged rubber part of the cuff with, then it turns out that he repaired it practically without cost.
How do you know when a replacement is needed?
During intensive use, the rubber cuff may be subject to physical wear, damage, or break due to stress. In such a situation, you need to replace the rubber band yourself. Due to damage to the rubber seal, water leakage may occur, which is why it is important to monitor the condition of the cuff and take action if damage is detected.
The reasons for replacing the cuff are the following factors:
- physical wear and tear during operation. Rubber is exposed to temperature changes, exposure to hot and cold water, and chemicals. Vibrations and friction of the drum, the intensity of washing have a significant impact on the wear of the cuff;
- friction. The rotation of the drum with things has a mechanical effect, especially when setting high spin speeds;
- damage from small sharp objects and clothing items. Locks, zippers, and decorative details often damage the cuff, after which leaks occur.
Removing the hatch cuff
How to remove a rubber band from a washing machine tub depends on the individuality of the washing machine and the way you load laundry into it.
But in general it consists of several stages:
- Removal from the washing machine body.
- Removal from tank.
But these stages in each model may differ in the course of the entire process due to technical design, and therefore, in order to replace the hatch cuff of a washing machine of a certain model, an individual approach will be required.
Many manufacturers of washing machines have included in their design a removable front part of the housing, which makes it easier to replace the cuff if it fails.
But most washing machines do not have such privileges, and replacing the cuff of the washing machine hatch with your own hands in such models is much more difficult, up to and including removing the tank from the outside.
Pull the cuff
The most important stage of work begins - installing the hatch rubber. Unpack the cuff and clamps. We figure out which clamp is external and which is internal and put them aside for a while. Next we do the following.
- We rub the cuff seat with a bar of soap, paying special attention to the edges of the hatch.
- Lubricate the cuff groove with soap.
Do not stain the entire rubber of the hatch with soap. The soap eraser will slip in your hands, and it will be impossible to “plant” the slippery part.
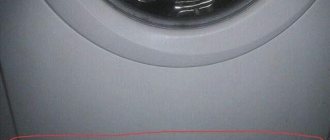
- We find a rubber protrusion in the form of an arrow on the cuff; it must be aligned with the mark on the hatch of the washing machine.
- Now the most labor-intensive stage of work - starting from the upper edge of the hatch, we pull the cuff over the edges in a circle. This will require considerable effort, so don’t be afraid to stretch the cuff to the limit, but still don’t overdo it.
- We examine the cuff. You need to make sure that the rubber part fits snugly into the seat everywhere. If necessary, the elastic band should be adjusted.
- We put on the inner plastic clamp. This part is very easy to put on; you just need to insert the free edge into the latch and tighten it.
- We tuck the outer edges of the cuff onto the edge of the hatch and tighten them with an external clamp in the same way.
The installation is complete. Now we check how the hatch closes. If the hatch does not close, it means that the cuff is installed incorrectly; you will have to reinstall the part or at least remove the outer clamp and correct it. If the hatch closes, then we are trying to start the wash, but you need to watch carefully so that water does not flow out or drip from the hatch. The new cuff should ensure absolute tightness of the hatch.
Interesting:
- How to change a bearing on a Samsung washing machine
- What can be done from an old washing machine
- Which Bosch washing machine is better to buy?
- How to change the belt on a Vestel washing machine?
- How to put a clamp on the elastic band of a washing machine
- How to replace the cuff on an Indesit washing machine
Reader comments
- Share your opinion - leave a comment
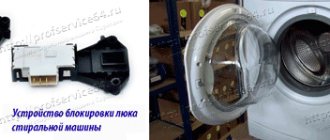
How to dismantle the first clamp
Before removing the rubber band from the body of the machine, pay attention to how it is secured there, namely with what kind of clamp, usually a metal wire, the ends of which are connected with a spring.
But there can also be a plastic clamp in the form of a ring with latches.
In the plastic clamp, release the latch and separate the ends of the fasteners. In a metal one, you need to put the spring on with a minus screwdriver and pull the clamp towards you gradually along the entire circumference until completely removed. The leading edge of the cuff is then removed from the front of the machine body.
How to remove and change?
In order to replace the sealing collar on the hatch, you will have to partially disassemble the washing machine. To do this you will need tools.
All removed parts should be set aside so that the car can be easily assembled later.
Step-by-step procedure for removing the cuff:
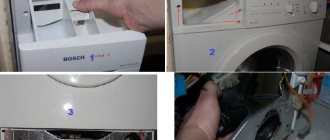
- From the back wall of the washing machine, in its upper part, unscrew the screws that hold the top panel.
- Standing behind the washing machine, pull the top cover towards you and remove it.
- Go to the front side of the car.
In the upper part, near the powder receptacle, unscrew the screws that hold the panel with indicators and buttons.- Inspect the end faces at the top. In some models, the mounting of this horizontal panel may differ in the number and location of screws.
- Move this panel towards you. This must be done very carefully so as not to break the contacts or break the wires coming from the control module, which is located directly behind the panel.
- It is advisable to disconnect the contacts (terminals) so that you can safely remove the control unit and put it away. If the wiring allows, the panel can be placed on top of the machine without disconnecting.
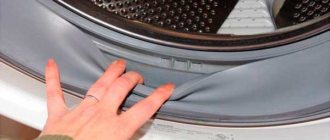
- In order to release the outer part of the cuff, you need to find a wire fastening under the elastic band that goes along the entire circumference and secures the rubber. At the bottom there is a spring insert.
- Use a screwdriver to pry up the wire and remove it, releasing it from under the rubber.
- Separate the free edge of the cuff from the outer part of the machine body along the entire perimeter and bend it inside the drum so that it does not interfere.
- Unscrew all the screws that hold the front side of the washing machine. Depending on the model, there may be a different number of them.
- Remove the front panel.
- Unscrew the clamp holding the cuff.
- Remove the cuff completely.
- Clean all joints and areas that were under the rubber. To do this, you can use detergent and a brush or sponge.
If you have any doubts about which cuff you need to buy, you can go to the store with the old one you removed. This will allow you not to make a mistake with your choice.
Procedure for installing a new cuff:
Put on the new cuff together with the clamp and carefully tuck it in.- Check that the fastening inner ring that holds the cuff is tucked into the recess on all sides.
- Tighten the fixing screw until it stops.
- Install the external façade panel. Secure with screws.
- Install the outer part of the elastic, bringing it to the front panel.
- Install the outer wire clamp.
- Continue the assembly process, checking how the disassembly was carried out.
To facilitate assembly, you can take photographs during the disassembly of the machine. It is better to put all the removed screws and clamps in order, so as not to confuse anything later.
After completing work on replacing the seal, it is necessary to carry out a test wash , monitoring the condition of the cuff.
A video to help you learn in detail about the process of replacing the sunroof cuff:
Removing the second inner (second) clamp
Having removed the first clamp, we move on to the second. The next stage will take a different amount of time depending on the design of your machine, the presence or absence of a removable front wall of the body, the need to gradually remove other parts and the possible removal of the entire tank from the body of the machine.
The second clamp on the machine body can be a wire clamp with a spring, a wire clamp with a clamping screw or a self-tapping screw; spring clamps are also often found. Having good access to the clamps, their dismantling does not take much time and labor. Then you need to remove the rubber band from the washing machine drum. Pay attention to the marks on it and the tank; if there are no marks, make your own with a marker, then replace the rubber band on the washing machine with a new one.
Installing a new cuff
Before replacing the rubber band in the washing machine with a new one, you need to inspect and thoroughly clean the seating areas on the body and tank.
When installing the cuff, the place where it is installed on the tank can be lubricated with liquid soap to make the task easier.
We begin installing the seal from the place of the mark, subsequently holding it to prevent spontaneous removal. After this, we check whether the cuff is correctly fixed; there should be an equal gap around the entire circumference between it and the drum.
Installing the front (front) outer clamp
If replacing the cuff was accompanied by removing the front part of the body, then put it in place. Then we install the outer clamp in place. The plastic one should be in an open state, closing its ends directly into the installation groove.
The wire should be in an assembled state, starting from the junction of the spring with the bent edge of the wire, gradually seating it in the groove.
After installing the cuff of the washing machine with your own hands, you need to check the tightness of the connections. To do this, close the hatch and turn on the washing mode for wool, delicate fabrics or rinsing. After a few minutes of work, drain the water and tilt the machine back towards the wall. There should not be a drop of water under the car.
We also use additional lighting to inspect the internal parts of the washing machine for leaks. If there are no leaks, then you managed to change the rubber band in the washing machine yourself, without the help of a specialist.
Here is the approximate time required to replace the cuff:
| Sequence of stages | Approximate time spent |
| Removing the front clamp (and removing the rubber from the body) | 1-5 minutes |
| Removing the inner clamp (and cuff from the tank) | 5-15 minutes (without removing the front part of the case and with removal, respectively) |
| Installation of a new part (with preparation of the seat) | 3-5 minutes |
| Installation of the internal clamp | 5—15 minutes (without mounting the front wall of the case and mounting, respectively) |
| Installation of the front clamp (with preliminary installation of rubber on the body) | 1-5 minutes |
Prevention measures
In order to avoid problems associated with the hatch cuff, you should take into account the following expert advice:
- When putting things into the drum, you need to make sure that sharp objects that can damage the washing machine, including the sealing rubber, do not get into it.
- Do not allow water to stagnate in the sealing collar recess or have foreign objects in it.
- When caring for the washing machine, in the process of cleaning the rubber rim, do not use objects with an abrasive surface, as well as scratch, scrape the cuff, or make any effort when cleaning it.
- When putting things into the drum of a washing machine, there is no need to tamp them down, overload them by weight, or forcefully push in oversized items.
- After placing things in the drum, the door should close without effort. Things should not hang down, lie on rubber, fall into the lock groove, etc.
- Rubber parts should be protected from pets that may chew on them.