Nowadays, almost every family has a washing machine. But in this world there is nothing eternal. Washing machines also become unusable and require replacement. But in some families there are self-made men. They will not take such an interesting thing as a washing machine to a landfill on the day it breaks down, but will disassemble it into parts and leave the most interesting parts in their husband’s household. And there are a lot of interesting things in the car. The most important thing is the electric motor. This is what is worth talking about in more detail. How to connect the washing machine motor to the network - we’ll talk about this in this article.
Exterior view of the washing machine PHOTO: 1stiralnaya.ru
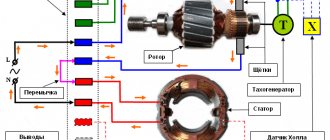
Electrical circuit of the washing machine
Every ordinary user is not required to have a good understanding of the electrical circuit of a washing machine. This is necessary for those who repair this representative of complex household appliances. But a general idea of its structure will not hurt anyone.
Main components of a washing machine PHOTO: 1stiralnaya.ru
Any washing machine consists of a mechanical and electrical part. The mechanics include the body, door, drum, all bearings and gears. To cushion the machine from shaking during spinning, springs are installed. Water is supplied to and drained from the machine through hoses that are fixed in pipes with seals. The drainage system has a drain pump installed at the outlet. A three-section tray is built into the machine to load detergents.
The electrical part includes an electric motor, an electrical circuit for its inclusion, a drain pump motor, a set of devices that form the algorithm and safety of the washing process.
The electrical circuit of a washing machine is primarily designed to turn on the motor.
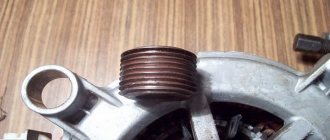
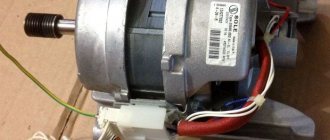
The electric motor and the drum are parts that easily pass into another life. Especially the motor. There are models equipped with two electric motors: one is the main one for washing, with a rotation speed of about 2000 rpm, and the second is a high-speed one for the spin centrifuge, with a rotation speed of about 3000 rpm.
The control system implements the washing program chosen by the owner. In old cars they are based on a time relay, in modern cars they are electronic systems. The program allocates a certain time for each operation and generates a command to turn on the engine in one direction or another. Some models have a third electric motor that drives the cam programmer.
The control circuit monitors the temperature of the motor windings to protect it from overload. Level and pressure sensors provide information to control the water supply. Heating of the washing liquid also occurs in the machine itself. A temperature controller (thermostat), working in conjunction with a temperature sensor, turns electric heaters on and off. If the engine in a machine has a variable speed, then the control system contains a speed sensor (tachogenerator).
The owner sets his wishes to the machine from the control panel located in the upper front part of the machine body.
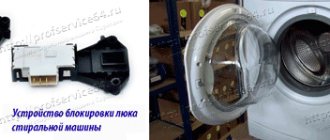
For user safety, all machines have a locking system. It does not allow you to turn on the motor when the loading door is open and open the door if there is water in the machine. A check valve on the water supply pipe protects against flooding.
The washing machine is connected to the electrical network using a three-pole grounding plug.
What you need to consider when connecting motors from different types of washing machines
The washing machine is connected to the electrical network in accordance with “PUE 7. Electrical Installation Rules”.
Connection diagram of the washing machine to the electrical network PHOTO: 1stiralnaya.ru
Even a superficial acquaintance with the structure of the machine and its electrical circuit ensures its more conscious operation and the ability to minimize the number of emergency situations. A schematic electrical diagram is a graphical representation of the main electrical components of a machine and the connections between them.
There are three types of electric motors in washing machines.
Asynchronous
Most washing machines from previous years use three-phase asynchronous motors, each of which consists of a stationary stator and a rotating rotor. The alternating current initiates a rotating magnetic field in the stator winding sections, which induces a current in the rotor. This secondary induced current interacts with the magnetic field of the stator, and a rotating force begins to act on the rotor, due to which it begins to rotate and transmit its rotation to the devices connected to it.
Engines of this type are simple in design, unpretentious in maintenance, and reliable in operation. The main disadvantages are large starting currents and difficulties in regulating the rotation speed.
Reversible connection diagram for an asynchronous motor with a starting winding PHOTO: elektt.blogspot.com
Collector
In commutator motors, the windings are located on both the stator and the rotor. Current is supplied to the rotor through a device called a “collector,” which consists of lamellas attached to the rotor shaft and two “brushes” that are stationary relative to the stator.
Connection diagram for a commutator motor PHOTO: elektt.blogspot.com A commutator motor operates on both alternating and direct current. Here it is easy to regulate the speed by changing the supply voltage. As an industrial device, you can use a dimmer from the lighting system that is suitable in terms of power.
Inverter
An inverter motor in a washing machine is the most modern solution. The principle of operation is that in the built-in inverter, the alternating current of the electrical network is converted into direct current, and then again into alternating current of the desired frequency, which determines the speed of rotation of the shaft. It, unlike the commutator type, has no brushes and makes less noise. No brushes - no wearing parts, so nothing needs to be replaced regularly. But you have to pay for an inverter; such a machine is more expensive.
Differences between electric motors
The differences between electric motors by type are given in their descriptions. The asynchronous motor is the simplest in design. The collector has the ability to easily adjust the rotation speed. And the inverter motor is directly connected to the drum shaft without belts and gears. In short, more modern engines make less noise and are subject to speed control, but are more expensive.
Capacitor for electric motor
For small motors (<1 kW), the value of the starting capacitor can be determined from the relationship:
C [uF] = (1800 x Pn) / U2
where Pn [W] is the rated power of the motor, U [V] is the supply voltage.
This formula is also suitable for calculating the starting capacitor value for single-phase start-phase motors.
For larger motors (>1kW) a capacitance of around 70uF/1kW is suggested. It is necessary to use starting capacitors with operating voltages of 400..630 V AC.
You can omit the calculations and simply connect a standard motor from the washing machine to 1 phase 220 V through a 7 microfarad capacitor connected between the required terminals. Connect the first power wire to the middle, and the second, depending on the direction of rotation, to one of the capacitor wires. The power drop will be 30% - this is in theory.
The issue of choosing a capacitor is easily resolved. Here are examples of capacitance values for different engine powers.
Pn [W] 90 120 180 250 370 550 750 1100 S [µF] 4 5 6 8 12 16 20 30
Useful: Connection diagram for an induction cooker to 220V or 380V networks
The rotation power in the washing machine is the same in both directions. These are motors with a typical connection for a single-phase motor. The main winding is connected directly to 220 V and a phase winding is connected in parallel with it along with a series-connected capacitor. If you reverse the phase winding wires, the motor will rotate in the other direction, but the power will be slightly less. This circuit works during the spin cycle. The same for slow and fast rotations - the capacitance switches inside the washer from 7 µF to 16 µF. Read more about the capacitor here
Connecting the motor of a modern automatic washing machine to a 220 V network
Washing machine motor connection diagram
New automatic washing machines have a commutator-type main motor. This means that it has a two-coil winding on the stator and an excitation winding on the rotor. The rotor and stator are connected in series. The current enters the field winding through the brushes. The electrical diagram for connecting the engine to the network is the same as on No. 5.
Speed controller
The speed controller can be used with any standard power of 2.5–3.0 kW. You can also use a lighting dimmer, but you must first replace the triac with a BT138X-600 or BTA20-600BW or another model with ten times the motor current consumption.
To avoid a drop in speed under load, special devices are used on the TDA1085 integrated circuit to control the current and voltage on the motor.
Engine speed controller PHOTO: electrik.info
If the engine speed needs to be reduced significantly, then it should be connected to the load through a belt drive or gearbox.
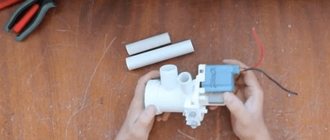
How to connect the motor from a washing machine
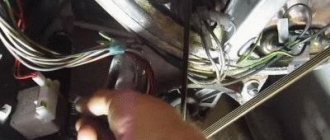
When connecting a motor removed from the washing machine, it is necessary to remove excess wires. When working, you should be guided by Figures 7 and 8, carefully monitoring the color of the wires.
Wires on the motor output terminal block required for connection PHOTO: sdelaysam-svoimirukami.ru
Connecting the motor to the network, taking into account the color of the wires PHOTO: sdelaysam-svoimirukami.ru
Connection diagram
Connecting a car's electric motor correctly is not so easy.
Need a wiring diagram for the motor from the washing machine. However, if you understand how this is done, it will not cause difficulties. First we need to find 2 pin pairs. To understand where they are, we can use a multimeter. Let's select one of the winding terminals and connect the tester probe. With the rest of the multimeter probe, we examine other terminals to find the paired one.
This way we will find the first pair. These 2 conclusions that have been preserved form another pair. Now we need to understand where the starting and working windings are. To do this, you need to measure the resistance. The starting part has more resistance.
So, we have already found a working winding. Now we can connect the motor using the drawing.
The diagram shows:
- ON - starting electrical winding. It is necessary in order to generate the initial torque in any direction.
- OB - excitation winding. It is also called the working winding. It is necessary for the formation of a spinning magnetic field.
- SB - switch (key) for short-term introduction of software to a 220-volt power supply.
If there is a need to change the direction in which the motor will rotate, you will need to swap the software pins. With such a change, the direction of rotation will be reversed.
If you begin to make a trial connection and start the engine, do not forget to take care of your own safety and the safety of those around you, secure the electric motor. This will prevent strong vibrations and unnecessary movements.
Connecting the motor of an old washing machine
Old washing machines have asynchronous motors with two windings - starting and working. The starting winding has a higher ohmic resistance. If output wires from both windings are found, and both windings are intact, then the motor can be connected
Connection diagram for the motor from the washing machine
There are two options for connecting the motor - with a capacitor designed for a voltage of 450-600 V, with a capacity of 4 to 8 µF and with a short-term power-on button.
Engine connection diagram of an old car PHOTO: zen.yandex.ru
Connection diagram for an old car motor with a short-term contact PHOTO: zen.yandex.ru
How to connect the motor
To connect the motor, the first step is to identify the pairs of wires from both windings. After this, decide on the connection diagram - with a capacitor or with a button. Assemble the circuit and perform a trial run. If the engine does not spin in the direction the owner wants, then the connection points for the starting winding should be swapped.
Connection to washing machine
How to connect the motor to the washing machine? Features that must be taken into account in order to connect the electric motor from the washing machine to a 220 V network:
- the connection model shows that the motor operates without a starting winding;
- There is also no starting capacitor in the connection diagram - it is not required for starting. But the wires to the network must be connected strictly in accordance with the diagram.
Each of these motors is designed for 2 mains voltages. There are 2 connection diagrams for it.
You can connect the electric motor from the washing machine:
By switching the windings, they achieve a change in nominal voltage from 1 to 2. With existing jumpers on the electric motor and a block with 6 terminals, it is necessary to change the position of the jumpers.
For any connection scheme, the direction of the windings must correspond to the direction of the windings. The zero point for the “star” can be either the base of the winding or the end, in contrast to the “triangle”, where they are combined only alternately. In other words, the end of the previous one with the beginning of the next one.
The motor can also operate in a single-phase network, but not with absolute efficiency. For this purpose, non-polar capacitors are used. With capacitors connected to the network, the maximum power will not exceed 70%.
What to do if the engine does not start
If the engine, removed from the car, does not start, then the reasons can be either mechanical or electrical.
If the switched on motor does not spin, but gets hot, you need to quickly turn it off and try to turn it by hand. If you hear a grinding noise, you should check the bearings; they could fly apart. Then they, together with the seals, should be replaced.
You also need to check if any debris has gotten into the gap between the rotor and stator.
If no mechanical causes are found, then you should ring the electrical circuits to see if there is a break somewhere. In commutator engines, you should check the wear of the brushes and the tightness of their contact with the commutator surface. Brushes wear out over long periods of use and must be replaced on time.