A Wi-Fi projector is special equipment for displaying images on a large screen. The only limitations can be the size of the room or the so-called screen itself on which the projection appears. Such devices are gaining great popularity due to the ability to quickly and easily connect to any home device, such as a phone, tablet or laptop. The main thing is that it has a wireless module for data exchange.
A portable projector with Wi-Fi for home can be a good alternative to conventional TVs due to its good image quality, relatively low price and high performance.
Installing the Projector
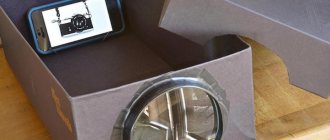
In order to connect this projector, you must first charge it thoroughly. You need to install it on a tripod, and even better, if not on the one that comes with the kit, but on a more stable stationary one, which is usually used for photo and video cameras.
Depending on the proximity to the screen, the picture will become smaller (if closer) or larger if it is placed further away. This will have almost no effect on the video quality - the projector allows you to play video with 4K resolution.
The tilt angle does not affect either - the device calculates it itself and makes the image even. The main thing is that the screen itself is smooth and exactly perpendicular to the floor.
To turn it on, move the power switch to the active position, and on P09 additionally press the “Power” button.
Advantages and disadvantages
Like any other device, the presented devices have their positive qualities and disadvantages.
- The image quality is inferior to TV and is highly dependent on lighting. Screen contrast becomes poor when exposed to strong sunlight;
- Broadcast quality is highly dependent on the resolution of the source file. If the film you are watching has low image quality, then all the shortcomings can be seen on the projection screen;
- complexity of installation and configuration. A projection screen is required for proper functioning;
- little choice. Despite the development of the market and the production of new technologies, the market is significantly inferior to televisions.
- reduced amount of harm to human health, since the equipment’s image is reflected and not direct, as on a TV;
- Small size of the device, which requires much less free space in the room. In case of a long period when the device is not used, it can be easily removed and hidden;
- much lower cost compared to TV. Even if you buy a good and high-quality audio system for the device, it will be cheaper than an analogue TV.
Desktop
Next, we point the lens at the white screen or wall - for ease of playback and setup, I recommend mounting it on a tripod.
The Android operating system begins to load - the starting desktop already has windows for entering the most used applications, such as Youtube or Play Market. Here we immediately have quick access to video playback sources:
- From built-in or external storage
- Via AirPlay for playback from Apple devices
- MiraCast for playback from Android
- HDMI for relaying a computer or laptop screen
Now you can select a file from a folder on the internal drive and start playing it
If you switch to the applications section, you will see icons of other pre-installed programs, in particular the Kodi media player, with which you can stream multimedia content from a home media server running on the local network.
Prospects
Today, the prospects for the market for such equipment are not stable enough. Despite the constant development and improvement of equipment and technologies (for example, Multi Screen), the devices are far behind TVs in sales. They are mainly used in offices and other institutions for work and all kinds of presentations. Rarely purchased for home use.
Output and broadcast images from a computer to a TV via Wi-Fi
However, recently there has been an increase in sales among private users.
Note! Projectors have become popular as an alternative to home theaters. Suitable for installation in rooms with a lot of free space.
Connecting the projector to the Internet via WiFi
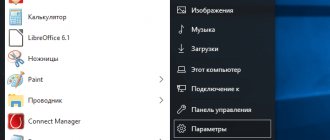
But for this you will need a connection to a WiFi router. To do this, go to the “Options” section and open “Networking Setting”
And then “WiFi Settings”
Turn on the wireless module with a virtual toggle switch
And we find our network in the list
And finally, enter the password - this is where the mouse comes in very handy
Installing other applications
In order to install other applications from the Play Market on the projector, you will still need to log in to your Google account or create a new one.
To enter your login and confirm login via SMS, it is also more convenient to use a real keyboard or mouse than a virtual keyboard and sensor.
Broadcast from an Android smartphone via Miracast
In order for media files from your smartphone to be broadcast through the projector on the screen, it has two built-in applications - Miracast for Android and AirPlay for iOS.
Let's start with the first one. The latest Android, in particular MIUI on Xiaomi phones, has a built-in function for displaying multimedia content on TV, set-top boxes and other gadgets.
It is located in the section “Settings - Additional functions - Wireless display”
But here it should be noted that it also happens that it is difficult to find it in the settings if the smartphone manufacturer has put some kind of special shell on it, for example, as Samsung does. Then it is advisable for the phone to also first install a separate application that pulls it out of the depths of the system configurations. There are many of them, it won’t be difficult to find - Miracast WiFi Display and another one, which is called Broadcast to TV screen, worked for me.
And one more nuance - both the projector and the smartphone must be connected to the same WiFi network, and even better, one should be at a frequency of 5 GHz to increase speed and thereby avoid delays in broadcasting.
When all the necessary programs are installed, you can start:
Launch the Miracast application on the projector
A window will open waiting for a connection, from which we are interested in information about the device name - it will be displayed in the list of available devices for sharing videos.
After that, we launch the application on the phone and look for our projector. It’s strange, but for some reason in Miracast WiFi Display it is displayed with the same name that was set on it, but in the second program it has a different meaning. However, this is not important.
Click on this link and allow the files to be played
Select the folder and file of the required video
It will start playing on the screen, and the smartphone display will turn into a control panel
Phone connection methods
There are only two of them.
Wireless
What are the differences between 3G and 4G networks: features, advantages and disadvantages
The method of data transmission among such equipment is gaining increasing popularity. The basis is a special DLNA protocol. Since it is impossible to connect the projector directly to the Internet, for this purpose they created built-in Wi-Fi modules, thanks to which the projector connects to a phone or tablet with Internet access.
In this case, the projector will be a kind of access point. All devices that connect to it will be able to exchange data, project videos or photos. To connect your phone and device you need:
- select Wi-Fi as a signal source in the projector settings;
- connect your phone or tablet to the appropriate Wi-Fi. The network name and password are specified in the projector settings;
- open the system settings of your smartphone or tablet and go to the “Screen” menu;
- select “Wireless Projection” or something similar.
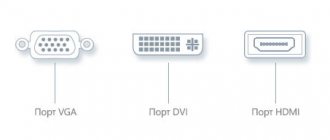
Connection using adapters
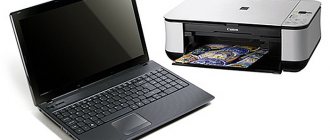
To make a connection using the presented method you will need:
- laptop, tablet or phone;
- special HDMI adapter.
First, you should check whether the gadget supports the MHL data exchange protocol. Almost all modern devices have the ability to work in it, but it is recommended to be on the safe side. The image is transmitted via an adapter that converts the incoming signal to the HDMI communication format. Connects using a micro USB port.
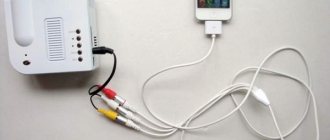
After this, you need to perform a certain sequence of actions:
- connect one end of the adapter to the corresponding connector on your phone or tablet;
- connect the other end of the wire to the HDMI cable of the projector itself;
- install special software and drivers.
Note! It is also necessary to take into account that certain adapters often do not have enough power from the transmitting device to properly convert the signal. It is recommended to use a special power cable and connect it to the required connector on the adapter body.
Stream a movie from iPhone to projector via AirPlay
If you have an iPhone or iPad, then video playback from it is carried out through the AirPlay application. You also need to install an additional program on your phone that supports DLNA connections. I chose the first one I came across - Nero Streaming Player - by the way, it is also available for Android.
Launch it and select “Play from this device” from the menu
Next, select the file you want to play
And then we select the device for relaying, that is, our projector
That's all. If you have any questions about connecting the projector, ask in the comments...
Description and main limitations
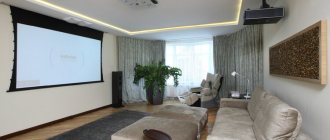
Every owner of a standard apartment sometimes wants to arrange in his own home something like a cinema with a large screen and high-quality sound. The sizes of modern televisions, although quite large, do not convey the effect that is achieved in a cinema hall. In addition, TVs with a screen diagonal of more than 50 inches often cost a lot of money.
An alternative to them is a projector with Wi-Fi, which allows you to wirelessly connect to any device and display the picture on the big screen.
Note! A modern projector with Wi-Fi is capable of producing an image with a diagonal of 7 m or more. However, it is difficult to find conditions for such a large screen, so a couple of meters is enough.
The latest generations of presented devices are small in size and can be installed and operated on a table, floor, hung from the ceiling and in other places. In addition, the device software allows you to remove any screen distortion, even if the device is installed at an angle. Nowadays, office projectors with Wi-Fi are widely used.
Restrictions
For such a device to function, it is necessary to have an external signal source, which can be a laptop, game console, or even a personal iPhone, that is, any gadget that has Wi-Fi or Bluetooth connection functions.
A natural limitation to the operation of devices is the size of the screen. Any surface can be used in its role, but the best quality will be only if it is a special stretched screen for broadcasting or a white painted wall.
In addition, serious devices with high performance can cost a lot of money, which often discourages buyers due to the inappropriateness of the purchase.