Usually every recipe begins with the words: “preheat the oven.” What does it mean? How long does it take to preheat the oven? Isn’t it easier and more economical to put the dish in a cold oven and only then heat it up? In this article you will learn why to preheat the oven and how to do it correctly.
In this article:
- What does "preheat the oven" mean?
- Why preheat the oven?
- How to properly preheat the oven?
- Is it possible to overheat the oven?
- What can you cook in the oven?
Chocolate muffins with condensed milk (RECIPE)
What does "preheat the oven" mean?
The oven starts very quickly, but it takes time for the oven to reach the temperature specified in your recipe.
Pie with sour cream and blood oranges (RECIPE)
The process of turning on the oven and the waiting time for it to heat up is called preheating the oven.
Try to avoid preheating
Even if your recipe says, “Preheat the oven,” it’s not always worth doing. Roasts, stewed vegetables or meats will cook perfectly even if you put them in a cold oven.
Preheating is only necessary if the dish must remain in the oven for a specific time. If there is air circulation in it, preheating is also usually not required, with the exception of baking bread, puff pastry and very delicate pastries.
Why preheat the oven?
Failure to preheat the oven in advance may result in insufficient and uneven cooking. And the cooking time specified in the recipe is increased exactly as much as necessary to preheat the oven.
Shortbread pie “Tart” lemon with raspberries and custard (RECIPE)
For proper baking, for example puff pastry, yeast dough and shortbread, a sharp heat impulse is required. If the oven heats up slowly along with the baked goods, then the chemical processes in it are not proceeding correctly.
In a preheated oven, the pie turns into an airy and tasty delicacy that rises evenly, is fried and has a golden crust.
Cheesecake with boiled condensed milk (RECIPE)
The milk fat melts, the sugar dissolves, air bubbles form, and the top caramelizes. All these reactions occur in the correct order and over a long period of time only when the oven is preheated.
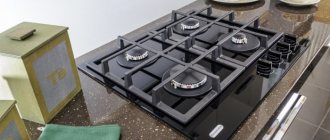
What types of thermometers are there for a gas oven?
It is easy to control the cooking process using a thermometer, which can be purchased at a specialty store. Their range is quite large, and they all differ in their functionality and price. To choose a thermometer for a gas stove oven, you need to focus on their technical characteristics. Let's describe them in more detail.
- Analog thermometers are mechanical devices that oven manufacturers often build into ovens. They are quite easy to use and have a reasonable price. They are produced with a measurement range in the form of a dial or linear scale. Their error is small - up to ±1°C. Depending on the chosen model, they can be hung, installed on levels in the oven, or mounted in the oven.
- Digital instruments are electronic devices that measure temperature instantly. They are equipped with the following functions:
- set the cooking time;
- a sound signal notifies about the end of baking;
- regulate the preparation of fish and meat dishes, desserts;
- have different color temperature indications.
Disadvantage: these devices break down at temperatures above 280°C.
- A temperature probe is a special type of device for measuring the degree of heating of meat or fish from the inside during baking. Equipped with a sound signal that notifies you when the desired temperature has been reached. The kit includes a steel needle with a sensor, a heat-resistant wire and an external measuring unit with a display. Use a probe to pierce the meat or other dish in several places and check the temperature. In this case, the integrity of the product is practically not compromised, as, for example, in the case of using a knife to check the readiness of meat.
- A non-contact probe is equipment that operates on the principle of a pyrometer. It determines the degree of heating of the dish without touching it using a beam. It is not widely popular because it cannot check the temperature inside the dish.
- The radio probe's technical characteristics are similar to the temperature probe, but with more advanced functionality. Its kit is complemented by a docking station and a remote control with a radio-controlled display, which can be carried with you within a radius of up to 1 km from the oven. This allows you to control the preparation of dishes while in other rooms or even outside the house. The device is expensive, but its functionality gives it a significant advantage over other similar devices.
If you want to use a thermometer for a gas oven, then consider the following recommendations:
- cheap models are made from low-grade materials, so they quickly fail;
- do not place the thermometer on the walls of the oven, as the readings will be incorrect;
- a digital thermometer is better than a mechanical one and will be able to signal when the desired temperature has been reached;
- if the oven is rarely used, then choose a mechanical thermometer that will not run out of batteries when it is not needed;
- give preference to a thermometer with a scale of up to 300 degrees, which will allow you to control even the high heat inside the oven;
- On small instruments, scale divisions and numbers are difficult to see, so choose graduations with large font;
- The most accurate temperature readings on the thermometer will be obtained in the place where the baking sheet will be installed.
In order to bake products efficiently, it is important to preheat the oven to the parameters specified in the recipe and maintain the desired heating temperature until the end of cooking. Using the above methods, this can be done easily even without a thermometer. If you decide to purchase it, then following the advice, it will not be difficult for you to choose a high-quality thermometer and then use it to prepare the healthiest and most delicious dishes.
Modern housewives have at their disposal a lot of household appliances that make everyday life much easier. An oven is rightfully considered one of the convenient devices. Housewives enjoy baking various foods, delighting their loved ones with tasty and healthy food. It’s great if you have an innovative oven at home with a lot of various functions and sensors. But, if there is none, how to heat the oven to the desired temperature?
How to properly preheat the oven?
The oven must be turned on before cooking
A standard electric oven can take an average of 15 to 20 minutes to preheat. The higher the temperature, the longer it may take. This time is usually enough to make a simple dish. If a recipe requires a long preparation time, turn on the oven halfway through the cooking process.
Prepare the oven
Be sure to check that there are no extra baking sheets, racks or broilers inside the oven. Additional items take away some of the heat, thereby increasing the heating time and disrupting heat exchange in the oven.
Check what level you need to cook at
Most foods - pies, cookies and muffins - are baked on the middle rack in the center of the oven.
Casseroles and lasagna get a golden top and crispy crust if you place the baking dish on the top level.
Puff pastry pie with chocolate (RECIPE)
The lower level is suitable for pizza and flatbreads with a golden brown bottom.
If the recipe does not specifically indicate at what level to cook, then you should place the dish on the medium level.
Turn on the oven and set the desired temperature
Read the recipe carefully to find out at what temperature it is recommended to bake the dish. In step-by-step recipes, this information is in the first paragraph.
Wait until the oven has preheated
Most modern ovens show the current temperature on the screen or indicate with a sound signal that they are ready.
Some ovens have an indicator light that turns off when the oven has reached the desired temperature. This indicator is usually located next to the oven temperature sensor.
Pie with apples and black currants (RECIPE)
Older models often do not have a temperature control—your oven may simply have an on/off switch. In this case, turn on the oven and wait 15 to 20 minutes before placing the dish inside. It's even better to use a special thermometer that will show the exact temperature inside the oven.
Steps
Preheating an electric oven
- Start preheating your oven before you begin preparing the recipe.
Electric ovens take 10 to 15 minutes to preheat. Usually this time is enough to prepare the food for baking. If you need more time to prepare your food, light the oven halfway through the cooking process.
In general, the rack is positioned in the middle of the oven, but some dishes require a position either higher or lower. Look at the recipe, remove the rack and move it to the level you need. There are grooves inside the oven that hold the racks in place.
Turn on the oven and set the desired temperature.
To determine the correct temperature, check your recipe. Usually the oven temperature is indicated at the very beginning of the recipe, in the first step. Simply turn the adjustment knob by pressing it until the mark stops at the desired temperature setting.
- If you are baking food, you should turn the knob until it stops at
- Wait until the oven reaches the required temperature.
Most modern ovens have a setting to display the current temperature or beep. Some ovens have a small light that turns on when the oven is hot. Such a light is usually located near the adjustment knob.
Place the dish in the oven and let it bake according to the recipe.
Keep the oven door closed unless the recipe says otherwise. Do not open the oven or look at the food being cooked, as the heat from the oven will dissipate and the cooking time will increase.
- If you are cooking on multiple racks, do not place them parallel. This will allow hot air to circulate around the dish and distribute the heat evenly.
Preheating the gas oven
- Make sure the room has good ventilation.
Gas ovens use gas to operate, which is why they emit more gases than electric ovens. Ensure good ventilation of the room, for example by opening a window.
Open the oven and make sure there is nothing inside.
If you store the baking sheets inside the oven, remove them and set them aside.
Install the grilles the way you need them.
Some recipes require changing the location of the sieve inside the oven to ensure even baking of the dish. Simply pull out the grill and move it to the level you need. There are grooves inside the oven that hold the racks in place.
- Foods such as pot roast or lasagna need a crispy crust, so they are placed on the top rack of the oven.
Muffins, cookies, and cupcakes must be baked evenly, so the rack is placed on the middle level unless otherwise indicated in the recipe.
- Dishes such as flatbreads and pizza need to be browned and crispy on the bottom, so a rack is placed at the bottom of the oven.
- Determine whether your oven ignites with a piezo lighter/match or with an electric igniter.
Older oven models are ignited using a piezo lighter, while more modern models have built-in electric ignition. Here's how to tell what type of oven your oven is:
- If your oven is lit with a piezo lighter, you can see a constantly burning fire. Which increases or decreases depending on the temperature.
If your oven is electric ignited, you won't see the flame until you turn the oven on and set the temperature.
- If your oven is lit by a piezo lighter, turn on the oven and set the temperature.
You may have to press the adjustment knob lightly before turning it.
If you have an electronic oven, press the bake button on the control panel.
Use the up/down arrow buttons to set the desired temperature. When the temperature is set, press the “Start” button. The numbers on the panel will change to show the actual temperature inside the oven. Wait until the temperature reaches the set level and until it is displayed on the display.
When the oven temperature reaches the required level, place the food in the oven.
A gas oven heats up much faster than an electric oven, so the required temperature will be reached in 5-10 minutes.
Take necessary measures if you smell gas.
If you smell gas while cooking, immediately call gas service 04 or 104 (in Russia) Turn off the oven immediately,
DO NOT
use any electrical appliances. If you turn on electrical appliances, an explosion may occur. Open the window, leave the house, use your neighbor's phone or mobile phone telephone to call emergency services. Do not use a mobile phone in the house.
Bake whole bream weighing up to 0.5 kilograms at a temperature of 200 degrees.
Bake bream weighing from 0.5 to 0.8 kilograms at a temperature of 200 degrees.
Bake bream weighing from 0.8 to 1.2 kilograms at a temperature of 200 degrees.
How to determine whether the scale on the oven corresponds to degrees?
What you should pay attention to first:
- The total number of divisions (as mentioned earlier, it may differ in different oven models).
- An indicator of the maximum temperature to which the oven heats up.
The number of divisions can be simply calculated by paying attention to the temperature switch, next to which the scale should be located. As for the maximum temperature indicator, it can be determined by the type of oven: for electric models it can reach 280-290 degrees, for gas models - 250 degrees (average figures are given). By clarifying these parameters, you can find out which division can be taken as 180 degrees in a gas oven. Which figure corresponds to the same temperature indicator in electric models will also be considered. Below you will find information on the relationship between temperature in degrees and divisions on the oven switch. Please note that these data are approximate.
The recipe for my favorite EASTER CAKE.
Off The recipe for my favorite EASTER CAKE I made Easter cake today, and I thought, would you like to share its recipe with my beloved Maryushki? I’ve seen a lot of recipes, but almost all of them, with rare exceptions, are different versions of baked goods, from Easter cake there is only one shape and decoration. Real Easter cake is made from special Easter cake dough and turns out much tastier than butter cakes and muffin-type Easter cakes. It has a fine, fine layered structure, but at the same time it is surprisingly delicate and...
However, if you are preparing foods that need to be baked or cooked, such as bread, cake, casseroles, chicken or frozen dinners, it is important that you preheat your toaster oven before you place it inside. The reason you need to wait is because the cooking time does not include preheating.
Degrees in the oven - what is the number on the graduation scale?
Putting food inside the toaster oven before it is fully heated may result in undercooked food. Here are some examples of how foods can react to being cooked too early. Baking - Baked foods that use yeast, baking soda, and baking powder, as raising agents require precise temperatures to create the chemical reactions needed to create something edible. If you place the dough or pastry in a cold or cold oven, then there is a good chance that it will rise too early or late. A proper roast sears the outside of the meat, which traps the juices inside and keeps it tender and juicy.
- If you've ever baked a cake and fell over, this is probably the reason why.
- Brooking - Shaving meats in cold ovens will cause them to dry out.
Reheating in a toaster oven is very different from a traditional wall oven.
Discussion
It is traditionally believed that Easter cakes are eaten throughout the Easter week until Radonitsa (9th day after Easter), and Easter cakes prepared according to this recipe are perfectly stored all this time, without losing freshness and aroma, although I did not have the opportunity to check this... Only the set aside pieces, prepared to take the treat to work, remained until 3-4 days from the moment of baking, and so everything was usually kneaded during Sunday, rarely when there was anything left for the next day... :) It usually takes me 8-10 hours... It is possible that the next day, out of habit, your hands will ache... But the result is good, therefore, I think, once a year, for the Bright Resurrection of Christ, you can prepare a real Easter cake. In addition, such a cake made with love, as they say, has very good energy...:)))))
The space inside traditional ovens is huge and preheating takes 10 to 20 minutes. That's a lot of energy used to heat all that air! On the other hand, the interior of toaster ovens is very small. Even the largest models don't have a lot of air to heat up. The time it takes to preheat these mini ovens depends on the temperature you select, but it usually only takes a few minutes.
Do any models tell you when to preheat?
Want to guess which device won for speed? The time difference would be even more significant at higher temperatures. Take a look at this video if you want to see my oven warmer in action. Yes, many models, although not all, will tell you when they are preheating. The most common alert method is a series of beeps heard when the heat reaches a set temperature. This is what my model does.
there is a special Baking paper - very convenient!
Therefore, modern gastronomic thought avoids it, with the possible exception of the hypertrophied liver. Everything you can cook from goose was invented in time immemorial, when the stoves were heated with coal and twelve people sat around the dinner table. But when a holiday comes to the house, it's time to refresh your memory. Most often, the goose is stuffed. And it is right. In itself, a three-kilogram gander will contain enough meat for a maximum of four people. Moreover, these four will not eat that much. But to make eight servings, a side dish is prepared in goose fat and the bird is stuffed with this side dish. To be honest, the fat of the goose is generally the most interesting part. You can get it in two... ...The goose must be sewn up with thick cotton threads, and then coated with a thick layer of clay. Then rake the coals, lightly dig the coated bird into them, sprinkle coals on top too, and light the fire again in this very place. So, during a cheerful conversation, the goose will get ready. Moreover, this will happen faster than in a gas or electric oven - the temperature of the fire flame is higher. After 1.5-2 hours, depending on the size of the goose. Try it! Goose with apples Normandy style Goose with porridge Roast goose with banana bread and chutney Stuffed goose breast If you do bake it in the oven, you can rub the goose with marinade. Soaking a goose in marinade probably won’t work - what kind of vessel is needed? Laugh...
The best thing to do if you buy a model that doesn't come with an indicator to tell you when it's preheating is to buy a small dish thermometer. You can place a thermometer inside and view it through the glass door to see when the air inside has warmed to your desired cooking temperature.
How to bake apple strudel
There is an additional benefit to using a furnace thermometer. It will show you how accurately your toaster oven heats to the selected temperature. If you find that your particular model is consistently heating too high or too low, you can adjust the temperature to achieve the best results while cooking.
This kind of saucepan is ideal for preparing meat stews and stewed vegetables, since this design will not allow the food to burn, and the lid will prevent the evaporation of liquid and help maintain a high temperature, which means you will not have to add oil, and the cooking process will take less time. Kazan Kazan is a cast iron cookware with thick walls and a semicircular bottom. It is a common belief that people cook in a cauldron only outdoors, but in fact this is not the case; you can cook in a cauldron at home, especially if you have a gas stove. To do this, you need to place the cauldron on a tripod and place it over an open fire. Traditionally, a cauldron is used... ...To do this, you need to place the cauldron on a tripod and place it over an open fire. Traditionally, a cauldron is used to prepare pilaf, but you can cook any other vegetable and meat dishes in it. The cauldron is convenient because, thanks to its design, it heats up evenly, which prevents food from burning and leads to the use of less oil. When choosing a cauldron, pay attention to the material from which it is made; a real cauldron should be cast iron, although aluminum cauldrons with thick walls are also considered good. Dutch oven Another type of cookware for stewing is a Dutch oven. It is a frying pan with...
You take the pizza out of the freezer. After the timer goes off, you rip open the oven door to find an undercooked pizza. Unfortunately, this problem is more common than you think and is even more harmful when processing baked goods.
Apple strudel made from puff pastry
Part of the problem is that years of heating and cooling put the internal components of the furnace under great stress and can wear out or lose accuracy over time. Find out how to check if your furnace is reaching the desired temperature and how to quickly fix the problem.
Methods for humidification in home ovens
Friends, hello! Today we’re talking about ways to humidify in home ovens. As you know, wheat bread needs steaming in the first 15 minutes. baking to form a beautiful golden crust, open the cuts. In addition, the humid environment of the oven allows the workpiece to increase in volume as much as possible in the first half of baking, because the surface of the dough, which has not yet formed a crust, can freely stretch as the workpiece increases in volume. There are several effective ways to steam in the oven and several more INeffective, but at the same time quite popular, I’ll start with those))
DOES NOT WORK:
BOWL + WATER on the bottom of the oven. Poured, set, forgot.
SPRAY. Spritz it into the oven from a spray bottle, as Bertine showed in the book.
WHY DOES NOT IT WORK?
In a very hot, hot oven environment, a powerful burst of steam can be effective, causing the inside of the oven to become very humid. When active evaporation does not occur (a bowl of water), or when there is not enough water for evaporation (a spray bottle), the crust of the bread sets too early, does not open the cuts at all, and is formed that is rough, without gold, and not flavorful. As in the photo below))
WORKS:
CAP! For me Emile Henry are ideal, I baked all my bread in a gas oven under a ceramic hood for many years ( and 90% of the bread on the blog too) and I still believe that this is the best and easiest way to create super-baking conditions bread in any oven. Here is the first bread that I baked under the Emile Henry , if memory serves, it was Vermont with rye flour:
And here is the first bread that I actually baked under a hood (then under a bowl).
The oven is also gas and is far from the most successful; if there had been a ceramic hot cap, the crust would have been more convincing, but at that time the result was completely delightful
WHAT'S THE SECRET? The cap and stone, accumulating heat well, very powerfully transfer it to the bread, which quickly warms up and quickly begins to evaporate moisture - exactly as much as the crust needs. Baking under a hood brings home conditions as close as possible to oven conditions, preserving the principle of heat accumulation and self-hydration of bread, as in a wood-burning oven. And it works absolutely everywhere in absolutely any oven!
Important: The effectiveness of this method depends on how well the stone and cap are heated and how well the bread has been proofed. Well-loose dough quickly warms up and conducts heat, easily evaporates moisture, unlike poorly prepared dough, and bakes easily. Warm-up time for the stone and cap is 60 minutes.
Here are a few articles about how the cap works:
Do I need to warm up the cap?
Caps in Kolpakov style (about different caps)
How to choose a baking stone + review of ours
Steam and stone, crust and crumb
BOILING WATER AND FRYING PAN!
A great way, but not for everyone. Suitable for electric ovens in which you can turn off convection and use only bottom heating separately, because this is not just a method of humidification, but a special baking mode. It allows you to bake 2-3 loaves of wheat bread at once (depending on the weight of the workpieces) and helps to open the cuts of the bread if they were not opened before due to an overly active upper heating element. Believe it or not, this is one of the main reasons why the cuts on your bread may not open!)) By the way, using a hood automatically eliminates this problem: under the hood, when used correctly, the bread always opens in the best possible way, because it does not receive heat from heating element, and from the walls of the hood.
The gist is this: