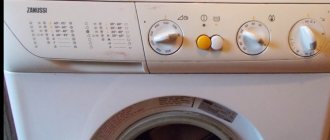
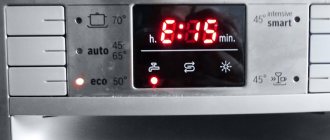
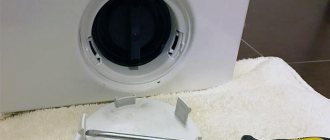
Drain pump breakdown - from RUB 1,600*
The pump is designed to pump out water during washing. It consists of a motor and an impeller. Basically, they break down: the pump motor burns out, the impeller is mechanically damaged. In the first case, the sound of the pump is not heard at all, in the second, the pump hums, but the machine does not drain water.
Note! Carefully check the pockets of items before washing. We have more than once encountered a situation where small foreign objects (coins, paper clips, zippers, curtain hooks, etc.) got into the pump and broke its impeller.
SIGNS
The washing machine does not drain the water: you can’t hear the pump working at all, or it is humming, but the water still does not drain from the washing machine. Zanussi cars with a display display error E20 or E21.
HOW TO FIX
Spare parts for the pump are not sold, so the pump needs to be replaced.
*Prices are only for the work of the master, the new pump is paid separately.
Assembling the washing machine
Installation is carried out in reverse order. However, there are some important subtleties.
First of all, when connecting the tank, it is advisable to use high-temperature plumbing silicone. You need to apply it to the joint. Some masters don't use it. But there are cases of small leakage at the junction. Therefore, we recommend using it.
Important! The silicone must be sanitary grade and high temperature resistant – above 100°!
The second essential point that must be fulfilled. When installing the pulley, we apply an anaerobic fixative to the threads. Only blue! Red is not allowed! You can buy it at an auto parts store.
Option for anaerobic thread locker.
This must be done so that the bolt that secures the pulley does not loosen during operation. This also happens. The washing machine will start to shake during the spin cycle.
Another important point is that if you used silicone, you should not use the machine during the day. It needs 24 hours to completely harden. Yes, and it is advisable to give the thread locker a day, according to the instructions.
Video
This approach can be applied when replacing bearings in any washing machine, not just the Zanussi brand. If you are unsure of your abilities, then it is better to turn to specialists!
Malfunction of the heating element - from 1800 rubles*
The heating element heats the water for washing. When it fails, the machine washes in cold water, the program reaches heating, and the machine turns off, or the washer overheats the water. The coil in the heating element burns out or it “breaks through” onto the housing. In the second case, the machine can knock out the machine, RCD or overheat the water.
SIGNS
The Zanussi washing machine does not heat the water; models with a screen display error E60, E61 or E69. In rare cases, the machine overheats the water. When overheating, code E62 is displayed.
HOW TO FIX
The heating element needs to be replaced.
*The price is only for the work of the master, payment for a new heating element will be charged additionally.
Bearing wear - from RUB 3,800*
The bearings of the washing machine ensure smooth rotation of the drum on the shaft. Over time, the oil seal weakens, water gets into the bearings, they rust and gradually collapse.
SIGNS
The Zanussi machine makes a lot of noise during the spin cycle and may not be spinning. If you remove the back wall of the washing machine (in machines with horizontal loading), you will see rusty stains on the tank from the location of the bearings. If you shake the drum by hand, you will notice how it dangles on the shaft. Sometimes the washing machine stains the laundry with grease from the seal (black spots remain on things) or with rust. In advanced cases, the drum falls down and stops rotating even while washing.
HOW TO FIX
Bearings need to be replaced.
*Rates for replacement of bearings, new oil seal and bearings are paid additionally.
Water does not heat up
This type of malfunction does not occur often. To repair this breakdown, you need to have a regular tester and know how resistance is measured. It is necessary to dismantle the back wall of the Zanussi washing machine and measure the resistance of the tubular electric heater (TEH).
This element is located at the bottom of the Zanussi washing machine tank. The resistance of the heating element should be 30 Ohms. In case of deviations, it is recommended to replace this element. If replacing the heating element did not help, then there is no point in further repairing the Zanussi washing machine with your own hands.
Failure of the control module - from 2300 rubles*
The module, which is also called an electronic controller or board, is a microcircuit with radio elements. It controls the operation of the washing machine. It contains all washing programs. The main reasons for control unit failure are power surges and moisture ingress. As a result, tracks or contacts on the board burn out and/or oxidize, radio elements burn out, and the firmware gets lost.
SIGNS
Signs of module failure are very varied: from the lack of spin to the reluctance of the Zanussi washing machine to turn on. The most common of them are the following. Machine:
- does not turn on;
- the drum does not spin;
- does not drain;
- does not erase;
- does not heat water;
- knocks out the machine gun;
- The programs at SMA Zanussi are going astray.
HOW TO FIX
The technician uses a multimeter to ring the elements and tracks of the microcircuit. Finds faulty ones. Burnt out elements are replaced with new ones, the tracks are soldered. If a firmware failure occurs (due to a power surge), the module memory is soldered off, reprogrammed using special equipment and soldered back in.
If there is significant damage to the control unit, it is completely replaced.
*Control module repair prices are for labor only, components or a new unit are paid separately.
DIY repair
As you can see, many different problems can arise while using a washing machine. Some require professional intervention, while others can be fixed on your own.
Replacing bearings
The condition of the bearings can be responsible for many problems that interfere with the operation of the washing machine. To replace these components, you must first disassemble the unit following basic disassembly principles. In this case, it is necessary to achieve free removal of the tank.
Immediately after disassembly, you need to pull out the tank and disassemble it into its components. To do this, you will need to unscrew the bolts around the perimeter of the structure. Now you need to remove the drum, the shaft of which is fixed in the bearing assembly. You can use a hammer to knock out the shaft.
Now it becomes possible to install a new bearing and seal. It is important to handle the process as carefully as possible so that no important components are damaged during assembly. Under no circumstances should you strike the holder or separator, as this may lead to permanent damage to the device. It is much wiser to use lubricants to facilitate the sliding of parts.
Replacing the heating element
Heating elements are most often located at the bottom of the tank, and access to them is gained when disassembling the machine. Before direct replacement, it is recommended to find out whether the heating element is mounted in front or behind in a particular model.
It is necessary to drain all the water from the tank, turn off the power to the machine and ensure the safety of the process. Then, using wrenches, loosen the nuts holding the heating element in place. You also need to disconnect all the wires that go to it from the heating element.
Sometimes seals can prevent the element from being removed, so you will need to gradually release the fasteners using a screwdriver.
The new heating element is inserted into the vacant space as smoothly as possible without any distortions. The component must fit into the guide bracket that holds it while the machine is operating. At the end of the repair, a nut is screwed onto the stud, and all the necessary wires are connected.
Cleaning the pump filter
One of the simplest and at the same time most common types of washing machine repairs is filter replacement. This is a fairly simple procedure that even an untrained person can understand. Before repairing, it is advisable to read the instructions for the specific device model, which should indicate the procedure for removing the filter from the installation socket.
Procedure:
- the inlet filter is unscrewed from the water pipe;
- the intake valve is cleaned of various mechanical contaminants;
- a special panel is removed from the washing machine, behind which the filter units are located;
- the valve unscrews together with the filter;
- all parts are thoroughly washed with running water;
- the structure is assembled in its original form.
Replacing the hatch cuff
To replace the hatch cuff, you must first find special rings under the hatch cover. By removing the first ring, the user gains direct access to the cuff, then it must be pryed with a screwdriver and pulled out.
It is recommended to carefully inspect the seal to determine the cause of failure. This will help adjust the operation of the machine in the future.
Now you need to install a new cuff. This process is somewhat more complicated and consists of the following steps:
- The seat is washed with soapy water in order to remove even the smallest inclusions that could interfere with the sealed location of the part. In addition, the slippery surface will help make placing the new cuff easier.
- Now you should directly install the cuff itself, using special mounting marks as guides. It is advisable to move in both directions at once, as otherwise there is a high risk of displacement.
- To strengthen the structure, an internal clamp is installed. In this case, the complexity of the procedure directly depends on the type of ring used. Conventional screw models are simply loosened to the desired level and then tightened. With spring rings, some difficulties may arise, since without certain skills it will not be possible to quickly install such a ring. In this case, you will definitely need an additional tool in the form of a screwdriver.
- The final step is to install the last clamp. Everything is much simpler here, since access to the seat is always open. The principle of placing the ring is the same as in the previous paragraph.
Replacing drum supports
The drum supports or supports are changed as follows:
- all side walls of the unit are removed;
- the drive belt is dismantled;
- the wheel is disconnected from the axle;
- Now you can unscrew the screws holding the support to the housing wall;
- weights may need to be loosened or removed;
- the damaged caliper is removed and a new component is inserted in its place;
- The seal is secured, as well as the mounting bolt.
It is recommended to treat all main elements with lubricants, which can significantly extend the service life of products.
Control module repair
Repair of the control module can consist of either direct restoration or complete replacement. The second option is preferable for people who do not have much experience in working with such elements.
To replace, you need to disconnect the machine from the network and open the special cover inside the structure. Under the cover is the block itself, which can be removed after unscrewing several retaining screws. When disconnecting, it is important to remember which pin was connected to what. It is best to sketch a diagram or photograph the element.
After replacing the main board and connecting all the wires, you can put the component in place. If everything is done correctly, the repair will help restore the functionality of the machine. If you don’t want to spend too much money on a new unit, you can renovate it. However, such manipulations are best left to specialists in service centers.
Replacing brushes in the engine
Replacing brushes in the engine seems to be a rather labor-intensive procedure, consisting of the following steps:
- Separation of the motor from the drum and visual determination of brush wear. All wires are disconnected, and their location is remembered.
- Removing old brushes. To remove the components, you will need a screwdriver, with which you can easily pick them up. If there are any defects on the collector, they must be eliminated.
- Installing new brushes. To achieve the required level of tightness and reliability, it is necessary to press down the elements with self-tapping screws.
Now you can assemble the car, connect all the wires and test.
Belt replacement
To replace the belt in most Zanussi models, you need to separate the rear wall. It is behind it that the problem area is hidden, in which the main work will be carried out.
Under the casing of the structure you can see two pulleys, each of which has a special belt. One pulley is connected to the drum, the second to the motor. The integrity of the belt or its jumping off prevents the drum from moving.
If the belt is in place, but the drum does not rotate, then the only option is to replace it. If it comes off, you can simply return the belt to its place, and performance should be restored.
Abrasion of motor brushes - from 1600 rubles*
The brushes generate an electromagnetic field, under the influence of which a torque is created and the motor shaft rotates. Over time, they wear out, make poor contact with the commutator, and the motor shaft, and as a result, the washing machine drum, stop spinning.
SIGNS
The drum of the Zanussi washing machine does not spin at all or does not gain speed during the spin cycle. Perhaps due to poor contact with the commutator, the brushes spark. Error E50 may appear on the display.
HOW TO FIX
Usually the master changes the brushes when their length becomes less than 1 cm.
*The prices indicated are for replacement of brushes; the parts themselves are paid separately.
Breakage or stretching of the drive belt - from 1000 rubles*
The belt is only available in Zanussi washing machines with a commutator type motor. It transmits rotation from the motor shaft through a pulley to the drum. When the belt stretches, the machine does not gain speed during the spin cycle due to its slipping. If it breaks, the drum does not rotate at all.
SIGNS
If the belt breaks, the washing machine runs the program: water is poured, heated, drained, but the drum does not spin. If the belt is stretched, then the washing cycle runs normally, but during the spin cycle the drum does not accelerate to the required speed. A stretched belt often falls off.
HOW TO FIX
The belt needs to be replaced, even if it is intact but falls off. Because due to an increase in its length, the tension decreases, and the belt will continue to slip off.
Note! If the new belt continues to fly off the pulley, this may indicate a bad bearing. The drum is loose, so the strap comes off.
*The price list is for work only, a new belt is paid on top of the amount.
We check and repair
The first step in the instructions on what to do if your Zanussi washing machine stops responding to the “Start” button is to check the power supply. Most startup problems happen due to simple carelessness: they forgot to plug in the cord or didn’t notice that there was no electricity at home.
If the plug is in the socket, there is light in other rooms, and the cycle still does not start, then it is recommended to pay attention to a specific socket. We need to find out more precisely whether there is tension in it. The easiest way is to connect a hair dryer or table lamp to the socket being tested. Lack of response from the devices indicates loose contacts, damaged insulation and necessary repairs. But with the help of an extension cord, you can simply and quickly run the washing machine through another outlet.
Another option is if the power cord to the machine is damaged. This is immediately noticeable: traces of burning, the smell of melted insulation, pinched areas or external cracks clearly indicate that the conductor needs to be replaced. If you have the appropriate knowledge and experience, you can carry out this procedure yourself, otherwise, contact the service department.
When everything is in order with the electricity, you should look for a problem in other places. But we do everything competently and consistently. We disconnect the machine from the network and evaluate the performance of each element that can trigger a shutdown.
Important! Make sure that the washing machine is completely unplugged from the power outlet.
- FSP. When not working, the interference filter can allow the general voltage to pass through and prevent the washing machine from starting fully. In this case, when connected to the network, not a single indicator lights up. You can verify the serviceability of the part by “ringing” at the input and output. The non-dialing FSP will have to be completely replaced.
- Start button. The problematic key is excluded from the list of possible causes in a similar way to FSP. Each conductor suitable for the button is tested (in the pressed position) and if the result is negative, it is replaced with a new one.
- UBL. There are two ways to understand that the car will not start due to a broken hatch locking device. The most accurate way is to measure the presence of a suitable voltage with a tester, and the absence of numbers on the multimeter display will confirm this version. There is another option: try to close the tank door, and the familiar “click” will 60% guarantee a working UBL.
- Internal wires. Damaged internal wires cause all indicators on the dashboard to flash simultaneously. In this case, you can try to find leaks yourself, restore insulation and make contacts, but it is better to let specialists completely replace all wiring.
If previous checks have not identified the source of the problem, then nine times out of ten the main control element is to blame. For machines with electromechanical control, you will have to deal with a programmer, and for electronic machines, you will have to deal with a module. It will not be possible to independently test such parts, replace the control unit or repair suitable conductors. Therefore, it is recommended to call a service representative. Moreover, there is always the possibility that the breakdown is purely individual and the cause of the shutdown is in a completely unexpected place. And the timely discovery of this fact will save a lot of money.
Attention! If there is a burning smell near the machine, a slight smoke, sparks or dark spots are visible - under no circumstances should you connect it to the network!
Zanussi machines, like all modern automatic washing machines, are complex units with high-tech electronic “stuffing”. One careless movement and minor repairs will result in very serious and, most importantly, expensive problems. Therefore, it is recommended to soberly assess your strengths and stop at the stage of checking the power supply. And let a specially trained technician do the testing of FSP, UBL, control systems and the instrument panel.
Interesting:
- How does a Zanussi washing machine work?
- Malfunctions of Zanussi washing machines
- Zanussi washing machine fault repair
- How to disassemble a Zanussi washing machine
- Zanussi washing machine does not drain or spin
- Washing machines Zanussi
1 reader comment
- 03/18/2019 at 21:24
Nikolay:
Where is the FSP and how to replace it?
Answer
Breakdown of the hatch locking device - from RUB 1,500*
The lock is designed to lock the door for security purposes so that the hatch cannot be opened during washing. UBLs are thermal and electromagnetic. In thermal cases, a thermal tablet with a conductive coating usually burns out or is destroyed, which normally heats up under the influence of the current passing through it, bends the bimetallic plate, and the door is blocked. Less often, the plate itself loses flexibility and bends worse. Electromagnetic locks break very rarely.
SIGNS
When the UBL fails, the door does not lock and the program does not start. Less often, the hatch does not open after finishing the wash. In models with a display, the malfunction may be accompanied by error E40.
HOW TO FIX
The sunroof locking device needs to be replaced.
*The cost is for labor only, a new lock is paid additionally..
Failure of the water inlet valve - from RUB 1,700*
The valve consists of a membrane and an electromagnetic coil. At a certain moment, the electronic controller sends a signal to the coil, the membrane opens, and water under pressure from the water supply enters the machine. Basically, the coil is burning in the valves. As a result, the membrane does not open and the machine does not draw water. Occasionally, the cause is in the membrane: due to wear, it does not fit tightly, and the machine constantly draws water even when it is turned off (provided that the shut-off valve is open).
SIGNS
The Zanussi washing machine does not draw water during washing or only during rinsing. The second case is typical for Zanussi cars with double valves. One of its sections (a coil with a membrane) is responsible for collecting water for washing, the second for rinsing. When the second section fails, water is filled as usual during washing, but during rinsing there is no set.
A more rare symptom is unauthorized water intake even when the machine is turned off. In this case, the membrane is to blame. It allows water to pass through, so the machine constantly fills with water.
In Zanussi models with a screen, when the valve breaks down, errors E10 or E11 light up.
HOW TO FIX
They don't sell spare parts for the fill valve, so it needs to be replaced completely.
*The price indicated is for repair work only, a new valve is paid separately.
Troubleshooting common problems
According to service centers and repair shops, Zanussi washing machines have to be repaired quite often. They have many weaknesses, let’s outline the main ones:
- The details of washing machines from this company are highly dependent on the quality and composition of the water you use for washing, since due to the high content of salt substances, scale forms on the heater and other spare parts, and the water intake and drainage system suffers from dirt and rust;
- Frequent breakdowns of hatch door locks have been observed with washing machines from this company, which is attributed to mass production defects;
- Among other things, scale forms on the heating element of such machines many times faster and much more in comparison with other models of washing machines, which is also considered a defect of the manufacturer;
- One cannot speak about the reliability of the drive belt, which tends to stretch, which requires periodic tightening or even complete replacement of the entire assembly.
The only positive thing is that the Zanussi washing machine with vertical or horizontal loading has an intelligent control panel and notifies the owner of a problem using special codes. Therefore, the owner of the equipment can, after studying the operating instructions for the machine, try to make repairs with his own hands, without contacting a specialist.
Let's look at the most common washing machine error codes:
- Coding E11 is displayed on the control display when, when starting any of the washing modes, water does not flow into the device through the pump hose;
- Code E12 also appears when there is no water supply, but in the rinsing mode;
- If during draining the water does not drain through the drain hose, the device issues code E21;
- Error E22 also appears when there is a drain, but not its complete absence, but only with low pressure.
If you decide to fix the breakdown without the help of a technician and make the repair yourself, you should carefully study the operating instructions supplied with the machine. It is important to be able to disassemble and assemble equipment.
In case of serious breakdowns, we recommend that you do not disassemble machines with vertical or horizontal loading yourself, but call a specialist who knows exactly what needs to be done. In simple cases, you can fix a breakdown in your Zanussi washing machine yourself. The most important thing is that if you disassemble the machine yourself, you need to study the structure of the equipment; its diagram is usually attached to the product upon purchase.
Damage to the hatch cuff - from RUB 1,800*
The rubber hatch seal prevents water from penetrating between the drum and the body of the machine. When a hole appears in the cuff, the washing machine leaks water during the wash, rinse or spin cycle. Basically, the cuff is damaged by small sharp objects from the pockets of things. Sometimes the seal wears out due to the rotation of the drum.
SIGNS
Zanussi washing machine leaks during washing, rinsing or spinning. There was a hole in the rubber seal of the hatch. The machine may be knocked out if water gets on the contacts of the parts inside the machine.
HOW TO FIX
A damaged seal must be replaced. A temporary solution is to tape the cuff.
*The price is only for replacing the cuff, the new seal is paid separately.
