How many bearings are installed in the washing machine, where are they located?
In standard automated models, upper and lower p/sh are traditionally installed, which are located in the rear part of the drum, ensuring silent and reciprocating movement of the shaft, securely fixing it in the seats. The performance of this unit must be monitored especially carefully in order to avoid financial costs.
The resulting play, which is a consequence of improper operation, excessive loading, etc., can lead to leaks and imbalance of the entire unit.
Depending on the manufacturer and modification of the machine, the service life of the elements and planned replacement varies; you should carefully read the maintenance recommendations or get advice from specialists.
Part characteristics
The bearing system in automatic machines with horizontal and vertical loading is one of the most important working units. It is located depending on the model of the unit - in the back or side of the drum in the cross. The assembly consists of bearings of varying sizes (2 pieces). One of them, a large one, takes on the main load and is located near the drum itself. Today, in models such as LG or Samsung you can find reinforced double-row bearing units (mono bearings) that can withstand heavy loads.
Samsung washing machine bearings
Important parts are divided according to the material from which they are made:
- metal;
- plastic.
The second option is in great demand, since most users distrust plastic bearings. In reality, everything turns out to be completely different. It is plastic parts that last much longer than their metal counterparts. Consisting of two layers - an inner metal and an outer plastic, they can not fail for quite a long period of time. Such bearings are equipped with expensive models of direct drive machines such as Bosch, Samsung, LG and Indesit.
Washing machine bearings
What is needed to replace bearings
To independently repair a washing machine at home, you need to carefully study the recommendations for dismantling ball bearings and prepare the basic tools:
- flat and minus screwdrivers;
- pliers, a set of hexagons, open-end wrenches and socket heads;
- side cutting nippers;
- special devices - pullers suitable for a specific model;
- a hammer, preferably with a copper head;
- consumables, lubricant, WD-40 aerosol spray, which greatly facilitates the removal of stuck-on elements;
- new p/sh, the modification of which should be clarified in the product passport, on the manufacturer’s official website or from an authorized service center.
You can also find video instructions with a detailed step-by-step description of the steps for each model of household appliance on YouTube.
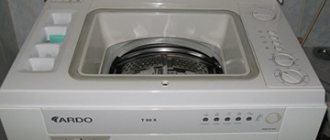
Replacing a bearing in a top-loading machine
In such modifications, repair work is carried out according to the following algorithm:
Sequentially unfastened and dismantled:
- side covers covering the main components;
- the caliper is turned out from the side opposite to the location of the pulley, the connection is “right” threaded;
- the front p/sh is removed, usually it is pressed into a plastic case, so you can just use a screwdriver without much effort.
- Be sure to avoid distortions, which can lead to cracks and subsequent leaks;
- to remove the second element you will need to remove the drive belt, grounding and pulley;
- the activities are repeated with the first p/w, taking into account the left-hand thread;
- eliminate contamination, check the integrity and functionality of other parts, apply lubricant.
Assembly is carried out in reverse order. To avoid mistakes, you can write down the order of all actions on a sheet of paper.
Replacing a bearing in a front-loading washing machine
The element is replaced in accordance with the manufacturer's recommendations or when abnormal noise, squeaking, vibration or leakage occurs. You can change parts yourself only if you strictly follow the instructions, have the tools and experience, since you have to disassemble almost the entire washing machine, regardless of the manufacturer, in order to get to the tank and remove the drum. Traditionally, front-loading models have 2 elements installed, which are not maintained, are replaced, and are subsequently disposed of.
The presence of a puller will greatly simplify all activities; if you do not have the device, use a copper hammer and chisel. Impacts should be applied to the upper cage carefully enough to avoid distortion, deformation of the seats and damage to other components.
After dismantling, you should thoroughly clean oxidation, dirt, and check other components for functionality.
How to change the bearing in an LG washing machine
Having prepared all the necessary tools, consumables and new ball bearings for installation, you need to read the instructions and begin disassembling the machine in the given sequence to get to the drum.
Removable and dismantled:
- top cover, 3 screws are removed from the back, and a tray for detergents;
- electronic panel secured with latches, with all wires disconnected;
- a rubber cuff, a fixing spring, and at the same time the functionality and safety of all parts is checked;
- the bottom panel, first unscrew the screw next to the filter, and the front panel with the loading lid;
- side and top weights;
- tank for detergent, pull out the pipes;
- back cover, remove the drive belt, turn off the heating elements;
- shock absorbers and springs, then remove the tank and electric motor;
- depending on the modification and year of manufacture, to get to the p/sh, the pulley screw is unscrewed or the drum is disassembled;
- Using a puller or improvised tools, old ball bearings are removed, cleaned, inspected and new parts are installed.
Assembly is performed in reverse order.
Who has how much
You can find out how many bearings are in an LG or Atlant washing machine by looking at the instructions for any of the units of this manufacturer or by consulting with service technicians or household appliance sellers. The owner of the machine may need such information only in one case - the unit has failed because the internal parts have worn out.
Bearing
The main cause of breakdowns of this kind is damage to the oil seal, which plays the role of a protective seal. The oil seal protects the bearing from contact with water and if it does not perform its functions, the liquid slowly seeps inside, damaging the most important working unit.
It is important to remember that if the oil seal and bearings are not replaced in time, the entire drum will have to be replaced.
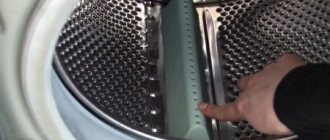
Washing machine drum
How many bearings are there in an Indesit washing machine? There are two of them, like the oil seal. Indesits may include:
- or components with parameters 20Х47Х14 mm;
- or components with parameters 25Х52Х15 mm.
In LG top-loading direct drive washing machines, components have specific serial numbers. For equipment from this manufacturer, these are numbers 6204-6206. Parts with the same numbers are also suitable for Atlant.
Set of bearings and oil seal for washing machines
Bearings in a Samsung washing machine are marked 203-204. At Bosch, depending on the model of equipment, the size of the parts also changes. Bosch bearing numbers are 6203, 6306. For different Ariston models, spare parts marked from 6203 to 6206 are suitable. Almost all Zanussi models are also repaired with components from this series.
How to replace a bearing in an Indesit washing machine yourself
In these popular washing machines, 2 p/sh also need to be replaced, which perform the connecting function of the pulley and the loading drum. Scheduled repairs due to natural wear and tear may be required after 5-6 years of regular, but fairly careful operation, in accordance with the manufacturer’s recommendations.
If the equipment is overloaded or installed incorrectly, an imbalance may occur, leading to increased load, damage to seals, moisture on the working surfaces of components and, as a result, corrosion and failure.
As in other front-loading modifications, dismantling and replacing parts is accompanied by preliminary almost complete disassembly of the equipment in order to get to the drum.
A brief sequence of activities for self-repair at home:
- preparation of tools, consumables and new bearings;
- draining all remaining water, disconnecting from communications;
- disassembling the machine, you should use the video instructions by searching on YouTube for the model of the unit;
- removing the drum, you may need a hacksaw to cut along the seam, or unscrew the fixing screws, dividing it into two halves;
- pull out the bushing, oil seal;
- dismantle the p/w with a puller or use a chisel and a copper hammer, tapping along the contour of the outer casing;
- clean the seats, all parts, check the integrity and presence of defects.
Finally, new elements are installed and reassembled in the reverse order.
How to change bearings in a Samsung washing machine
Household appliances manufactured by a well-known Korean concern are distinguished by good functionality and reliability, but like all units they require periodic preventive maintenance and replacement of consumables.
If it is not possible to invite a specialist, try replacing the parts yourself, having first prepared the necessary tools and purchased new ball bearings. The repair kit is selected based on the service code located on the sticker on the back. At the same time, oil seals must be replaced, as well as other elements that are worn out or affect performance.
The machine is disassembled in a given sequence, which can be found in the video instructions by typing the model in a search engine, since more modern types differ in design features.
In any case, you will have to get to the plastic tank. Then you need to remove the pulley using a socket or adjustable wrench, knock out the shaft by tapping the end with a hammer, disconnect the fastenings and pull out the drum. If there is wear on the shaft, the crosspiece may also need to be replaced.
After removing the oil seal, which is pryed off with a screwdriver, the large one is knocked out inside the tank using a chisel, and the small one is knocked out. Avoid slipping of the tools and strike consistently along the contour of the outer casing.
The bushing is cleaned of scale, oxidation and possible rusting, the seats are lubricated with a specially designed compound, new seals and oil seals are installed and assembly is carried out. To facilitate the process, it is advisable to write down the order of all operations and photograph the connection of the terminals; you can also number the pipes with a marker.
Number of elements
On both vertical and front-facing washing machines, the bearing assembly is considered one of the main mechanisms. It ensures the drum spins, affecting the quality of washing and spinning. The location of the bearings varies depending on the model and manufacturer: in the cross on the back or side of the drum.
The assembly consists of an oil seal and bearings. As a rule, there are two last elements: an outer ring of a larger diameter, which takes on the main load, and an inner, smaller one. But on some modern models from the LG and Samsung brands, the mechanism consists only of a reinforced double-row mono-bearing, which, due to its improved design, can work “for two”.
Plastic bearings are considered more reliable than metal bearings: they are less subject to wear and last many times longer.
Bearings also differ in material of manufacture and are divided into:
- metal;
- plastic.
Metal bearings are in great demand, since many consumers do not trust plastic, relying on the reliability and strength of metal. But in reality everything is different: plastic clips last longer. The whole secret is that such “rings” consist of two layers: steel on the inside, plastic on the outside. This increases the wear resistance of the part, allowing it to withstand significant loads without destroying the structure. By the way, it is these systems that are preferred by well-known, proven reliable brands LG, Bosch, Indesit and Samsung.
Some details of replacing the bearing in the Atlant washing machine
Belarusian cars occupy a worthy place among budget models, featuring a fairly high degree of reliability. The main problem encountered is the periodic need to replace bearings due to wear. The main signs indicating the need for repair are a characteristic hum that occurs when the spin cycle is turned on, vibration and other extraneous sounds. You can verify the need for maintenance by opening the loading door slightly, rocking the drum, and then turning it. If there is play and uneven rotation, it is necessary to remove the worn-out bearings and replace them. Otherwise, more expensive repairs may be required.
You can order the required elements by modifying the unit on the Internet or from the supplier. Korean parts, which are more wear-resistant, are also suitable.
As with other front-loading machine repairs, complete disassembly is required to remove the tank. You should turn off all networks and hoses, unscrew the filter and drain the remaining water, and install the equipment on a level surface. Then sequentially disconnect the panels, covers, electrical wiring, pull out the detergent tray, motor and weights. To unscrew the pulley, you can use a wooden block to jam it.
Having pulled out the tank, you need to lay it on the floor, unscrew the screws and divide it into two halves, remove the drum and begin replacing the seal and seal. This modification has one element located in the tank opening.
The part is knocked out quite easily, by systematically tapping with a chisel along the contour of the outer casing. After dismantling, you should thoroughly clean the mounting hole and check the safety and functionality of other elements. The drive belt may need to be replaced.
How to change a bearing in an Ariston washing machine
If you follow all operating rules, the service life of ball bearings on Ariston machines is from 6 to 10 years, without the need for maintenance; manufacturing defects are practically eliminated, judging by the reviews. But if the seal is overloaded or the seal is damaged, water may get into the seal, which will lead to leaching of the lubricant, rusting and failure.
An increasing hum during spinning, vibration, and sometimes grinding are characteristic signs that urgent replacement of parts is necessary. To be sure, you can check whether there is any play in the drum in the tank.
At home, repairs are carried out if you have the necessary tools, traditional for such work, free space and pre-purchased seals and seals. As in machines from many other manufacturers, the parts are located in a drum, which can be reached by disassembling almost the entire unit.
In order to avoid mistakes, you need to study the instructions for self-repair, during disassembly, write down all actions, label the pipes and contacts.
Having disassembled the machine and pulled out the tank, you need to lay it on the floor, unscrew the locking bolt and remove the pulley. Open the latches and remove the bolts around the perimeter and remove the drum. If it does not give in, you can lightly hit the bushing with a stop. Then the outer piece is removed by uniform tapping on the chisel, which should be installed at the edge of the outer casing, moving along the entire contour of the part. To prevent damage to other elements, it is better to purchase a puller in advance. The internal p/sh is dismantled in the same way.
Next, the seats are cleaned, all components and assemblies are checked, and the machine is assembled.
How can you tell if a part is broken?
It is quite difficult for the user to identify a malfunction at an early stage. The more wear on the bearings, the more obvious the “symptoms” of failure will become. The following signs will indicate that the bearing assembly has failed:
- noise and grinding noise when the drum rotates. Washing and spinning may be accompanied by clanging and crunching. The more revolutions the engine gains, the louder the sounds produced by the equipment become;
- bad spin. Due to the destruction of the bearings, the motor cannot operate at full power, so the things in the drum remain too wet;
- increased vibration. Due to the imbalance of the drum, the machine literally “jumps” during operation;
- hatch cuff defect. When the drum begins to play, its edges wear out the rubber seal.
If you notice one of the signs of malfunction, it is better to check the condition of the bearing assembly. If diagnostics confirm the problem, you need to immediately replace the components. You can entrust the repair to a specialist or, if desired, try to do it yourself.
Interesting:
- How to change the seal on a washing machine?
- Replacing the oil seal on a Zanussi washing machine
- How to change the seal of a Bosch washing machine?
- Indesit washing machine is leaking
- How to change bearings and seal on an LG washing machine?
- Error E06 Whirlpool washing machine
Reader comments
- Share your opinion - leave a comment
How to replace a bearing in a Zanussi washing machine
Despite the fairly high reliability of Zanussi household machines, the drum ball bearings need to be replaced periodically, especially during intensive use with maximum load. In modern modifications, error code E13 or E55 is displayed on electronic displays, which are issued by the self-diagnosis system. This indicates a possible oil seal leakage, play or wear of the seal. A characteristic feature is also the sound that appears during the spin cycle.
In order to dismantle and replace parts, you will need to disassemble the machine. Unlike other models, there is no need to remove the front panel; just unscrew the back cover to gain access.
After sequential disassembly of the unit and removal of the tank, using a special puller or improvised means, the elements are knocked out, the seats are cleaned, the belt, crosspiece, drum geometry and serviceability of other parts are checked. To facilitate dismantling, it is advisable to use WD-40 aerosol.
If the machine is under warranty, all repairs should be carried out only at a service center.
You can find the answer to the question: how to replace bearings in an automatic washing machine yourself: Veko, Bosch, Ariston, Lg, Ardo and other popular models by studying in detail videos on the Internet and step-by-step instructions. And to purchase the necessary parts for the bearing assembly, use the catalog of bearings for washing machines https://podshipnik.mobi/catalog/bearings/podshipniki-dlya-prochey-tehniki/podshipnik-dlya-stiralnoy-mashiny
Press for professionals
Specialists who are constantly involved in repairing washing machines, trying to optimize the installation process, are constantly trying to find new, non-standard solutions for performing the work. A screw press for washing machine bearings will be useful to professional craftsmen. For beginners who will carry out repairs once or twice, it makes no sense to buy this device, although if there is a desire, why not.
The design of a professional press is simple. The device consists of:
- screw;
- nuts;
- a set of washers of different diameters (6 pieces included in the set, ranging from the size corresponding to bearing 202 to 207. They are also suitable for bearings of the 300 series).
With the help of a screw and nut, the bearings are compressed together, and dimensional washers ensure that the forces from the structure will be applied exactly to the place where it is necessary so as not to destroy the part being installed.
The bottom nut can be easily removed from the screw stud. Initially, the element was designed for 203 bearings. If a ring 204 or 205, that is, of a larger diameter, is installed, another washer “goes down” to the nut, and only after that the bearing is fixed in the press. The screw consists of two parts: the stud itself and the upper nut, which is fixed “tightly” with a pair of bolts. It has a hole for a regular Phillips screwdriver, with which it will be convenient to hold the structure when pressing the bearings.
Let's figure out how to install washing machine bearings using a press in practice. For example, you need to hammer in rings 205 and 206. The algorithm of actions is as follows:
- Using your fingers, insert the inner and outer bearings into the “socket” so that they remain in the tank lid;
- prepare a press fitting and two washers of the appropriate diameter;
- place a ring for the 206 bearing on the bolt from the side of the fixed nut, insert the pin into the “socket”, the edge of the screw will “come out” on the other side;
- put a washer on the stud for the 205 bearing;
- take a removable nut, tighten it on the screw until it stops by hand;
- Fix the press from below with a screwdriver (inserting it into the hole on the “fixed” nut), tighten the top with a wrench until the bearings are completely pressed in;
- Unscrew the structure and pull out the press.
Using a professional press, it is possible to install both bearings at the same time.
You can try to assemble the structure yourself or buy a ready-made press developed by specialists, costing approximately 1,400 rubles (about 500 hryvnia or 18.5 US dollars). Even if you add shipping costs, the product will still pay for itself from the first repair.
Interesting:
- Replacing a bearing in a Zanussi washing machine
- How to change a bearing on a Samsung washing machine
- How to change the bearing in a Kaiser washing machine?
- How to change the bearing in a Vyatka-automatic washing machine?
- How to remove a stuck bearing from a drum...
- How to replace bearings in a Beko washing machine
Reader comments
- Share your opinion - leave a comment


