Models capable of copying and scanning documents
To photocopy one copy of a passport or scan an important document onto a computer, it is not at all necessary to run to the nearest kiosk with a sign that says “photocopy-printout”; it is enough to have a modern device on hand that can copy information. Today, quite a lot of models support this feature. The printer has long ceased to be a device with functionality limited only to printing. A modern MFP is not only a printer itself, but also a scanner and a copier.
Most copiers, including both inkjet and laser printers, can transfer scanned information to a computer. To find out whether the device has a scanner and copier, it is best to look at its characteristics. However, sometimes it is enough to superficially study the case. If there is a cover on the top of the device with a glass surface underneath, then this device has the functions described above. The printer, as a rule, is equipped only with a receiving tray for blank paper and prints it vertically upward, whereas in an MFP the printed product comes out from the end, below the scanner area.
Scanner
How to scan to a computer through the Windows Printer Wizard - MFP.
- Lift the lid
- If there are foreign bodies, wipe the scanner glass
- Place the sheet of text or photo face down
- Close the scanner cover
- Open the tab in the "Start" system and sequentially open: "Control Panel" - "Hardware and Sound" - "
- Right-click on the shortcut with the name of your MFP
- "Start Scan"
- Options: “Preview” - “Scan”
- The scanned document will appear in a pop-up window
- “Save”, or, if necessary, send the file for printing.
How to scan a document to a computer from a printer using special software.
- After installing the device data, open the program list
- Open the printer icon
- "Scan"
- Select format: black and white/color
- Select resolution
- Specify the folder to save the file
- “Preview” - “Scan” - “Save”
Here's how to scan a document to your computer from a printer.
How to make a copy of your passport
- Instructions on how to make a copy of your passport
- NECESSARILY! Remove all foreign objects (staples, stickers, covers, etc.)
- “Settings” - “Options” - “Grayscale” - “Resolution”
- Place the document (passport) closer to the edge, moving 3-5 cm from the edge
- Close the lid tightly
- "Print"
- Using the frame, select the desired area, leave empty fields outside the limit, you can scan documents
- Select the desired format for saving the document to your computer.
for official data format –tif/bmp)
How to scan documents, photos and images
- Check for stains in the photo, as well as foreign bodies
- Place photo face down
- Use a scanning program (for example scanitto pro)
- Specify the type of scanning in this software (black and white/color)
- Set the format to "Photo"
- Set the resolution to maximum
- DO NOT make changes to the settings during the process, or lift the lid!
- Scan documents and images with the “Save” printer
- Select a folder to save photos
- A very simple diagram: how to make a scan of a document, photo and images
- If the MFP application does not save the necessary scanned information, then press the key combination “Ctrl + S”
- Select a folder to place the scanned document in
- It is recommended to install programs that can easily help you save scans automatically (for example, Adobe Reader, DJVU Reaser")
- If after scanning the file turns out to have black fields, cut them off in the editor.
- Standard photo resolution: 150 dpi
- Permission for special certificates – 300
- jpg has a lower resolution than tif/bmp
optimize image parameters, change resolution (the higher it is, the larger the final file size)
A simple tip will help you figure out how to use the scanner.
Preparing for work
So, to use the scanner, you need to follow a few simple steps.
- The first thing you should do is check whether the scanner is connected to your computer (PC or laptop). A USB cable is most often not included with the device itself, so you should purchase it in advance.
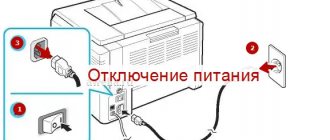
- Next, you need to turn on the device itself and press the power button on the case.
- After turning it on, you need to insert a disk (or flash drive) with software (drivers) into the drive. Typically, such a disk or flash drive is supplied in a packaging box and is part of the package.
- If for some reason there is no disk, then you need to go to the manufacturer’s website, enter the full name of your scanner in the search box, after which you will see a list of all drivers available for downloading to your computer. All you have to do is select the most current one (by release date), download and install it by double-clicking on the distribution with the .exe extension.
Once the driver installation process is completed, the device is recognized by your operating system. It can always be found in the appropriate section (printers and faxes, etc.). Typically, the name of the device is the full designation of its model, including an alphabetic and digital index. If desired, the name can be changed to any other through the system settings.
After the process of installing drivers and synchronizing the device with the system, you need to decide what software you will use. The Windows OS family offers programs built into them by default, but this is far from the only solution. In any case, it is important to understand that you cannot do without a specialized program that will be responsible for the scanning process.
We scan on Canon printers
To perform scanning, accordingly, the device must have a special unit responsible for creating an electronic copy of the document. Such blocks are placed in printers, MFPs, or they are separate models called scanners. Regardless of the type of device, the scanning principle is almost identical and can be performed in different ways. We suggest you familiarize yourself in detail with all the known ones.
Method 1: Button on the printer
Absolutely all models that have a scanner built into their functionality have the necessary button that starts this process. The user only needs to perform a number of actions to activate document copying:
- Connect the printer to your network and turn it on, then connect it to your computer.
- Lift the scanner lid and place the document side down.
Click on the assigned button to start scanning.
A notification should appear on the monitor screen indicating that the scanner is warming up and the lid should not be opened.
Afterwards, the folder where the finished document was saved will automatically open. By default, all files are placed in "Documents".
Now you can take out the document, place a new sheet in its place and create an electronic copy of it in exactly the same way. As you can see, there is nothing complicated in carrying out this operation.
Method 2: IJ Scan Utility
Canon has created a separate software specifically for its equipment called IJ Scan Utility. It performs the function of pre-setting scanning, which allows you to ultimately receive the required document in the desired format. IJ Scan Utility is installed together with the printer driver, from the included CD, or downloaded separately from the official website. After successful installation, you can proceed directly to copying.
- First of all, launch the IJ Scan Utility itself and select the active device.
Then proceed to configure additional settings.
In the window that appears, you can create settings for each type of scan. For example, a save location is selected, a default viewer is specified, and a name is selected for each file. We recommend that you familiarize yourself with all the advanced settings by examining the mentioned menu.
Next, all that remains is to select the scanning type based on your own needs.
We will look at performing this procedure using the ScanGear mode as an example, since there is a set of additional tools here. First, it is recommended to upload a scan for viewing by clicking on the appropriate button.
Next, the captured area and output format are edited and color rendition is corrected. Only after this the “Scan” button is pressed.
Wait for the scan copy to be received and the copying procedure will be completed successfully.
It is worth noting that lately Canon has not been particularly active in supporting the development of the utility discussed, so it is possible that you will not find it on the website with the software for the printer model or on the disk. In this case, we recommend using the other methods given in this article.
Method 3: Programs for scanning documents
Nowadays on the Internet there is a wide variety of software that performs various tasks. Among the endless list there are also applications that allow you to scan documents. Their advantage over standard tools is the availability of advanced functions, for example, instant sending of a copy for printing, which makes them popular among certain circles of users. Next, we want to show the process of working in such software using the example of Scanitto Pro.
- Download and install the program. After starting, the first thing to do is select the device from which you will scan in the future.
Set the image settings to suit your needs. The functionality of Scanitto Pro allows you to configure the mode, brightness, contrast, resolution, scale and format of the finished file.
Next, click on “View” or “Scan” to start this operation.
When finished, a photo will appear on the right. Double-click on it if you want to go to editing.
In the editor that opens, you can adjust the size, rotate the image, crop it, or immediately send it to print.
In addition to the software mentioned above, there are many more paid and free analogues that provide similar functionality with certain features. Therefore, each user can easily find the option that suits them. We advise you to familiarize yourself with additional material on this topic by clicking on the link below.
Method 4: Standard Windows tool
The Windows operating system has a default tool that allows you to quickly and easily scan documents from your printer. Its peculiarity lies in the presence of a preliminary configuration and sorting of ready-made files. The whole procedure looks like this:
How to Scan Documents to PC
When a scanner or printing device equipped with a scanning function is connected to a PC/laptop, the user can digitize the necessary documents and photographs. The scanning procedure is performed in one of the following ways:
- through the system application “Scanner Wizard”, which is available in the computer’s operating system;
- using third-party programs;
- through the standard Paint utility.
A prerequisite for successfully creating electronic copies of printed pages is that the driver for the connected scanning device is installed on your computer. Before starting the process, you must check the glass surface of the device under the lid. If dust, small debris or stains are detected, the defects should be corrected. After turning on the scanner, you need to make sure that it is active, place the media with the printed side facing the glass and lower the lid.
When the necessary preparation has been completed, you can use the chosen method of performing the operation. Scanning using the Wizard is the basic option.
Scanner Wizard window
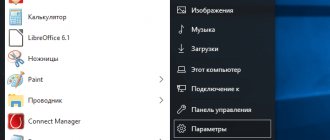
- Click “Start” on the computer screen.
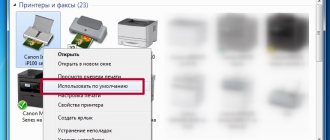
- Find the Fax and Scan utility in the list of standard Windows 10 tools and run it. In Windows 7 and 8, you should search for the required utility by going to the “Start” menu tab → “Control Panel” → “Hardware and Sound” → “Devices and Printers.” Next, you should activate the shortcut for the connected MFP/scanner and launch the “Scan a document or image” wizard.
- In the wizard window that opens, you need to configure the operation parameters: black and white, color scanning, brightness, resolution, path to save the result, etc. Here in the preview you can see what the scanned document will look like.
- Activate the process by clicking on the “Scan” button, and upon completion of scanning, save the result to the PC memory (the “Save” button).
Completing the Wizard
Using third party scanning software
Third-party scanning software is of interest to users due to its expanded functionality: text recognition, conversion from one format to another, the ability to send an electronic image by mail, fax, etc. The use of any such application implies the fact that it is installed on the computer. To launch the program, use a shortcut located on the desktop or in the Start menu.
Before starting to use third-party software, it is recommended that you read the user manual.
After launching, the necessary settings are made in the program window that opens, after which you can start scanning and also use other functionality.
- ScanLite app. The product has a simple, concise interface. User settings are minimal: you need to specify the file name and folder to save the scan result. The scanning operation is started when the corresponding button is pressed.
- ABBYY FineReader. A program that allows you to transfer a printed document to an electronic format and recognize the text for subsequent editing. The software is paid, there is an introductory test period.
ABBYY FineReader features
- WinScan2PDF. A free program compatible with Windows OS that allows you to save scanned documents to a file exclusively in PDF format. The software is easy to use.
- RiDoc. Application with support for a large number of formats. Suitable for users who need to save electronic images of documents in various formats.
- Xerox Easy Printer Manager. A proprietary application for Xerox printing equipment. In addition to the digitizing function, Easy Printer Manager provides users with tools to improve image quality.
Scanning with Paint
The Paint program is included in the standard set of Windows tools. This application is equipped with scanning support. The user only needs to use the Start menu to find the application in the list of programs and launch it. In the window that opens, open the “File” tab, where you select the “From a scanner or camera” submenu item. After this, select the settings necessary for the scanning process, and also determine the file format for saving the image. The digitization process is initiated by pressing the appropriate button.
Scan to Paint
There are many ways to obtain an electronic image of a printed document or photographs. The user has the right to choose the option that best suits his needs.
How to scan and photocopy using a printer correctly
You can see a printer in almost every home.
This device has become an integral part of our lives. Every day a person needs to print out a task, photocopy documents on a printer, etc. Today, there are many new generation devices on the market called multifunctional devices (MFPs). They not only speed up work, but also save space and money. How to scan a photo to a computer?
Previously, before the advent of these devices, people had to purchase several devices in order to separately perform the functions of copier, scan and print. This took a lot of time. Now we can freely and in a short period of time, from one device, photocopy or photocopy a document.
Where can I buy an MFP?
MFPs can be purchased in special stores specializing in technology, such as Eldorado, M.Video, etc. Or in online stores, for example Ozon.
List of printer-scanner models:
- Sharp
- Samsung
- Ricoh
- Panasonic
- Kyocera
- Xerox
- HP
- Epson
- Canon
- Brother
Of the presented manufacturers, MFP produces models of different price categories. Mid- and high-end products have a sufficient list of features.
In order to determine the type of printer, you need to look at the device body. If the top cover is equipped with special glass, then this device is an MFP. If it is equipped only with a paper tray, it is usually a printer.
Learning to use the scanner yourself
What is a scan and what does a copy mean?
Scanning (scanning) is a process that converts paper documents into electronic form.
Scanning, photocopying, printing - all this speeds up work in office work and more.
Photocopying is the exact reproduction of information (copying) and the production of duplicates on paper.
How to use the scanner?
2 options for scanning a document to a computer:
- Editable
- Not editable
Editable document - a scan of the document is loaded through a recognizer (special software)
A non-editable document is a scan of a document that turns any text document into a non-editable image.
Preparing for work
Preparation starts with the scanner:
- Check the connection of the scanner to the computer.
- Plug in the device and press the power button
- After turning on, insert a disk (flash drive) to install drivers. Often such programs come bundled with the printer.
- If for some reason the disk is not included in the kit, you need to go to the manufacturer’s website and download drivers from the site.
After installing the drivers, decide what software you will work with. It will be impossible to scan documents without a scanning program.
Popular programs:
To check the capabilities of the scanner in the interface of any of the above programs, click - “File” - “Import”.
In the last branch you should see the name of the device, then it works properly.
Scanner
How to scan to a computer through the Windows Printer Wizard - MFP.
- Lift the lid
- If there are foreign bodies, wipe the scanner glass
- Place the sheet of text or photo face down
- Close the scanner cover
- Open the tab in the “Start” system and sequentially open: “Control Panel” - “Hardware and Sound” - “Devices and Printers”
- Right-click on the shortcut with the name of your MFP
- "Start Scan"
- Options: “Preview” - “Scan”
- The scanned document will appear in a pop-up window
- “Save”, or, if necessary, send the file for printing.
How to scan a document to a computer from a printer using special software.
- After installing the device data, open the program list
- Open the printer icon
- "Scan"
- Select format: black and white/color
- Select resolution
- Specify the folder to save the file
- “Preview” - “Scan” - “Save”
Here's how to scan a document to your computer from a printer.
How to make a copy of your passport
- Instructions on how to make a copy of your passport
- NECESSARILY! Remove all foreign objects (staples, stickers, covers, etc.)
- “Settings” - “Options” - “Grayscale” - “Resolution”
- Place the document face down
- Place the document (passport) closer to the edge, moving 3-5 cm from the edge
- Close the lid tightly
- "Print"
- Using the frame, select the desired area, leave empty fields outside the limit, you can scan documents
- Select the desired format for saving the document to your computer.
for official data format –tif/bmp)
How to scan documents, photos and images
- Check for stains in the photo, as well as foreign bodies
- Place photo face down
- Use a scanning program (for example scanitto pro)
- Specify the type of scanning in this software (black and white/color)
- Set the format to "Photo"
- Set the resolution to maximum
- DO NOT make changes to the settings during the process, or lift the lid!
- Scan documents and images with the “Save” printer
- Select a folder to save photos
- A very simple diagram: how to make a scan of a document, photo and images
Save scanned documents.
- If the MFP application does not save the necessary scanned information, then press the key combination “Ctrl + S”
- Select a folder to place the scanned document in
- It is recommended to install programs that can easily help you save scans automatically (for example, Adobe Reader, DJVU Reaser")
- If after scanning the file turns out to have black fields, cut them off in the editor.
- Standard photo resolution: 150 dpi
- Permission for special certificates – 300
- jpg has a lower resolution than tif/bmp
optimize image parameters, change resolution (the higher it is, the larger the final file size)
A simple tip will help you figure out how to use the scanner.
How to scan with an HP printer?
HP - almost any person can find equipment from this brand. Easy to use, simple settings, convenient functionality. Let's move on to the mini-instructions on how to scan on an HP printer.
Method 1: Program from the HP package
- Connect the printer either via WI-FI or USB cable.
- Open the top cover
- Place the document face down
- Go to the “HP Deskjet” (“ScanJet”) program
- If the tool is not found, then reinstall it or load it through the disk that you provided (you can leave the settings as standard)
- "Save"
Simple steps to answer the question: How to scan on an HP printer.
Method 2: How to scan with an HP printer - Button on the scanner
- Repeat all the points above.
- Find the “Scan” or “Scan” button on the printer panel
- "Save"
(You can use analogues of the program if the license disk is lost).
How does the photocopying process work on a printer?
Photocopying is the exact reproduction of information (copying) and the production of duplicates on paper.
How to make a photocopy of documents?
- You will need an MFP
- Paper
- Refilling the multifunction printer
- Load paper into the input tray
- Clean the glass if necessary
- Place the document face down
- Align with the border of the guides (lines around the glass)
- Close the copier/printer cover
- Select print color from the control panel
- If you need many copies of the same document, click the Start button several times.
- (At one time, depending on the device, you can make from 1 to 20 copies at a time.)
- To change the paper format, press the “paper” button
What to do if the device does not scan?
- "Start"
- "Control Panel"
- "Administration
- "Device Manager"
- Find scanner name
- "Image Processing Devices"
- Click on + - this is how you will find the model name
- download the driver for scanning.
- If everything is in working order, but scanning does not work, then download or upload the program for your MFP.
You also need to check the operating condition of the device, namely:
- Power supply unit (wire)
- Visible damage
- Mains voltage
- Grounding electrical wiring
- Restore and check settings
Scan Options in Text or Photo Mode
Despite the fact that drivers from all manufacturers are different and do not have one universal scheme, there are a number of basic settings that are present in all devices without exception.
The first thing worth mentioning is DPI. When working with text, this item should not have a value below 300 (the same from a printer or MFP). The higher it is, the more accurate the picture will be. With a high DPI value, scanning will take a little longer, but the text is more likely to be readable, and you won’t have to resort to recognizing it. The optimal value is 300-400 DPI.
The second thing you should pay attention to is color saturation (chroma). There are only three options here: the option of scanning black and white text, gray and color (magazines, documents, posters, etc.). The higher the color, the longer it will take to scan.
In photo mode, the most important thing is to avoid blurring of the picture, and also to make sure that all edges lie flat on the surface. Color and tone are set in the settings options in preview mode before you start the scanning process from the printer.
It should be noted that for photo digitization, not only the scanning process itself is important, but also the process of post-processing of the finished material using specialized programs.
When scanning photos, it is advisable to use maximum clarity settings; this will minimize possible inaccuracies during the process itself, although it will take 10-15 seconds longer.
Making a photocopy on a printer
One of the most common office tasks is photocopying documents. You need to copy documents (passport, driver's license, etc.), important papers, books, notes. Learning to copy is quite simple; to do this, you need to adhere to the following algorithm of actions.
- Make sure the device is connected to the network.
- Check printer drivers.
- Check the condition of the documents for dirt, wrinkles, wear and fingerprints.
- Open the top cover of the device.
- Carefully place the document there with the side to be copied down. Make sure that the paper lies exactly along the marks on the device.
- Press the “start” button (on a printer and copier) or “copy”, if it is an MFP, and then “start”. Take the finished copies from the receiving tray, remove the source from the scanning compartment.
Important: the number of copies is adjusted in hardware using buttons (most often in the form of arrows).
The printer also has a number of additional features. For example, you can make several copies of pages, fitting them onto one sheet of paper. The easiest way to learn how to make a photocopy of a passport on one page is from the following video:
We scan on Canon printers
To perform scanning, accordingly, the device must have a special unit responsible for creating an electronic copy of the document. Such blocks are placed in printers, MFPs, or they are separate models called scanners. Regardless of the type of device, the scanning principle is almost identical and can be performed in different ways. We suggest you familiarize yourself in detail with all the known ones.
Method 1: Button on the printer
Absolutely all models that have a scanner built into their functionality have the necessary button that starts this process. The user only needs to perform a number of actions to activate document copying:
- Connect the printer to your network and turn it on, then connect it to your computer.
- Lift the scanner lid and place the document side down.
Click on the assigned button to start scanning.
A notification should appear on the monitor screen indicating that the scanner is warming up and the lid should not be opened.
Afterwards, the folder where the finished document was saved will automatically open. By default, all files are placed in "Documents".
Now you can take out the document, place a new sheet in its place and create an electronic copy of it in exactly the same way. As you can see, there is nothing complicated in carrying out this operation.
Method 2: IJ Scan Utility
Canon has created a separate software specifically for its equipment called IJ Scan Utility. It performs the function of pre-setting scanning, which allows you to ultimately receive the required document in the desired format. IJ Scan Utility is installed together with the printer driver, from the included CD, or downloaded separately from the official website. After successful installation, you can proceed directly to copying.
- First of all, launch the IJ Scan Utility itself and select the active device.
Then proceed to configure additional settings.
In the window that appears, you can create settings for each type of scan. For example, a save location is selected, a default viewer is specified, and a name is selected for each file. We recommend that you familiarize yourself with all the advanced settings by examining the mentioned menu.
Next, all that remains is to select the scanning type based on your own needs.
We will look at performing this procedure using the ScanGear mode as an example, since there is a set of additional tools here. First, it is recommended to upload a scan for viewing by clicking on the appropriate button.
Next, the captured area and output format are edited and color rendition is corrected. Only after this the “Scan” button is pressed.
Wait for the scan copy to be received and the copying procedure will be completed successfully.
It is worth noting that lately Canon has not been particularly active in supporting the development of the utility discussed, so it is possible that you will not find it on the website with the software for the printer model or on the disk. In this case, we recommend using the other methods given in this article.
Method 3: Programs for scanning documents
Nowadays on the Internet there is a wide variety of software that performs various tasks. Among the endless list there are also applications that allow you to scan documents. Their advantage over standard tools is the availability of advanced functions, for example, instant sending of a copy for printing, which makes them popular among certain circles of users. Next, we want to show the process of working in such software using the example of Scanitto Pro.
- Download and install the program. After starting, the first thing to do is select the device from which you will scan in the future.
What to do if the device does not scan
There are not many reasons why this happens.
- The program is not responding. Everything is simple here, reboot the device and wait for the system to boot. If the task is repeated, then turn it off for at least 60 seconds, then turn it on.
- Error. If there is an error in the operation of your scanner, you should eliminate it by first learning its code. In order to find out the error code, it is necessary to carry out diagnostics, which are carried out differently for each model. It is important to remember that the scanner can operate in service mode, however, such an MFP will not be able to scan and photoxerize, at least until the error is resolved. For Canon brand scanners, to activate this mode, you need to press the reset button five times.
- Your device is currently performing another assigned task. The MFP may be waiting for a copy queued to print just when you need to scan something. To do this, simply complete the current task and start a new one.
- The scanner driver has crashed. If the above methods do not help, try reinstalling the scanner driver, this may be the problem.
- Cord connection problem. Unplug the PC and scanner and then plug it back in, this may solve the problem in some cases.
- The common device driver (for both the printer and scanner) may have become corrupted. In this case, you should reinstall all software. The easiest way to find it is on the manufacturer's website.
- Resetting the settings. If none of the above helps, you can try to revive the device by resetting the settings to factory settings. This is done in the OS menu, by clicking on the corresponding “reset settings” item, or by hardware (see instructions).
Before taking the device to the service, try connecting it to another PC, installing drivers and scanning something. If this does not work, then the breakdown may be serious, and it is difficult to fix it with improvised means.
How does the photocopying process work on a printer?
Photocopying is the exact reproduction of information (copying) and the production of duplicates on paper.
How to make a photocopy of documents?
- You will need an MFP
- Paper
- Refilling the multifunction printer
- Load paper into the input tray
- Clean the glass if necessary
- Place the document face down
- Align with the border of the guides (lines around the glass)
- Close the copier/printer cover
- Select print color from the control panel
- If you need many copies of the same document, click the Start button several times.
- (At one time, depending on the device, you can make from 1 to 20 copies at a time.)
- To change the paper format, press the “paper” button
Techniques for operating scanners and MFPs
It is important to remember that a scanner costs money, and not little at that, so in order for it to serve you for as long as possible, you need to adhere to some rules. Where to start? Be as careful as possible when working with the glass coating - this is the most sensitive element of the scanner. If there are abrasions, scratches and dirt on it, this will certainly affect the quality of the digitized material. Periodically wipe the glass from dust with a soft material (for example, synthetic suede).
- Whenever you are going to scan a document, make sure that the piece of paper is clean and free of dirt and dust. Under no circumstances should you scan dirty objects or use an abrasive.
- Even if your device does not scan, do not rush to fix the problem yourself.
- Do not press or press on the glass surface.
- Never try to clean glass with powder or a lot of moisture, the former may scratch the surface and the latter may wet the electrics.
It is best to prepare the document to be scanned in advance. For example, if a document is not preserved in very good condition, then at high resolution all the flaws will be visible on it. Review the status of the document before setting the required resolution. Also make sure that there are no pieces of adhesive tape or other fastening materials (staples, etc.) on the piece of paper. If there are obvious fingerprints on the paper, it is best to remove them with an eraser or flannel cloth.
Learning to competently use all the capabilities of scanning and photocopying is not so difficult; you just need to show persistence and patience, and then any technique will obey you. If you are unsure, it may be best to stick to simple instructions at first until you feel comfortable using the scanner and photocopy yourself.