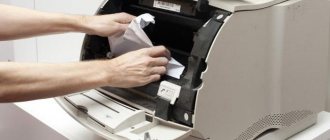
Situations often arise when you need to stop printing sent to the printer, for example, due to an erroneously selected document, poor-quality printing, the need to format text, or make other changes. To avoid wasting sheets and ink, the first step is to remove the paper from the tray, after which you will need to cancel the job.
In addition, when printing several documents, especially when they are large, the process may freeze, after which the printer no longer responds to subsequent commands to print the document. You can correct the situation by clearing the print queue. Manipulations are performed using various methods; many printer models have a job cancel button on the body, but if the equipment does not require its presence, then it is not difficult to cope with the task using a computer using operating system software. For example, if there is a printer icon in the system tray, you can clear the print queue by opening the properties window and selecting the appropriate option. If there is no shortcut in the tray, you can use other effective methods.
Viewing the queue through the “Control Panel”
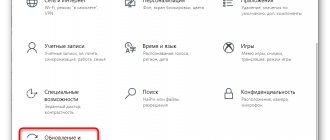
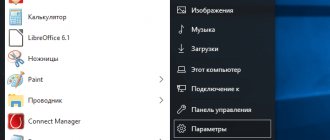
One of the options for clearing the print queue involves using the Control Panel; the method is available for all versions of Windows and is suitable for different printer models. If on Windows 7 there are no problems with going to the “Control Panel,” then in the case of Windows 10, many users are puzzled by finding it. The fact is that Microsoft decided to replace the familiar “Control Panel” with a more advanced “Settings” service, but still left the opportunity to use the traditional tool, although it was hidden. You can go to the window through the “Start” context menu, as well as through “Search”, entering the name of the service or using the “Run” console (Win + R – control command).
How to cancel printing files on a printer using the Control Panel:
- Go to the service, open the “Devices and Printers” section.
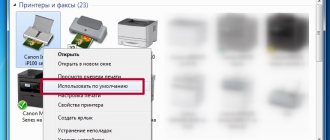
- Select the printer you are using, double-click on it to open a window with information (the same window will also open when you right-click and select the “View print queue” option).
- There will be a list of files that were scheduled for printing. Select the object that you want to remove from the queue and press RMB, select “Cancel” from the context menu or, having selected the object, press the Del key.
- If you need to reset all items in the queue, click “Printer” on the top panel of the window and then “Clear print queue”.
After the manipulations have been completed, the list should be cleared and new tasks can be performed. Here, in the printer menu, there is also the “Pause Printing” option, which is relevant when the printer jams the paper and does not stop on its own.
Delete queue via printer properties
- Go to Start.
- Open the "Devices and Printers" section
- Select a printing printer from the list.
- Right-click on the name. To view all documents sent for printing, select the appropriate option from the drop-down list.
To reset the entire list of printed materials, click on “Printer” - “Clear print queue”.
If many documents have been sent to the queue and you need to cancel printing of a specific one, then select it and use the context menu to cancel.
In Windows 10, the feature can be used in the Settings window.
Rebooting a system process
This method is great if you need to cancel a task as quickly as possible, but usually they resort to it when the previous option did not work. How to clear the entire printer print queue:
- Open the “Run” console (press Win+R or use another method convenient for you, for example, through the “Start” context menu).
- Type the command services.msc and press the enter key.
- The Services window will open. In the list of services, look for “Print Manager”, right-click and select the “Restart” option from the context menu.
- There is no need to stop the service, we just restart it.
The method copes with the task quite quickly and effectively. As a result of the actions performed, the printing task is removed, and the list of documents will be completely cleared. You won't be able to select specific files and just cancel their printing, so this fact should be taken into account when using this method.
Another solution to the problem involves stopping the “Print Manager” (RMB – “Stop”), then clearing the “Printers” folder and restarting the service.
Reboot the joint venture
This method involves working with computer services. To cancel printing, it will be necessary to reboot the system process that is responsible for implementing the printing procedure on the current operating axis. To successfully complete the operation, follow these instructions:
- Using a combination of Win and R, launch a dialog box to work with system commands.
- In the line, enter the phrase services.msc and confirm your actions by clicking the “OK” button.
- After this the program will open. All local services running at a given time will be displayed here.
- Among this entire list, you need to find a print manager.
- Activate it and start the process of restarting the service in the context menu by clicking on the corresponding button.
This method of how to cancel printing on a printer should resolve the problem. When you restart the print spooler, all prepared files will be completely removed from the queue.
Deleting a temporary folder
When a printer is asked to print documents, the system creates temporary files containing the information required to complete the printing. So, if you manually clean the folder where this data is stored, you will be able to reset the task.
Before performing the actions, it is better to stop the “Print Manager” (see above) and start the service again after cleaning.
How to manually stop printing on a printer:
- We go along the path C:\Windows\System32\Spool\Printers (if “C:\” in your case is not the system drive, indicate the letter of the partition on which the OS is installed).
- We delete the contents of the Printers directory (not the directory itself), which will ensure that printing on the printer is canceled.
When using this method, it is worth considering that all files will disappear from the queue, so if we are talking, for example, about an office and the use of equipment by several employees, we take this point into account.
Command line
In fact, the same process can be significantly simplified by carrying out all the manipulations not manually, but through the command line, for which you must work on the computer under an administrator account.
We perform the task as follows:
- We launch the command line with extended rights, using any method convenient for you, for example, through the “Start” context menu (right-click and select command line with administrator rights).
- In the terminal, enter the command net stop spooler and press the enter key to stop the Print Spooler.
- We enter two more commands, after each of which we press Enter:
- del %systemroot%\system32\spool\printers\*.shd \F \S \Q
- del %systemroot%\system32\spool\printers\*.spl \F \S \Q
- These commands clean up the Printers folder, which contains data from documents sent for printing (".shd" and ".spl" files), as a result of which it is possible to remove the task assigned to the equipment.
- Now we start the Print Spooler service by entering the command net start spooler.
How to properly cancel printing on printers
Many novice users of office equipment often look for answers to the question of how to cancel printing on a printer and how to clear the printer’s print queue.
You can solve the problem of canceling the printing process very simply - to do this, find the “O” button and click on it. If it’s not there, then just take it and pull out all the paper with which you filled the special tray.
Alternatively, you can simply restart both your PC and printer. Another solution to this problem is to use an option such as clearing the print queue.
First way
- So, to answer the question of how to stop printing on a printer, first open the section called “Hardware and Sound” through the “Start” menu. Having gone into it, find a submenu with devices and printers there, then click on it.
- Find the problematic device in the list of presented devices and right-click on it, then select “View print queues.”
- In the new window, select the menu called “Printer” and click on the item that involves clearing the print queue. After this action, all documents from the print queue in the printer will have to be deleted, including those that have already been printed.
Second way
If the question of how to cancel printer printing is still relevant for you, then use rebooting the system process that is responsible for printing in the OS installed on your computer/laptop.
- To clear the document print queue in this way, press the Win+R key combination to open a window designed for entering all kinds of system commands.
- Enter the command “services.msc” in the only field of this line and press Enter or simply “OK”.
- In the new window, among the large list of services, find the one called Print Manager. Once you find it, click on “Restart service”.
This approach to solving the problem as a whole should help remove printable documents that are in the queue.
What should I do if the print queue is not cleared?
If the print queue is not cleared, then most likely the cause of the problem is that the documents are blocked by the device driver or operating system. Try clearing them with a normal reboot of both devices, i.e. and PCs and office equipment.
If this does not help, then go to the “Printers” folder at “C:windowssystem32spool” and delete all its contents manually or use the following recommendation
But keep in mind that all deleted information about the print queue will be irretrievably lost - this must be taken into account when working in an office where several printers are connected to one PC
Force cleanup via command line
To force clear the print queue using the command line, first run it as an administrator. Then enter the command “net stop spooler”, which is used to stop the service responsible for printing documents.
Then write one by one
- "del %systemroot%system32spoolprinters*.shd /F /S /Q"
- "del %systemroot%system32spoolprinters*.spl /F /S /Q"
These two commands are designed to delete all files with the extension .snd and .spl as well as the folder called “Printers”. At the end you should enter the system command “net start spooler”. Thanks to it, the print service will be restarted in its previous mode of operation.
But in order not to enter all these commands one by one into a line specially designed for them, it is better to create a BAT file.
To do this, you will need to open any text editor with a minimum set of functions, for example, the usual Notepad, and immediately save the file, setting the BAT extension for it. Then enter all the above commands into it line by line and save again.
But if this script, which allows you to clear the print queue, suddenly does not work, then you need to check the presence of the “...spoolPrinters” directory in the device settings. To do this, find the required office equipment in the “Devices and Printers” section and open its properties.
There, go to the tab with additional parameters and pay attention to the path. If the path is specified differently, then in the script you will have to correct it by editing the BAT file - to do this, open it using the same Notepad
Thus, there are several effective methods for solving canceling printing on a printer and clearing its queue. In the future, try not to overload your device with a large number of tasks, otherwise you will again encounter the problem of printing cancellation.
How to correctly cancel printing on printers Link to main publication
Bat file
This problem can occur systematically, then the user has to constantly intervene in the process in order to remove documents from the queue. In such a situation, it is worth checking for updates to hardware drivers, updating if new versions are available, or reinstalling using special software or manually. Incorrect drivers often become the culprit of the problem when the printer flatly refuses to print.
A temporary solution to quickly clear the print queue is to create a file with the “.bat” extension. This is very easy to do:
- Create a text file.
- It should contain the four commands already familiar to us from the previous solution - to stop the “Print Manager”, delete the “.shd” and “.spl” files from the Printers directory and activate the service.
- Save. When you run (as administrator) the created Bat file, the commands that were used in the previous solution to the problem will be executed.
For even greater convenience, create a shortcut on your desktop and run it every time you need to stop printing documents.
