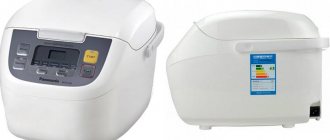
Distinctive features of Mulinex yogurt makers
The Mulinex company is one of the leading manufacturers of kitchen appliances, including yogurt makers, which are distinguished by their high quality and wide range of capabilities. The company presents several models to customers, which, in general, are practically no different from each other, have a similar set of functions and a similar technology for preparing yogurt. Devices may differ in appearance - design, body color, location of the control panel, etc., as well as in capacity and number of jars in which ingredients for making fermented milk products are placed. All models of yogurt makers fit perfectly into the kitchen interior, decorated in both classic and modern styles.
Each Moulinex yogurt maker is equipped with a digital timer that automatically regulates the cooking time of the product. In addition, the standard package includes instructions for using the Moulinex yogurt maker, written in several of the most popular languages, and a recipe book, from which you can obtain detailed information about the technology for preparing yogurt, the required products and their quantities, etc.
Features of Moulinex yogurt makers
Making homemade yogurt involves preparing the necessary mixture, consisting of milk and a special starter, and loading it into a device to carry out the fermentation process. The quality of milk and the shelf life of bacteria directly affect the taste and benefits of the finished product, which has a positive effect on the functioning of the digestive system and helps strengthen the immune system.
The operating principle of various devices is the same, but they may differ:
- design;
- volume of containers;
- the presence of an electronic or mechanical timer;
- presence of a display;
- additional functions that increase comfort: sound signal, markings on containers.
Modern models, for example, Moulinex YG 230 , have LCD display with an electronic timer; markings on the container lids will allow you to monitor the freshness of the product. The auto shut-off function works, and on the display you can control the yogurt preparation time. The set includes 7 glass containers with a volume of 140 ml. The yogurt maker comes with instructions for use with basic recipes for making yogurt.
DJC series yogurt maker without timer
In simpler models, from the Moulinex DJC , there is no electronic timer, but it is possible to mark the lids on the jars; the cooking time mode includes 3 intervals: 8, 10 and 12 hours. After the cycle is completed, a sound signal sounds. Yogurt containers are made of glass with a volume of 150 ml. Thanks to the successful design and optimal dimensions, other containers are also suitable.
It is worth noting that the Moulinex yogurt maker from any model range has a stylish design and guaranteed quality. It was the Mulinex company that was one of the first suppliers of this kitchen appliance to the Russian market, and took a stable position on it.
How to make yogurt
The operating principle of all yogurt makers is that the device maintains the required temperature for a certain time, which is required for the fermented milk bacteria to react and turn into a delicious, healthy product. Having loaded the ingredients into the jars and covered them with lids, all that remains is to turn on the device and set the timer. During the entire cooking time, there is no need to open the yogurt maker and check if everything is in order - the well-functioning mechanism works flawlessly and allows you to forget about the cooking process until it is completed.
Of the products needed to make yogurt, you only need milk and starter - special fermented milk bacteria, thanks to which the fermentation process will begin. To obtain the most delicious homemade yogurt, it is recommended to take homemade milk with a high percentage of fat content, after boiling it. If you use store-bought milk that has been pasteurized, then it is not necessary to boil it, you just need to heat it to the required temperature.
As for the choice of sourdough, dry sourdough is the most preferable, a wide selection of which is available in pharmacies and supermarkets. Such starter cultures are specially designed for making yoghurt at home and contain an impressive bacterial composition. It should be remembered that a variety of bacteria will contribute to obtaining the most delicious and healthy yogurt.
It is noteworthy that next time the prepared yogurt can serve as a starter in itself - just add a couple of spoons of the finished product to the milk and place it in the yogurt maker. The exception is baby food - a secondary product is not suitable for feeding babies under 1 year of age, since the bacteria content in it increases several times compared to the primary version.
How the starter works
We can say that the starter in the recipe for making yogurt in a yogurt maker acts similarly to that used in the preparation of kvass, where each subsequent portion is made on the basis of the previous one.
Important: mother starter should not be stored in the refrigerator for more than 2 days.
The powder is mixed with milk in the proportions specified in the instructions and a separate container is used for these purposes, or the ingredients are immediately mixed in container jars.
We offer you a video that discusses and characterizes different types of starter cultures:
Easy vanilla yogurt recipe
| Ingredients | Quantity |
| pasteurized milk - | 1 l |
| vanilla pod - | 1 PC |
| dry sourdough - | 2-3 tablespoons |
| Cooking time: 360 minutes | Calorie content per 100 grams: 68 Kcal |
Vanilla yogurt is rightfully considered the simplest and most delicious option for homemade dessert.
The fact is that pieces of berries and fruits, sugar and other additives are used after the ripening process is completed.
However, this statement does not apply to vanilla pods, which can be placed with milk and starter directly into the unit.
If you do not want to make this dessert with natural vanilla flavoring, then use 1 tablespoon of vanilla extract.
The only caveat is that vanilla powder is added to the finished product.
And now we will prepare a recipe for natural yogurt in a yogurt maker.
Cut the pod lengthwise and put it in a saucepan where the milk will boil.
After it has undergone heat treatment, the vanilla can be removed from the composition, cooled a little and cut into as many pieces as we have jars for dessert.
In a separate bowl, mix the starter powder and milk, pour the mixture into jars.
At the end of the process, place a prepared piece of vanilla in the middle of each portion.
We close the unit, set the necessary parameters and wait for the allotted time (depending on the model).
Then put the container in the refrigerator for 4 hours.
This time is quite enough for the tasty and healthy dessert to take its final shape.
Instructions for use
The process of making yogurt in a yogurt maker is extremely simple.
- You need to take milk heated to 40 degrees (no more and no less, otherwise yogurt will not work).
- The starter is added to the milk and mixed thoroughly until the lumps disappear.
- The mixture is poured into jars, which must first be doused with boiling water to eliminate foreign bacteria. After this, the jars are closed with lids and placed in a yogurt maker for a period of 8 to 12 hours.
- After the time has passed, the yogurt maker will signal the end of the cooking process - the jars can be removed and immediately placed in the refrigerator for 6-24 hours to stop the growth of bacteria and allow the product to thicken.
An unusual dessert for coffee lovers in the Mulinex yogurt maker
This dish is prepared with the addition of your favorite instant coffee.
The methods for preparing the unit, as well as the proportions of using the starter, remain identical to the previous recommendations.
To make a coffee yogurt recipe in the Mulinex yogurt maker, you will need the following components:
- granulated sugar – 100 g;
- instant coffee – 4 tbsp. spoons;
- medium fat milk – 1 liter.
- ready-made dry starter (3 tablespoons) or 1 serving of homemade yogurt prepared the day before.
According to tradition, milk is heated over low heat and brought to a boil.
Add sugar and coffee to the product, then, already cooled to 40 degrees, enrich it with sourdough and lightly beat with a mixer.
Our coffee dessert will then be prepared using a miracle machine.
Pour into portions and set the intended mode.
After the time has passed, cool the dish, similar to previous recipes.
Now look at a very easy and simple version of the treat for the Mulinex yogurt maker:
Important nuances when preparing
Ideally, the finished yogurt should not spill out of the jar, even if it is turned upside down . If the product turns out to be liquid, it means that it did not spend enough time in the yogurt maker; if it is too thick, with separated whey, it means that the cooking process was delayed.
At this stage, you can add any fruit, jam, preserves, honey to the yogurt. However, nothing prevents you from making yogurt sweet right away by adding the necessary additives before placing the jars in the yogurt maker.
Natural yogurt can be stored in the refrigerator for no more than 5 days, however, if the product is consumed by children under 1 year old, it is not recommended to store it for longer than 2 days.
In order not to forget the date of preparation of yogurt, the Mulinex company has equipped the lids of the jars with expiration date markers . The mechanism is extremely simple - you just need to turn the digital indicators in search of the required symbol.
Classic yogurt at home: what you need and how to make it
The classic version of a fermented milk product can be made in absolutely any yogurt maker, using a number of required components and without adding sugar or sugar syrup.
How to make homemade yogurt: necessary ingredients
- A liter of selected milk with a fat content of at least 3.5%.
- One package of dry or liquid starter.
Step-by-step instructions for classic sour yogurt
- Pour the milk into a saucepan or ladle, put it on the stove, and heat it to the desired temperature, most often room temperature.
- Add one small spoon of warm milk to the bottle with the starter and shake well. If you are using a component in bags, then pour the fermenting powder into a small container, add a spoonful of milk, and beat.
- Pour the prepared fermenting agent into a saucepan or ladle with milk. Mix well.
- Carefully pour the resulting mixture into a container or containers.
- Place the jars or bowl on the tray of the yogurt maker and close the device with the lid.
- Set the required amount of time on the timer (from 6 to 10 hours) or set an alarm.
- Leave the yogurt to cook.
- As soon as the time expires, remove the bowl or jars with the finished fermented milk from the household appliance. Cool by covering with lids. And then put it in the refrigerator for 2.5-4 hours.
When using pharmaceutical preparations for fermentation, they must be diluted with 2-3 teaspoons of warm milk and left for 10-12 hours inside the yogurt maker turned on at minimum power. Then you will need to cool the existing mixture and put it in the refrigerator for another 1.5-2 hours. Only then use it to make yogurt yourself.
Several original recipes
In order to prepare yogurt in the Mulinex yogurt maker, you need to familiarize yourself with the attached recipe book. Having tried already proven recipes, you can start experimenting.
Recipe 1
To prepare yogurt you will need 2 liters of milk and 0.5 g of dry starter. Pour homemade milk into a saucepan and boil, cool to 40 degrees, add bacteria, stir. Pour the mixture into jars and place in a yogurt maker for 6 hours. To cool the finished product and obtain the final consistency, place the jars in the refrigerator for 2 hours. Before use, add fruits or berries to taste - fresh or pureed.
Recipe 2
You will need 2 tbsp. l. with a slide of milk powder, 190 grams of vanilla yogurt, 1 liter of skim milk, 3 tsp. vanilla extract, sugar (at the rate of 1 tsp per 1 jar of yogurt). Mix milk powder and yoghurt, add 150 ml of cold milk to the mixture, then add sugar and vanilla extract. Heat the remaining milk to 40 degrees and add to the mixture. Pour into jars and place in a yogurt maker for 8 hours. After turning off the device, place the jars of prepared yogurt in the refrigerator for at least 6 hours.
Why yogurt may not work out
There may be cases when yogurt does not come out in the Moulinex yogurt maker, i.e. The cooking process is completed, but the product did not turn out. This is not necessarily due to technical damage to the device. Yogurt may not thicken for the following reasons.
- Skim milk was used without adding milk powder. To make a product, you can add 1 jar of ready-made yogurt instead of the dry mixture.
- The sourdough starter has expired.
- The milk was very cold, the room temperature was quite low, and as a result there was not enough time for the fermentation process. In this case, you can restart the process.
- When adding raw, unprocessed fruit. They produce acid, which interferes with the fermentation process.
The Moulinex technique fully copes with the task; it is important to monitor the quality of the ingredients used to prepare the fermented milk product. Recipes for a yogurt maker, if they are not included in the instructions, can be found on the package of the starter.
