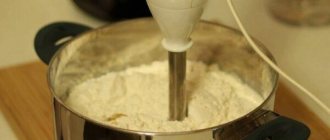
A blender is a common small household appliance that almost every modern housewife has in the kitchen. With its help, you can easily grind fruits and vegetables into puree, grind minced meat or beat fluffy biscuit dough. Unfortunately, over time, all equipment breaks down and begins to need repair. In order to handle the repair yourself without damaging the equipment further, you need to find out in advance how to disassemble your particular blender.
How does a blender work?
There are three types of these small appliances on the market today: the handheld, the stationary, and the food processor companion. Each type is driven by an electric motor, which activates the working elements of the mechanism. After connecting to a direct source of electricity and turning on the “Start” button, the knife begins to rotate, chopping the product in the bowl along one closed path.
During operation, the electric motor, bypassing the output shaft and spindle, transmits torque to the blade. As a result, you can adjust the speed of chopping fruits, vegetables or meat by controlling the grind. A circulation is formed inside the bowl - the crushed food moves to the background, and the front moves towards the blades.
This phenomenon is characteristic of powerful technology that is properly designed. Budget models do not always allow you to easily and quickly grind food to the desired consistency. A circulation is not formed, as a result of which the knives rotate through the air without touching the product. This feature is not always the cause of breakdowns - most likely, the power of your model is not enough to cope with the task.
If you are going to repair the blender yourself, we recommend that you take into account its operating principle. This will make it easier to identify the source of the malfunction, as well as disassemble, repair and reassemble the equipment without damaging other elements of the mechanism.
Blender repair
Faulty electrical elements in the circuit can almost always be replaced with ones of similar characteristics, and the circuit itself can be cleaned of contaminants, which can also cause malfunctions or interruptions in the operation of the immersion blender.
If an electric motor burns out, it can only be sent to a landfill, since it is almost impossible to repair it at home. The electric motor can also be replaced, but only entirely and with exactly the same size and electrical characteristics.
If, on the contrary, the motor is working properly, but the control circuit could not be repaired, then it can be left as a “spare part” to be used somewhere else.
Types of blenders and their design
This is a necessary technique that allows you to replace many devices. A mixer, meat grinder, shaker will no longer take up space in your home, because this invention has all the required attachments. Each housewife can choose any convenient variation for herself: stationary or submersible. Each of them has its own individual design and advantages.
Submersible
Visually, this model resembles a cane to which an attachment is attached. Most often, manufacturers include several functional components that allow you to quickly beat, mix or grind products. The peculiarity of this model is the need for constant monitoring, since it will not be able to work without your help.
The submersible view has a simple design:
- engine;
- spindle;
- Control block.
With their help, products crushed in a bowl can turn into a puree or emulsion with small pieces in just a couple of minutes. It will also be convenient to whip egg whites or mix ingredients using special attachments.
It is worth noting that immersion-type models are not suitable for chopping, whipping or mixing large volumes of products. They go on sale with low power, which is enough for domestic use. If you neglect this point, your model will quickly break.
Stationary
Unlike a manual one, a stationary one can work independently. You can load the products you need for chopping into it, press the “Start” button and continue doing other things. The classic model of this type consists of a main body and a bowl, which is attached to the top. If necessary, you can independently install the required attachments, which are included in the basic package by the manufacturer.
Stationary consists of the following parts:
- bowls, which are hermetically sealed with a lid;
- engine;
- spindle;
- knife;
- drive shaft;
- blocker;
- switch;
- wires.
Since the structure is more bulky and multi-component, it will be more difficult to repair.
Free hands are the main advantage of stationary models, but using them for chopping, mixing or whipping small amounts of food is irrational. This technique does not perform its duties well if it is not fully loaded.
Disassembling the Scarlett blender
Disassembling this brand of blender is similar to the previous process, but there are some changes:
- It is necessary to remove the back cover with pliers, with the help of which the speed of rotation of the knives of the device is adjusted. The lid pulls up.
- Underneath there are four self-tapping screws that need to be unscrewed.
- Now the disassembly process goes to the opposite side. Here, on the electric motor shaft, there is a plastic coupling that acts as a protective device to prevent dirt and moisture from getting inside. The coupling is removed by hand; you just need to pull it out.
- The front part of the Scarlett blender body is attached to the main part by crimping a metal attachment. There are no additional fasteners here, not even glue. Therefore, you just need to pull this part towards you, turning it a little from side to side.
- Then the metal nozzle is removed, which is also the decorative part of the device body.
- Now the main body must be disassembled lengthwise into two parts. To do this, you can use a knife or a screwdriver with a thin tip. The blade is inserted into the slot, and by turning the handle of the tool, the two halves are moved apart, inside of which there is an electric motor and a control plate. The latter is secured with two latches.
Symptoms of breakdowns
Before repairing an immersion or stationary blender, it is important to correctly diagnose the breakdown. Any deviation from stable operation signals the occurrence of problems, but there can be many reasons why they appeared. If the whisk of a blender breaks, fixing the problem will not be difficult, because you can see exactly what you are dealing with. But if the problem is hidden deep inside the mechanism, it will not be possible to immediately determine the source. Repairing a submersible with your own hands is possible, but it is best to carefully study the manual for a specific model in advance. In turn, stationary ones need a more professional approach to troubleshooting faults of any complexity, since the mechanism is more complex.
Buzzing sound when turned on, but no action occurs
If you start using it, but instead of stable operation the device hums, but does not grind, there may be several reasons for this problem:
- The blender attachment is broken. In most cases, the working mechanism jams, resulting in a buzzing sound, but no grinding occurs. To eliminate this problem, you need to carefully press the “Start” button after removing the bowl.
- The motor winding is broken. If deactivating the “Start” button did not help return the device to working condition, it is most likely burned out. This problem can be identified by the specific burning smell that appears immediately after switching on. You can fix this problem yourself, but only if you need to replace the brushes. Other reasons may turn out to be expensive in terms of cost, which is irrational, because it will be cheaper to buy new equipment.
If you are not sure that you can fix the problem yourself, we recommend not to tempt fate. Contact the service center, where professional technicians will fix problems of any complexity correctly and efficiently.
No buzzing sound when turned on
When nothing happens when you press the Start button, the absence of a buzzing sound is not always a reason to panic. There may be several reasons why the equipment does not work:
The malfunction may not be hidden in the device itself, but in the outlet. Before you start panicking, check if it works.
If used for a long time or improperly stored, it may happen that the cord may break down. This happens like this: in one or more places it bends and does not allow electricity to pass to the working mechanism. To diagnose a breakdown, you need to open the case, find the power block and the cable screwed to it. In this unit you need to check the presence or absence of current using a special screwdriver. If electricity is supplied, it means the cord is working.
Some models may have fuses that burn out after a while, blocking the operation of the device. The problem can be solved by replacing them with new ones.
If nothing happens when you turn it on, and the above points are fully operational, the engine is most likely burned out. You can diagnose a breakdown by checking the board for visual defects. If it is swollen or the tracks are interrupted, the device cannot be repaired, since the cost of this part will be more expensive than buying new equipment.
Doesn't shred
If the device turns on, but the blade mechanism does not spin, it is most likely jammed or the motor is faulty. The problem can be resolved by replacing or rechecking the correct installation of parts. In some cases, the problem lies in the low power of the blender, which is not enough to grind the product to the desired consistency.
Blender repair in Moscow can be carried out by many service centers. If you don’t know how to restore stable operation of your equipment, contact a specialist. It will help you fix breakdowns of any complexity easily and quickly.
Doesn't spin
What to do if the blade in the blender does not spin? You should not sound the alarm bell, since the reason may be a simple jamming of the mechanism. To correct the situation, you need to remove the bowl and check the knife for malfunctions. You can repair a Philips blender or another brand yourself.
Does not work
If at a certain moment the blender stops working, at best your motor winding has failed. You can fix it yourself or take the equipment to a service center. If basic diagnostics do not produce results, repair of a Bosch or other brand blender is at risk. The source of the breakdown may lie in the board, the repair of which will be expensive. Visual defects on its surface may be the answer to the question why the blender does not work.
Repair features
Before proceeding directly to troubleshooting, it is important to know the internal structure and operating principle of the unit.
The blender itself is a motor of a certain power, hidden in the body of the handle, which we hold, pressing the button and adjusting the speed (manual). The motor can also be placed in a stand housing (stationary).
A special attachment with a knife (whisk, crusher, etc.) is put on the motor shaft, which rotates the knife or rotates itself when a button is pressed.
The general purpose of both types of devices is the same, but in the event of a breakdown, their own characteristics and repair subtleties appear.
Sometimes the breakdown of a blender is caused by poor operation of the knife, slipping during chopping, or the presence of large pieces in the ground mass. This is not a breakdown, but a common problem with low-power models, which, due to limited motor power, cannot cope with solid food. If the unit has previously coped with harder fractions, then it is worth examining it for malfunctions.
Stationary models
General structure of a stationary blender:
- bowl with knife;
- motor shaft;
- bowl latching mechanism;
- electric motor;
- switch and speed controller;
- power cord.
The instructions in the table contain a description and methods for eliminating the most common malfunctions of a stationary blender:
Problem:
The bowl of a stationary unit may leak where it is connected to the body.
Solution:
bowl repair consists of simply replacing the gasket.
The latch for attaching the bowl is broken
Unfortunately, the part cannot be repaired and you will have to either find a replacement (which is not always possible) or buy a new device.
Manual models
The design of a portable blender is somewhat different: the simplest models are very compact and consist of:
- handles with electric motor;
- speed switch and power button;
- legs (oblong attachment with a “skirt” and a knife);
- power cord.
The set can be supplemented with a mill bowl, attachments for beating liquid products, making purees, etc.
One way or another, for a submersible blender to work properly, the following problems should often be eliminated:
Power cord fault
The cord is the “weak” point of portable models, since there is a much higher probability of damaging it with an accidental sharp movement, crushing it with a heavy object, etc.
- disassemble the handle with the motor;
- we check the condition of incoming contacts, evaluate internal elements for damage;
- We connect a new working cord to the contacts and check the functionality.
Speed controller failure
If the blender does not work, but makes characteristic buzzing sounds or does not change speeds, then perhaps the problem is with the regulator:
- disassemble the body;
- using a multimeter we “call” the part;
- We solder the part if the problem was found and adjusted each position;
- Pay attention to the regulator contacts - they must be closed.
Repairing a blender with your own hands in most cases involves disassembling the case. Most branded models provide this, but there are also non-separable models. In the latter case, disconnect the housing elements with extreme caution, and use adhesives when reassembling them.
Common problems
The malfunctions in the table below are typical for any type of blender:
The knife in the attachment or chopper bowl may grind the pieces worse, tear them, or jam during operation. Repairing the chopper in this case consists of replacing it, since the knife cannot be sharpened.
How to disassemble a blender chopper:
- press the knife axis with your finger;
- Pull it upward using a rotating motion.
In most bowls, the knives are removable, and if not, then only replacing the bowl will solve the problem.
If the knife in the foot of an immersion blender becomes dull, how can I repair the attachment? In this case, you can either purchase a new one or disassemble the attachment, replacing only one knife.
If the unit stops working, the problem is probably in the fuse:
- disassemble the body;
- remove the fuse;
- We replace it with a new one (the price of a new part is very small).
Engine malfunction
If the blender does not spin, although it hums and clearly shows signs of life, then this may be a malfunction in the motor winding.
It is not recommended to repair it yourself. Try to purchase a new engine, otherwise you will have to go to the store for a new blender.
When, it would seem, it was possible to determine the malfunction and change the part, but it turns out that the next time it is plugged into the network, the device does not turn on again, then this is probably a short circuit.
In this case, you cannot fix the problem on your own. This kind of damage cannot be repaired.
Minor faults
In most cases, the stable operation of equipment can be blocked by minor faults. Diagnosing and eliminating them is not difficult, but in some situations a complete repair of the blender may be required.
Issues such as repairing a blender attachment or bowl have no rational solution. In such cases, you need to replace the old part with a new one. Also, before disassembling an immersion blender, read its manual in advance. Some models have a molded plastic body that cannot be repaired.
Blender blade repair
The problem of knives not rotating is a common occurrence that occurs due to improper use. You won't be able to sharpen the blades yourself, but replacing them won't be difficult. If the blender does not turn the knife in the bowl, use the following algorithm:
- remove the bowl;
- remove the knife;
- replace the old knife with a new one.
In some cases, it may be necessary to disassemble the blender, namely the bowl. When carrying out this process, immediately replace the seals, otherwise after a while you will need to return to repairs again.
Cleaning required
When Kenwood does not turn on, repairs are inevitable, but in some cases cleaning can help. It should be carried out only after the blender is disconnected from the network, using the following algorithm:
- remove the bowl from the body;
- remove the ring nut;
- free the cutting mechanism from the object that blocks its operation;
- check the knife for defects;
- wash the parts with warm water using detergent;
- let the parts dry;
- assemble and run the equipment in test mode.
When cleaning, do not use metal or sharp objects, as they can harm the equipment./blockquote>
conclusions
As you can see, disassembling an “unassembled” immersion blender is not particularly difficult, although the manufacturer made this task somewhat more difficult by placing some plugs on the glue and making the screw heads non-standard. Also, nothing prevents you from trying to repair the blender on your own if you have at least some idea about the structure of electrical appliances.
The situation is much worse with sealed devices, which cannot be repaired even in service centers. Some equipment manufacturers simply find it beneficial that their products are not repaired using “handicraft” methods, and that individual original components and parts are replaced only as a whole, assembled. Although in this case, a breakdown of the device may result from the combustion of one tiny fuse, which costs nothing to replace. Instead, people are forced to throw the “broken” device in the trash and go buy a new one. You can also assemble an immersion blender yourself.
Mechanical damage and ways to eliminate it
Knowing how to fix a hand or stationary blender, you can save a lot, because most problems do not require large investments. In some cases, mechanical damage can block the operation of equipment. For diagnostics, you can use different methods, such as: disassembling the blender bowl or body.
Leaking engine gasket and bowl
If during operation a leak develops between the body and the bowl, do not hesitate to repair it. To do this, apply the following algorithm:
- remove the bowl from the body;
- unscrew the spindle;
- replace the old gasket with a new one.
When repairing a Scarlett blender with your own hands or another brand, please note that the spindle has a left-hand thread.
Damage to the lid latch mechanism or attachment
If the lid latches or attachments break during operation, they cannot be repaired. The problem can only be solved by purchasing a new component.
Please note that not every manufacturer offers replacement parts for their models. Take this point into account when choosing equipment, otherwise, after the bowl, lid or nozzle fails, you will have to buy new equipment.
Damage to the blender body
If the blender body is damaged during operation, it cannot be repaired. The problem can only be solved by purchasing new equipment.
Damage to the blender jar
Due to careless use, the bowl latches, which not only hold the container, but also operate the device, may fail. There is no point in trying to repair it, since it cannot be returned to its previous state. The problem can only be solved by purchasing a new bowl.
Leg repair
Most models, including the ELENBERG BL-3205 G blender, are equipped with a leg that cannot be restored. If it is made of metal, you can try to bend it manually. Even after returning to its previous shape, the leg will no longer work as well as before.
Please note that the monolithic leg cannot be restored. If it breaks, you will need to buy a new one that is compatible specifically with your device model.
Gearbox repair
Repairing a blender gearbox is a problem that you may encounter in cases where the equipment operates beyond its capabilities. This problem occurs due to overheating: the heated shaft melts the gear seats, which leads to its jumping off. To eliminate the breakdown, the device must be disassembled and visually inspected. If the gear is intact and just slipped off, it needs to be put back by replacing the fasteners or using superglue.
If during the repair you find that the gear is broken, you need to purchase the same one. No analogues or similar models will fit.
Engine failure
Sometimes it happens that the blender does not want to work at all. There are several reasons for this. Firstly, the no-bowl lock may fail. In this case, just listen to the blender being turned on. If you hear a quiet buzzing sound and the knife remains still, the locking mechanism may have engaged. You need to remove the bowl and press the lock button with a long object (for example, a pencil). If after this the blender does not work, then most likely the problem is in the motor. There is a high probability that the winding has burned out. In this case, there is only one way out - change the engine.
If you are lucky and the engine turns out to be in good condition, we move on to the next stage of testing. First, let's make sure that there is still voltage in the outlet. To do this, we plug in another electrical appliance. If it works, then everything is fine with the outlet. The next step is to check the blender's power cord. The job is not difficult, but you will have to disassemble the case (tips for disassembling Bosch hand blenders may come in handy here). By the way, before doing this, you need to make sure there is a fuse. If it burns out, we replace it with a similar one. Often, after performing these simple operations, the blender starts working.
The fuse must always be rated. Installing homemade fuses (“bugs”) leads to a fire.
If this operation does not restore the unit’s functionality, continue to check the power cord. Having plugged the plug into the socket, you need to use a voltmeter (tester) to measure the voltage that is suitable for the fuse or the power connector. If there is voltage, it means the power cord is working. If not, then you just need to replace it with a new one.
There are power connectors completely encased in plastic, with no access to the contacts. In this case, you can carefully insert needles with wires soldered to them through the insulation of the wires and connect them to the voltmeter.
Sometimes the following situation happens: when you plug the plug into the socket, the fuse immediately burns out. This means that there is a short circuit inside the device. It may be in the engine or in the electronic system unit. Repair in this case is simple: having determined the location of the short circuit or open circuit, you need to replace the faulty unit. If the problem is in the motor, we change it; if it’s in the electronics, we change the board. Determining the malfunction of the electronic board is also not difficult. You need to examine it carefully. If the inspection reveals swelling of the capacitors, carbon deposits on the resistors, or ruptures and peeling of the conductive paths of the printed circuit board, then we can confidently assume that the malfunction lies here.
Before repairs, the device must be disconnected from the network.
Electrical faults and troubleshooting methods
Identifying electrical faults is much easier than any other. When repairing a faulty blender yourself, you can use special devices to quickly find the source of the problem. A voltmeter or a special screwdriver will help you.
Broken wire
If the blender does not turn on, do not immediately worry and go to the store to buy a new one. In most cases, the source of the breakdown is not in the mechanism itself, but in the wire. To check it, apply the following algorithm:
- disconnect the device from the power supply;
- check the wire using a special tester;
- disassemble the blender body;
- find the power block where the wire is screwed;
- check for electricity using a special screwdriver;
- if there is no electricity, replace the old wire with a new one.
If you carried out the replacement process correctly, after the repair procedure is completed, your equipment will work again.
It's a fuse issue
If your blender burns out, you shouldn’t immediately resort to radical measures: buying a new one or trying to repair the board. In some cases, a blown fuse may prevent operation. To diagnose and repair it, you need to apply the same algorithm of actions as in the case of a broken wire.
Blender motor repair
The first sign of problems with the motor winding is the presence of a buzzing sound when the working part itself is not working. To make sure of this completely, you need to disassemble the housing, find the engine and check its condition.
It is not advisable to disassemble Vitek equipment to repair the engine, since the cost of repair will cost you more than buying a new blender.
Failure of the speed controller
This type of failure is common in household blenders. The malfunction can be identified by alternately switching speed modes with the regulator. If the mechanism operates at one speed constantly, the speed switch is broken.
To check it, you need to unsolder the regulator from the blender, then check all positions. When changing speed, a short circuit should form. If the current does not flow in one of the positions, this is where the source of the breakdown is located. The regulator can be repaired or bought a new one.
Before repairing a Polaris blender or equipment from another manufacturer, read the instructions for use in advance. Some models are equipped with a safety lock that does not start the operating mechanism until the bowl is installed.
Disassembling a Bosch hand blender
You need to start disassembling a blender of this brand by removing the cover of the mixer speed control. It is located on the back of the device, and is installed on two latches, as is the case with the Brown brand of blender. Therefore, it must be removed in the same way by placing it in position “2” or “3”, gradually unwinding and pulling it towards you.
Under the cover there are two self-tapping screws with cross-shaped slots on the heads. They need to be unscrewed with a screwdriver. Now is an important point on which the integrity of the blender body structure depends. The latter consists of two parts connected to each other using slots along the body. These two parts need to be disconnected from each other. To do this you will need a screwdriver or knife. The tip of the tool is inserted into the gap between the parts of the blender and rotates, thereby disconnecting them from each other.
At the same time, a click will be heard, which indicates that the parts are moving away from each other. It's not the sound of broken plastic, it's the sound of latches coming loose. Disconnection is made from both sides along the device body. Structurally, the Bosch blender is semi-collapsible. Its lower part is cast, so when opening the case, take care that the cast joint does not break. Now you need to remove the plate and motor from the blender.
Disassembling a Brown brand blender
If during use you encounter a problem that the Brown brand blender does not work, you can try to fix it yourself or take it to a service center. When deciding to troubleshoot problems yourself, use this disassembly algorithm:
- Using pliers, remove the cartridge, also known as a holder for attachments.
- Using a thin screwdriver or knife, knock out the weld seam by inserting the blades between the body and the casing. These steps must be repeated until the engine moves freely.
- Bending the clamps, remove the engine.
- Together with the motor, you can easily remove the board, using pliers as necessary.
- There are latches inside the back cover that need to be bent. This will release the back section.
- Using a screwdriver, pry up the speed controller and bend the power cable holder. Next, you can begin diagnosing and repairing faults.
Be very careful when handling the board as it is very fragile. If you damage it, the equipment being repaired can be thrown away.
Disassembling the Philips blender
Philips blenders have a slightly different body design, which also falls into the one-piece category. How to take it apart:
- Remove the decorative cover from the rear side, where the speed controller is located. It is attached to the rear end of the device with double-sided tape. Therefore, it must be pryed off with a screwdriver or knife and disconnected.
- Next is another cover, secured with two self-tapping screws. They can be removed with a screwdriver. Pay attention to the fastener heads; they have a special slot shape. But you can unscrew them with a regular screwdriver.
- Under the cover there is a plastic regulator gear. It can be removed by hand.
- Now the disassembly process moves to the opposite side of the household appliance. There is a lid here, which is designed to protect the internal mechanism of the blender from debris, dirt and water. It is secured to the device with two snap buttons. You need to press on them with a screwdriver and bend the ear with a knife. After which the cover is easily removed.
- Under it there is another cover, which is attached to the blender body with adhesive. It is shaped and covers the electric motor shaft and the motor itself. Use a knife to remove the glue and pull out the lid.
- Now the electric motor itself is pulled out from the control plate, which must be checked for functionality using a multimeter.
Read also: What can you cook with a blender?
The Polaris and Redmond model blenders can be disassembled in the same way. The only difference is four self-tapping screws on the back with cross-shaped heads that hold the plateau inside the device, for the first and three for the second.
DIY repair
You can often do the repairs yourself. Before disassembling the blender attachments and its other elements, you need to study the instructions and follow their recommendations. The following tools may be needed for repairs:
- Flathead screwdriver or knife.
- Pliers.
- Magnet for removing small parts.
- Superglue for repairing seams.
First, unscrew all the screws and remove all possible elements. Now you can start checking parts and repairing them.
Inspect the knife; if it is dull, it must only be replaced. You can buy a new one at a special hardware store. To remove the old part, you need to wrap it with a cloth and unscrew it, and screw a new one in its place.
It is better to purchase a new knife immediately with an oil seal, since some bowls cannot be disassembled and it is impossible to remove the knife.
If the blender is turned on but does not work, you need to check the voltage in the outlet using any device. If everything is fine with the outlet, check the cord. First you need to disassemble the case, find the wire in the power block and perform a continuity test using a multimeter or tester. If there is no signal, the wire requires replacement.
When the blender rotates slowly or does not move at all, but still hums, there may be a problem with the speed controller. The switch has different positions, you need to turn them on one by one and determine the operation of the device by the sound, the louder the sound, the faster the speed. If it does not change, then the regulator is removed from the unit and ringing is carried out in all modes.
You may also encounter mechanical damage such as a leak between the bowl and the engine. To do this, you need to remove the container from the body, unscrew the spindle and replace the old gasket with a new one.
The problematic part in the blender is the assembly in the gearbox in the area of the shafts and gears. Under heavy loads, the landing spots of the gears begin to melt and fly off under the influence of the iron shaft. This causes the nozzle to stop rotating. To repair, you need to disassemble the gearbox and examine the gears; if they are intact but have fallen out, they can be glued in place with superglue. This will extend the life of the blender for some time.
Basic operating rules
The rules for using a blender are simple , but compliance with them determines how long and trouble-free it will serve you.
Information: If you bought a whisk separately from the blender, it is advisable that they be from the same brand. Their power must also match to avoid breakdowns and failure of equipment.
- Before first use, the new nozzle must be kept in boiling water and then rinsed;
- There is nothing difficult about assembling a blender with a whisk. It is enough to connect the whisk with the gearbox to the motor and turn until it clicks slightly. After making sure that the nozzle is securely fastened, you can start cooking;
- To facilitate the mixing process, add liquid products first, followed by dry ones. The blender must be shaken periodically to rid the working part of any adhering ingredients. Never use it to knead thick dough - this may cause breakage;
- Do not use too hot products; it is better to wait until they cool down to at least a temperature of 60 degrees;
- The ingredients must be cut into small pieces, otherwise there is a risk that the attachment simply cannot cope with large portions;
- When preparing large quantities of food, you should periodically turn off the appliance to avoid overheating.
Important! It should be remembered that when using an immersion blender with a whisk, it is necessary to avoid excessive pressure on the bottom of the plastic or glass blender bowl; under pressure, the whisk attachment can easily deform, which will lead to it losing its properties, breaking or being ineffective.
Follow the instructions for working with the nozzle very carefully and these household products will serve you for a long time.