Novice craftsmen are often interested in the question - how to remove a bearing from a washing machine drum , because in some repair situations it is difficult to do without dismantling this element. Over time, any elements of the unit may fail, which makes it necessary to dismantle and replace them, and in such circumstances you will have to contact a service center or perform the replacement yourself. Today we will look at the nuances of dismantling and subsequent installation of bearings at home. Let's get started!
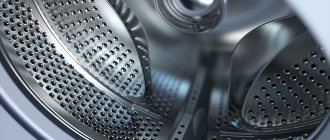
Removing the bearing from the washing machine tank
In what cases is washing machine repair required?
Of course, every housewife dreams that the device will work uninterruptedly for decades, but this is impossible. Over time, various breakdowns may appear:
- electrical circuit malfunction;
- problems with water entering the drum and draining;
- noise during bearing operation.
There are various reasons for such problems:
- improper operation;
- voltage drops in the network;
- excessive loading of the washing machine, above the specified norm;
- wear of some components.
The instructions for each unit indicate the permissible loading rate, exceeding which leads to breakdowns.
Quite often, users turn to service center specialists with a request to replace the bearing, because this element does not last forever, and after a certain time it becomes unusable.
Find out how to parse error codes for Ariston washing machines in a special article on our portal.
What is a bearing and why is it changed?
A person without the appropriate experience may not pay attention at all to such an important structural element as a bearing, because it is not noticeable during external inspection. However, it is an important functional part that serves as a support for the shaft. It turns out that the bearing holds the shaft, allowing it to rotate. To put it another way, this element takes on the entire load, which it distributes across other nodes.
You can determine the level of wear of a part without outside help, because such a breakdown will be difficult not to hear. Especially often, a faulty machine begins to vibrate in the “spin” mode.
If there are faulty parts, the unit may bounce during washing.
Note! You can also check bearing wear by visual inspection - alternately squeezing the drum from the top and bottom. If a gap is detected, the part must be replaced.
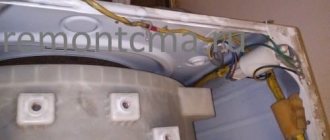
Of course, many people prefer to “ignore” the noisy operation of the drum, which is why they postpone repairs. Unfortunately, over time this will lead to damage to the crosspiece on the drum, and such a breakdown requires expensive repairs.
Sometimes, when a bearing is faulty, liquid leaks out from under it, which in turn ends up on the heating element . This will inevitably lead to the module shorting out, and then all that remains is to dispose of the device.
Prices for heating elements for a washing machine
Heating element for washing machine
Experts recommend replacing the bearing after a certain period, even if it is in working condition, because it can fail at any time. In addition, this element deteriorates when exposed to water, because a serviceable bearing does not come into contact with it, and a broken element can get wet. As a result of the leak, rust appears, which also affects the oil seal - it is also recommended to change it, like the bearing, every five to six years.
A washing machine from any manufacturer may require replacement of the bearing and oil seal.
However, even if you do not plan to change parts, you should periodically disassemble the washing machine to lubricate them. After all, in places where there is little lubrication, corrosion quickly forms.
Note! The importance of replacing the bearing and seal at the same time is that these parts must have equal wear, otherwise one element, even a new one, will still cause the other to fail.
Preparing for repairs
If after the previous wash there is liquid left inside the drum or the system itself, it will need to be drained, because during the repair work the machine will have to be completely disassembled.
During the preparation process, you should also perform the following steps:
- disconnect the equipment from the power supply:
- disconnect any connections (you will need to drain the remaining water from the hoses);
- Water must be removed from the drain filter.
You must make sure that the device is unplugged and there is no water inside.
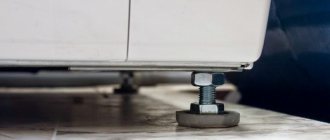
It is recommended to move the washing machine to a free space so that it is convenient for the technician to disassemble it
How to remove and replace a bearing in a washing machine?
Before starting work, you need to prepare all the tools and available materials :
- screwdrivers (set);
- pliers;
- keys;
- hammer (needed to remove the bearing);
- silicone seal;
- degreaser.
To dismantle parts with signs of corrosion, use special aerosol products
In addition, it is necessary to prepare parts that will be installed in place of the faulty ones. In order to purchase bearings and seals, you need to know the make and model of the washing machine (it is better to photograph the information from the technical passport or take it with you). It is recommended to purchase consumables only from a specialized center , otherwise they may not fit the parameters.
Preparation for repair
Before you begin directly repairing the washing machine, you need to prepare the necessary tools and spare parts that we will replace. From the tool we will need:
- Regular metal hammer
- Set of open-end wrenches of different sizes
- Pliers
- Metal rod
- Screwdrivers (phillips and slotted)
- Silicone sealant.
- Special waterproof lubricant for washing machine bearings (in extreme cases litol)
- Camera or phone with a camera - during the process of disassembling the washing machine, we recommend taking photographs of all the parts that you are going to disassemble so that the assembly process is as simple as possible.
Required spare parts for repairs
Of the spare parts for repairs, we will need two bearings and an oil seal, which we need to buy. To be more confident in the correct purchase of spare parts, you can first disassemble the washing machine, remove the old bearings and oil seal, and then use the numbers to find originals or analogues on the Internet. Or find stores that sell spare parts for washing machines, and based on the brand of your machine, they will select the necessary parts for you.
Try to buy original spare parts, they guarantee you a long service life. Also, only buy bearings that are designed for washing machines (they are usually sealed).
Don’t want to bother with such a complicated repair of your washing machine? and choose the best new washing machine for yourself.
Replacing a bearing in a top-loading washing machine
As we have already said, it is better to purchase the part that you plan to replace in advance, but this is only possible if you know what it looks like. If you are faced with a similar task for the first time, you will need to first remove the part to use it as an example, and then go to the store to find a similar one.
Bearing diagram in a washing machine
The bearing replacement process itself requires adherence to an algorithm. We will consider such actions using the example of a Zanussi washing machine.
Step-by-step instruction
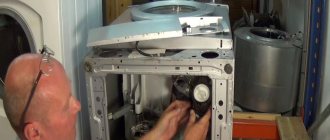
Step 1. We will start the analysis from the side panel (right), because this is where the pulley is located.
Using a screwdriver, you will need to unscrew the screws
Step 2. After removing all fasteners, you need to open the side panel.
The belt should be released
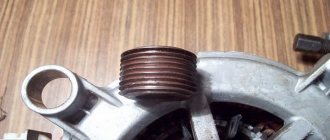
Step 3. Now you will need to remove the support to free the pulley. If the fasteners are rusty, they can be difficult to remove, so you will need the help of a partner.
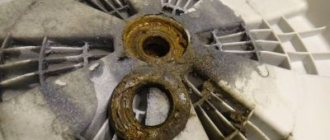
Here it is immediately clear why the breakdown occurred, because there is play in the indicated place
Step 4. Now you need to remove the remaining traces of corrosion. This is necessary in order to see in which direction the bearing is removed.
Using a rag, you need to clean the fasteners from rust.
Step 5. Now you need to take two screwdrivers and place them on the sides of the mechanism.
Using some effort, you should dismantle the unit
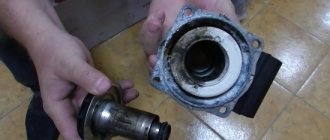
Step 6. Now you need to remove the oil seal. Here it is impossible to disconnect the bearing from the support, so it is completely replaced.
The oil seal itself and the places with which it comes into contact must be treated with a special lubricant included in the package.
Step 7. Next you need to install a new node.
There should be signs on it so you know which way to screw.
Step 8. Now you need to tighten the fasteners using the same two screwdrivers. Only now you need to move in the other direction. Using the same principle, you should replace the bearing on the other side of the washing machine.
Tighten the fasteners
Note! Since most of the internal elements are made of plastic, they should be handled carefully so as not to damage their integrity. If there is too much rust, you can clean it using special products, for example, WD-40. They degrease the surface in the best way and remove any deposits.
Removing the inner and outer races
When part of the bearing remains in the tank, removing it can be very problematic. But it is imperative to remove the fallen clip from the socket, otherwise you will not be able to repair the washing machine. To get the job done, prepare the following tools:
- hammer;
- a long thin drift (approximately 12 mm thick in diameter);
- slotted screwdriver;
- gas key;
- Bulgarian
So, if the bearing race is stuck, you must:
- treat the seat and the stuck part of the part with WD-40;
- use a screwdriver to remove all rust from the rim, spray the assembly again with aerosol;
- wait 10-15 minutes;
- turn the tank lid over and look into the “socket” from the outside. There will be a protruding edge of the stuck-on clip;
- push the drift inside so that it rests against the protruding edge of the stuck part;
- Use a hammer to tap the inner rim, moving the drift crosswise.
If you're lucky, the stuck bearing support will fall out after a couple of blows. In most cases, you will have to knock on the clip 10-20 times. When you still can’t pull out the part, treat the seat and the dilapidated ring again with WD-40. Wait 15 minutes until the part gets wet and continue knocking out the rim.
It happens that part of the bearing gets stuck to the drum shaft. The element must also be deleted. For this:
- treat the part of the bearing that “sticks” to the shaft with WD-40 aerosol, leave the structure to soak for 10-15 minutes;
- use a gas wrench to try to twist the clip;
- if the key slips, use a grinder - use it to make notches on the right and left sides of the stuck rim. You should act carefully so as not to damage the shaft sleeve;
When using a grinding machine, be sure to follow safety precautions and wear special safety glasses.
- again spray the joint with WD-40 liquid, wait until the aerosol takes effect;
- use a gas wrench to twist the stuck part of the bearing. Do-it-yourself risks will help you remove the clip.
This is how you can press out a collapsed bearing. The work can take from 20 minutes to three hours. It is important to be patient and act carefully so as not to damage the tank and drum shaft. After removing the broken ring, all that remains is to clean the seat from traces of wear, rust, and metal shavings. Then you can begin installing new components.
Interesting:
- Replacing a bearing in a Zanussi washing machine
- How to change a bearing on a Samsung washing machine
- How to properly remove a bearing from a drum
- Changing the belt on an Ariston washing machine
- How to change bearings in a Whirlpool washing machine?
- How to change a bearing in an Indesit washing machine
Reader comments
- Share your opinion - leave a comment
Replacing a bearing on a front-loading washing machine drum
In this case, the process is complicated by the fact that you will have to remove the drum from the device. We will consider the sequence of actions using the example of disassembling a Samsung washing machine. This is a standard model, so the same principle can be used to replace bearings in devices from another manufacturer.
Table No. 1. Bearing replacement instructions
| Step, illustration | Process description |
| There is usually a special sticker on the back wall of the structure, which indicates all the characteristics of the device. Using this information, you can purchase new bearings and seals without first disassembling the machine. |
| Since the back panel does not unscrew here, all work will be done from the front. However, this is not difficult to do. |
| Before starting work, you will need to disconnect all elements, including the powder tray. |
| This should be done carefully, unscrewing the screws one by one. The upper part of the panel is fixed with latches; they are also removed carefully. Carefully disconnect each wire from the socket and remember the location. If this causes difficulties, then it is better to draw a diagram or take a photograph. |
| In order to do this, you must first unscrew all the screws on the front panel. |
| In this case, you will need to remove the belt, motor and shock absorbers, since these elements will interfere with further disassembly of the tank. |
| It will be easy to unscrew the pulley using a 16mm wrench. |
| Here it is no longer suitable for use, which is why replacement is required. |
| Both elements will need to be replaced. As in the previous case, the oil seal should be carefully treated with lubricant, because the lubricating layer facilitates friction, which will significantly extend the life of the part. Don't skimp on lubrication. At the same stage, it is necessary to replace the rubber seal if it has become unusable. At the same time, even if you are not going to change it, you need to coat the joint with silicone sealant. |
| It is necessary to return all elements and fastenings to their places. |
Video - Disassembling the drum and replacing bearings
Directly disassembling the tank and replacing the bearing
Now we will describe step by step the process of disassembling the drum and how to replace the bearing. If you have managed to disassemble the washing machine, then disassembling the drum and replacing the bearing will not be difficult for you. The main thing is to carry out all the work very carefully and carefully remember the entire disassembly process.
- Clear some space around the drum so that nothing gets in your way.
- In order to avoid damage, it is best to remove the rubber cuff by first marking its location on the drum tank with a marker.
- After this, we turn the drum tank upside down with the pulley for easy dismantling. Unscrew the bolt securing the pulley to the shaft and remove the pulley.
- Then we need to recess the shaft, for this we will need a rubber hammer, if you don’t have one, you can perform this operation with a simple hammer. To avoid damaging the shaft, it is best to knock it out through a wooden block.
- Having freed the shaft, you need to unwind the drum tank itself, and then carefully separate it into two halves. Now we can easily replace the bearings in the washing machine.
- First you need to thoroughly remove dirt and wipe all working parts of the washing machine. Then inspect the removed parts for additional damage.
- If you are convinced that everything is in order, use a knockout or a blunt chisel to knock out the bearing.
- We remove the old seals.
- Lubricate the bearing seat with LITOL-24.
- Then we install the seals and, using a hammer and a knockout, press the bearing into the socket.
That's all. We were able to change the bearing in the washing machine ourselves. After this, all we have to do is reproduce all the actions we did in reverse order. Pay special attention to the drum tank assembly. In order to prevent leaks, installation must be done very carefully and when connecting two parts of the tank, be sure to generously cover the joint with sealant before connecting.
Replacing the bearing in a top-loading washing machine is done in a similar way, taking into account its design features.
There are washing machines with non-removable tanks; their repair is best carried out in specialized workshops.
Since replacing a bearing in them is an order of magnitude more complex repair, requiring skills in cutting and soldering the tank. Therefore, it is better to entrust a professional to change the bearing in such a difficult case than
If your bearing in your washing machine is humming or has completely “fallen apart,” then replacing it is simply necessary so that the machine can continue to function, because as a result, the drum will begin to dangle and subsequently other components of the machine will deteriorate. If you do not change the bearing in time, then the operation of such a machine can cause consequences that will force you to change the entire washing machine.
If you decide to replace, then you have two options:
- Calling a repairman and entrusting the job to a professional is the most convenient option, which guarantees you that all the work will be done correctly (subject to the professionalism of the master) and in the shortest possible time. But how much does it cost to change a bearing in a washing machine today? The numbers can actually scare off many, because the cost of repairs can range from 30 to 50% of the cost of a new washing machine.
- If the cost of repairs was high for you or you think that this work can be done yourself, then this information will be useful for you.
Here we will go through all the stages of repair step by step.
Subtleties when repairing washing machines from different manufacturers
Above we looked at standard options for dismantling and replacing bearings and seals. However, each model of washing machine may have a slightly different process for removing and installing parts, and we will briefly cover this below.
"Indesit"
Since disassembling such a device requires certain professional skills, it is better to immediately contact a specialist. Most often, the breakdown is associated with damage to the crosspiece on the drum or jamming of the electronics.
This washing machine is difficult to disassemble
"LG"
Most often, washing machines from this manufacturer are front-loading, so dismantling must begin by unscrewing the side wall on the right side. Here you should be careful when breaking the electric motor, otherwise you can easily damage its elements.
"Samsung"
The difficulty in dismantling machine elements lies in the fact that the bearing fastenings are weak, so they can easily be damaged by negligence. You should work carefully, without using physical force.
Most devices from this manufacturer are also front-loading.
Find out how to change the bearing on a Samsung washing machine, and also read the instructions in a special article on our portal.
Mistakes that are often made during bearing dismantling and replacement
Inexperienced craftsmen often make serious mistakes during the process of disassembling and assembling the device, which leads to the final breakdown of the unit.
Main mistakes:
- There is a break in the wiring of the sensor that is responsible for locking the door.
- Damage to the pulley surface caused by tools during dismantling.
- Violation of the integrity of the rusted thread.
- Broken drain pipe.
- When a bearing is knocked out with a hammer, the drum often becomes unusable.
Video - Replacing bearings in a non-separable tank
To maintain the functionality of the unit, you should pay attention to such errors and avoid them.
What and how to remove the clip?
More often, a damaged bearing is knocked out or removed from its seat with a special puller. The second option is more difficult, since not everyone has the opportunity to get this tool. It is also not a fact that the device will fit and help you remove the part with your own hands. Therefore, it is better to resort to a more real and working knockout.
But you also need to find a suitable device for knocking out. Many craftsmen prefer a punch. Instead, a curved chisel made from a 22-24 wrench with one cut off horn of 24 is often used. If necessary, the holder is locally ground by a Chinese engraver with an abrasive attachment, and then knocked out.
There are also ingenious inventions that greatly simplify the process of knocking out bearings. So, some people fix a collet with semicircular jaws on balls and complement it with an expanding element. Then it is easier to hit the part with a hammer, ensuring uniform and precise tapping.
But novice and “casual” repairmen rarely encounter stuck bearings and do not strive to make special devices for knocking them out. In such cases, it is recommended to use improvised materials. A good example is a section of thick-walled pipe, the diameter of which optimally fits into the hole between the edges of the holder. It is enough to rest the tube on the outer rim and sharply hit it with a hammer.
Another option is to use electric welding. We weld two tubercles on opposite sides of the ring, then put an extension for the heads on them and knock out the bearing. This method also has an obvious advantage: during welding, the part warms up, which simplifies the removal process. The main thing is to have a welding machine and know how to handle it.
An experienced master offers another banal but effective scheme. We proceed like this:
- generously treat the affected area with WD-40 and leave overnight;
- in the morning we fix a pointed rod of reinforcement 30 cm long on the outer frame;
- we break through the structure with a hammer;
- lubricate the inner race with WD-40;
- use a grinder to file the holes on the rim as deep as possible (as carefully as possible so as not to damage the oil seal);
- place the reinforcement on the rim and, turning it, tap it with a hammer;
- continue until the clip bursts.
When knocking out a bearing, you must wear glasses and gloves - it is unsafe!
When knocking out a bearing, it is important to remember your own safety. It is necessary to work only with gloves and special glasses to protect yourself from metal fragments. Do not forget that these parts are very fragile and when tapped, they scatter into dozens of small and dangerous pieces.
You can remove a stuck bearing with your own hands, but the process is complicated and time-consuming. If time, experience and effort are not enough, it is better not to experiment and entrust the knocking out to professionals.
Interesting:
- How to remove a stuck bearing from a drum...
- Replacing a bearing in a Zanussi washing machine
- How to properly remove a bearing from a drum
- How to change bearings in a Whirlpool washing machine?
- How to change the bearing in a Kaiser washing machine?
- How to repair or replace a washing machine cross
Reader comments
- Share your opinion - leave a comment
Universal tips
If you decide to repair the unit yourself, then you need to follow some tips that will be useful during the work process:
- Washing machine tanks are either collapsible or non-collapsible. With the first option everything is clear - you will need to dismantle the fastenings. In the second case, everything is more complicated, because you will need to cut the drum evenly along the marks, without affecting the internal filling. After replacing the bearing and oil seal, such a tank will need to be connected with self-tapping screws and glued to restore the tightness.
If repairs are necessary, the non-separable tank is sawn apart
- It happens that not only the bearing assembly, but also the bushing on the drum becomes unusable. Sometimes a part can be restored if you turn to a turner. If the bushing is deformed too much, then all that remains is to purchase a new one.
- It is worth noting that all non-original low-quality parts quickly fail, so you should not save on purchasing such items. It is better to purchase spare parts from specialized service centers.
- Before you begin repairing your washing machine, it is advisable to study in detail the instructions that come with it. If it has not been preserved, then information can always be found on the Internet by the name of the model.
- When replacing the bearing, experts advise checking other elements of the washing machine that may have been damaged by a faulty part. Sometimes they have a dense layer of scale on them, which is best cleaned with special means.
Force method
Dismantling the remains of a destroyed ball bearing is often complicated when it is impossible to drive the puller. If the clip remains in place, there is nothing to grab onto with a regular puller, and it is impossible to pull off the spare part.
In this case, you can remove it in several ways:
- If there are a lot of balls missing and the separator is plastic. We destroy the separator with blows of a screwdriver. After this, roll the balls into one place - the inner ring can be easily removed or knocked out.
- With a metal separator we use a strong screwdriver or punch. By striking between the balls we destroy the separator.
- Hopeless units will have to be cut out by welding, dismantling them in parts.
- Removing a stuck node helps by heating it, followed by sharp cooling with water. The scale that holds the part cracks when the temperature changes.
- Weld a metal sheet to the bearing plane. After clamping the part in a vice, with light blows on the metal, we tighten the spare part itself with it.
- Instead of a metal sheet, you can weld a bolt into the central hole. In this case, we influence it, swinging it or pulling it out with a press.
- Instead of the lost balls, a bolt of a suitable size is pushed in and rotated, engaging in the raceway. The repairman’s task is to apply enough force to pull out the “turnip”.
Contact a specialist
As we have already said, the design of not every washing machine allows you to carry out repairs yourself, so there is a need to contact a specialist. In this case, it is recommended to give preference to specialists who perform work at home, because the unit can be easily damaged during transportation to a service center.
If there is a complex internal structure of the unit, it is better to call a professional technician
The advantage of repair by a master is that a professional, thanks to his skills and special equipment, will quickly find the cause of the problem and spend only a few hours on repairs. At the same time, newcomers try to deal with the breakdown for several days in a row.
In addition, all serious companies are required to issue a warranty card. This means that if there are any problems after repairs, you can contact them again, but this time for free.
Find out how to get rid of the smell in your washing machine at home in a special article on our portal.
How much does it cost to replace a bearing?
If you decide to contact a specialist, then you need to take into account that replacing the bearing will cost from 1200 to 2500 thousand rubles. The cost is influenced by the design feature (frontal or vertical) and the complexity of the breakdown.
Note! Since other elements besides the bearing often become unusable, sometimes the cost of repairs exceeds half the cost of the unit itself. Then it is recommended to dispose of the device and purchase a new one.
Before repairing, it is advisable to carry out diagnostics in order to determine, based on its results, whether it is profitable to repair the equipment
Prices for the range of washing machines
Washing machine
Washing machine repair at home
Is it possible to replace spare parts on site? Repairing washing machines at home by a specialist takes much less time. After the cause of the malfunction has been determined, the technician will begin to “reanimate” the unit, and will not postpone the work until later, as is often done in a workshop for repairing household appliances.
In most cases, just one visit from a highly qualified specialist is enough. The technician has all the necessary spare parts with him. You can be convinced of their originality. After completing the repair work, the specialist will definitely turn on the machine and check it in working condition. This will ensure that it is properly repaired and installed. A highly qualified technician will be able to deal with even the most difficult breakdown within a few hours. He will clearly demonstrate the operating rules of the unit and explain to you what incorrect actions on your part led to the malfunction of the equipment. The master will give you proper advice.
Repairing washing machines at home is convenient and profitable. In any case, a specialist will come and determine the problem free of charge. The repair work itself has a fixed price. Parts also have their own cost. The arrival of a specialist makes it possible to save valuable time, money and nerves. To avoid certain problems arising after the repair, only call a trusted technician who will issue you a warranty card for the repair work he has carried out and provide high-quality spare parts.