Some thermal bags can keep you warm, while others can keep you cold. Despite the difference in functions, they have the same device, of course, if there is no possibility of connecting to the electrical network. Speaking about heat-retaining containers, it can be noted that they are made of two layers of fabric or plastic, between which there is a layer of foam plastic or polyethylene. Sometimes the wall thickness reaches 4 cm, which will allow you to maintain the desired temperature even longer. The lid of the thermal bag is equipped with a similar principle.
Features of the design of the cooler bag and its function on the road
The main components of such household appliances are special batteries filled with a dry salt or liquid solution. Before use, to maintain cold, place the batteries in the freezer for several hours, then place them in a cooler case along with pre-chilled food. If your bag plays the role of a heating pad, then, on the contrary, you need to lower containers with a solution that maintains the temperature into water, then place them inside the bag with hot food. You can store freshly prepared pizza, pies, main courses, coffee or tea in these thermoses for several hours.
Types of cooler bags for hiking: what are their differences
Refrigerated boxes that can be taken on a trip or hike are usually divided into options that differ in type of design and purpose. Some serve as a large device for storing large volumes of food, others are designed to keep only a few kilograms of food fresh. Let's look at the existing options.
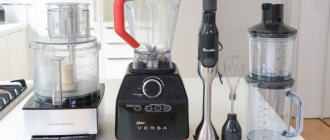
Thermal bag - a universal mobile device
Such a household appliance plays the role of both a refrigerator and a thermos at the same time. Whatever product you put in it, it will maintain the set temperature for several hours. Accordingly, warm things will remain warm, and cold things will remain cold. This option is made from fabric with a layer of thermal insulation. In appearance it looks like an ordinary large bag for hiking and traveling.
Thermal container - similar in type, different in design
This option works on the principle of thermal bags, however, its body is much stiffer and stronger. The device is made of plastic or foam and has a thick layer of thermal insulation inside. Allows you to store cold and hot foods. It works using batteries charged by cold or heat, which are included in the kit.
Car refrigerator - what is it?
A car refrigerator is a similar device to the previous ones, but it has the ability to work without special batteries, which once again take up space in the bag, because it can be difficult to fit something in it anyway. Such devices reach the desired temperature by recharging through the car's cigarette lighter. Of course, for people who do not have a vehicle, such a thing will be superfluous in the household.
Cooler bag for groceries: what can be carried in it
The device is intended strictly for food, but you can also store water here. Basically, cheese, sausages, fruits, vegetables, chilled snacks and desserts are placed in such units. Of course, all this should be in different containers.
We transport medicines in cooler bags
A medical cooler bag plays the role of a first aid kit in which you can store medications that require keeping in a cool place. You should definitely take such a box with you on the road, even if you are absolutely healthy. If you have children, then your cold first aid kit should contain antipyretic, antiseptic and painkillers.
Fishing cooler bag: its purpose
You've probably already guessed why you need a cooler bag for fishing! That's right, it is convenient to transport fish bait and bait, as well as the caught fish itself. But it is better to do this in a separate container so that the smell does not absorb into the walls of the thermal bag. At the same time, you can put food with you in such a refrigerator.
Useful tips
- The thickness of the thermal layer - the greater, the better. When you come to a hardware store, buy foil insulation from 0.5-0.8 cm, and foam plastic from 2-3 cm.
- You can buy foil-isolon at a large hardware store, and the price will not put a dent in your pocket. Material consumption – from 1 – 1.5 m.
- It is better to choose a bag for a portable refrigerator from dense, water-repellent materials that are highly durable and at the same time easily washable from dirt.
- Make sure that the handles and pockets are sewn tightly, and that the fasteners close the thermal bag tightly. In good production models, the outer zipper is covered with a special Velcro flap to reduce heat transfer.
- For ease of use of the car refrigerator, you can sew a cover with handles onto a plywood box. Don’t forget to place pieces of padding polyester, a cut blanket or any other insulation between the plywood and the cover - this way you will protect the contents of the thermal container from rapid heating.
- It is better to transport any thermal container in a large bag with other things or in the trunk of a car. Keep your portable cooler out of direct sunlight and try to open it as little as possible.
- When thawing frozen cold storage batteries that you made yourself, condensation may appear - take this fact into account and take care that moisture does not spoil the food. For example, wrap everything in separate sheets of newspaper.
- When loading food into a self-contained refrigerator, remember that there should be as few gaps and voids inside the thermal container as possible. Do not forget to transfer food with cold accumulators or regular ice packs.
If manufactured correctly, with care and following our simple recommendations, your thermal bag or car refrigerator will pleasantly surprise you with its efficiency, reliability and durability. At the same time, it’s nice to know that you were able to save a tidy sum, because in a store such a purchase would cost a significant amount. You can make several thermal containers of different sizes - small boxes for an individual snack at school, in the office or at training, 4-5 liter travel bags for shopping or modest picnics, spacious backpacks from 10 liters for large companies and impressive preparations, etc. . Now, knowing how to make a cooler bag with your own hands, it will not be difficult for you!
- 7 best Bosch refrigerators according to customer reviews
- 8 best Samsung refrigerators according to customers
- 9 best inexpensive refrigerators according to buyers
- 10 best LG refrigerators according to customer reviews
How to make a cooler bag with your own hands: master class
The master classes on making cooler bags collected by our team will help you quickly and without large financial waste make a useful bag for storing food while traveling.
A simple way to sew a two-chamber cooler bag with your own hands
First select a convenient bag that you have in your household. The more practical it is, the easier it is to turn it into a mobile refrigerator. This option will be compact and not noticeable in weight.
Items for a cooler bag: everything you need to have on hand
You don't have to use a sewing machine or needle and thread to make a bag. Ordinary tape will do an excellent job of fastening internal walls. So what we need to prepare:
- foamed polyethylene with foil (double-sided);
- the bag itself;
- zipper for fastening;
- silver or regular tape.
When making a mobile refrigerator-bag, it is necessary to take into account that the gaps between the seams should be minimal or absent altogether. The accumulated cold is released well through them.
Step-by-step instructions for a DIY cooler bag: a very budget option
When all the inventory is prepared, we can begin to build our container. It is better to first cut the polyethylene and prepare the parts of the required size, so as not to waste time on this process when sewing a compact thermal bag.
| Illustration | Description of action |
| We fasten the polyethylene foam parts together so that there are no gaps between them. Thus, we connect all the parts together. | |
| Next, we attach it to the two upper parts, which will play the role of a fastener, with pins or tape and check the functionality of the lock. When the two parts are closed, they are compressed very tightly, giving no chance for cold to escape. | |
| We connect the resulting fastener to the resulting container. The inside is ready. After which we place it inside our bag. | |
| We cut out partitions from the same material, which will come in handy if you need to carry bottles of water or don’t have to look for food for a long time. Such inserts may not be used unless necessary. | |
| From the same material we cut out an insert with a width equal to the width of the inside of the bag. We attach it to the inner walls and get a two-chamber thermal bag for carrying products. |
By making such a bag, you save significantly on your purchase. For it, you can also make batteries to maintain the cold, or before taking it outside, first put our invention in the freezer for several hours.
Making a portable version of a cooler bag
The quality of a portable thermal bag can be ensured with the help of properly selected materials.
Selecting a base
When making a portable refrigerator, we will take into account that it should be a product that is convenient to carry. Therefore, as an external case you will need a spacious bag with reliable handles. Shopping, sports, travel and even beach bags are well suited for this.
Important! When choosing a base for a cooler bag, give preference to bags made of durable, water-repellent materials.
It is imperative to check the reliability and strength of the zipper: the cooler bag must be tightly fastened.
Taking measurements and making patterns
Having selected a bag suitable for the case, we begin manufacturing. The inside of the container should follow the shape of the selected bag, but not match its dimensions, but be smaller. Then it can be conveniently placed in the case. A pattern helps to avoid errors with sizes. Measure all the components of the existing bag: bottom and top, front and back, sides. The quality of the entire product depends on the accuracy of measurement.
Attention! The inner surface is made smaller than the outer one. To do this, subtract 5–7 cm from the external measurements of each part.
Then they draw up a diagram, which in finished form should have the shape of a cross. All pattern blocks are made in the shape of rectangles.
- Center - 1 rectangle: bottom.
- To the right and left of the center - 1 rectangle: sides.
- Above the center - 1 rectangle: front part.
- Below from the center there are 2 rectangles: the back and the lid.
Selection of materials
The correct selection of materials for making a cooler bag with your own hands helps ensure reliable cold retention.
To work you will need:
- Insulation
Foil-isolon has proven itself well as an affordable and high-quality insulation material. It consists of special foamed polyethylene, on the surface of which foil is applied on one or each side. Any type is suitable for a bag, but a double-sided one will perform the task of keeping the cold better.
- Scotch
You can connect the internal parts of the bag using any tape. It is more convenient if it is double-sided. And the use of metallized tape, which has an additional layer of foil, will not only hold the parts of the bag together, but will also act as a heat reflector.
- Zipper or Velcro
Think in advance about how your bag will close. The best way to do this is to use a zipper.
You can also make an extra flap on the top of the bag to overlap the front and secure with Velcro. The valve must be added to the pattern in the form of an additional rectangle that connects to the lid of the bag.
Connecting the parts of the bag
Having prepared the materials and the pattern for the inner container of the cooler bag, we move on to the main part of the work.
- Using the pattern, we cut out the bag blank from isolon.
- We transfer to the isolon the inner sides of the rectangles indicating where the parts of the bag are connected: the center with the side, the back with the top, etc.
- We bend the cut material along the internal lines applied to it.
Important! When using one-sided foil, make sure that its surface with foil becomes the inner surface of the container.
- When using a zipper, sew it to the insulation.
- We connect the parts of the resulting isolon box. It is best to “baste” them first: fasten them with sewing pins and give the product a shape. Then fasten the joints with tape.
- We strengthen the joints. To strengthen and give shape, each joint can be additionally glued with a layer of tape on the inside and outside. You can also pre-reinforce the joints with strips of insulation that were left after cutting out the pattern. They are secured with double-sided tape. Additionally, you can once again glue these strips on top with tape.
- We insert the inner unit into the outer case and carefully straighten it out. The resulting portable refrigerator can already be used!
- Finally, you can fill the available free space between the cover and the container with material: padding polyester or batting, or you can even use pieces of an old blanket.
- The finished look of the product will be given by fastening the external and internal parts. They can be sewn or tightly connected using double-sided tape.
Making a do-it-yourself refrigerator box for a car
We will produce thermal boxes for road transportation in the form of a box. It will be both stable while driving and practical for use. All we need for manufacturing is:
- special reflective film (sold for heated floors);
- hard foam with low friability;
- plexiglass;
- polyurethane foam in a container.
| Illustration | Description of action |
| We glue together all the sides of the thermal box; they will be made of foam plastic. | |
| To fix all fasteners we use ordinary polyurethane foam. | |
| We put plexiglass on the bottom of our travel refrigerator. It will prevent fragile walls from damage. | |
| We make a lid with a protrusion to seal the thermal box tightly. Then we cover all sides of our invention with a special film. |
To maintain the desired temperature of food in such a device, you do not have to buy cooling batteries. It is enough to keep food or water in the freezer for a short time. If space allows, you can also cool the box.
Another way to make a homemade cooler bag
Another simple and budget-friendly way is to make a bag yourself from ordinary cardboard boxes. To produce them you will need two pieces, and they must be of different sizes. It is optimal if one is 2-3 cm wider than the other, since you will have to insert one into the other. The space between the two boxes must be filled with foam or dense foam.
Many people use foam rubber to make camping refrigerators. This is extremely undesirable, because this material absorbs heat well.
Using a similar principle, you need to make a lid and line its inside with insulation (foam or polystyrene) so that it fits tightly onto the container. The top of the box can be covered with thick foil or reflective film.
We make our own batteries for travel refrigerators
It is not necessary to purchase refrigerants for camping thermal containers. It’s quite possible to make them yourself. For this you will need durable plastic bags, salt, water and gelatin. The solution must be concentrated. We dilute half a pack of salt in three liters of boiling water, add two packs of gelatin to it. Pour the contents into heat-resistant sealed bags and cool. Before use, immerse them in the freezer until hardened, then place them in a thermal bag at the bottom or between products.
Types of cold accumulators for thermal bags
Containers with liquid to maintain a low temperature are made based on helium, glue or silicone. They all maintain the desired temperature equally from the moment they are placed in the bag after freezing. You can make such DIY products from any plastic container, but it is better if they take up minimal space in the mini-fridge.
Sources of cold
The cooler bag itself is designed to maintain the existing temperature. That is, it will not be possible to cool drinks in it without additional devices. For these purposes, you can use cold accumulators.
You can make them yourself if you first freeze the water or put ice cubes in bags. They don't take up much space, but may still melt over time.
It is more practical to use gel-based cold batteries. You can buy ready-made ones, or you can also make them yourself. You can use a baby diaper. They pour a lot of water into it, then take out the absorbent gel, put it in a bag and freeze it. That's all, the gel battery is ready. You can also make it from wallpaper glue or gelatin.
How to use a mobile refrigerator and extend its service life
Typically, portable refrigerators in the form of bags are used mainly in the summer season, when it is time for food to spoil quickly. But even after several uses, if the operating rules are not followed, difficulties may arise with the function of the device:
- Do not store sharp, pointed objects, especially cutlery, inside the refrigerator.
- Avoid using glass or metal utensils inside the bag. Such containers can easily damage the side walls of the device.
- Don't pack too much into your cooler bag. This will lead to a violation of the integrity of the thermal insulation, after which it is extremely dangerous to store products in such conditions.
- Do not keep foods open, especially those that have a characteristic odor: fish, smoked meats, sausage and others. They eat into the polystyrene foam.
- Periodically wash the cooler bag and treat it with kitchen antiseptics.
Most bags that you make with your own hands can easily withstand wet treatment with detergents. Therefore, take this into account during the cleaning procedure. If you have any questions about the topic of today’s article, be sure to ask them in the comments below. We welcome feedback and are ready to discuss exciting issues with you.