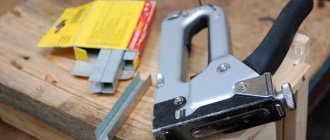
Do-it-yourself repair of a construction stapler
Often during the operation of tools, their malfunction occurs.
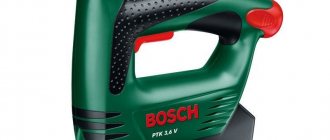
A mechanical stapler is no exception, repair of which may be required soon after purchase if the cheapest option is purchased. Let's look at the features of repairing a furniture stapler using the example of a malfunction when two staples shoot out.
Why does the stapler shoot two staples, and is it possible to fix such a breakdown? First we need to figure out why it shoots two fasteners. The reason for this malfunction is the weakening of the clamping force of the staple cassette. The pressure is provided by the rammer. Over time, the spring loses its clamping properties, which leads to a defect when the device fires two staples at once.
You can fix this in the following way:
- For staplers with a spring type of spring, make a U-shaped plate and place it between the latch and the rammer. Such a plate will eliminate free movement of the rammer, and as a result the stapler will hit exactly one staple
- For staplers with coil springs, increase the force of the rammer spring. This can be done by adding spacers in the form of washers
A detailed description of the mechanical stapler repair process is presented in the video material.
No less popular is the problem when staples do not fly out of the stapler.
If in the first case the problem is solved without the need to disassemble the device, then here you cannot do without it. It is easy to disassemble the stapler, depending on its model. To do this, remove the cotter pin washers, and then disassemble the tool. Next you need to get to the impact mechanism, since the malfunction is associated with it. Repairing a construction stapler with a malfunction such as staples not firing is as follows:
- The sides of the striker are inspected
- There should be no licked areas where they come into contact with the handle. The presence of such indicates that the striker does not move to the upper position, but jumps off almost immediately when you press the handle
- The licked areas of the edges must be ground off with a grinder, after which we can assume that the tool has been repaired
- All that remains is to assemble it and check the proper functioning
Another type of failure of a mechanical stapler is when the staple shoots out in the shape of the letter “M”.
This type of fastening is not reliable, so the problem must be corrected as quickly as possible. We will consider the reasons for this malfunction and the features of its elimination below:
If the staples jam in the shape of the letter “M”, then the reason is that the striker has worn out. The striker is a plate that is connected to the striker. This type of breakdown often occurs due to the fact that the striker is made of low quality steel
With prolonged use of the tool, abrasion of the end part of the striker occurs, which contributes to the creasing of staples in the shape of the letter “M.” The alignment of the striker is carried out using a fine-grain file. It is important to take into account that removing a large amount of edge from the striker is not recommended, as this will affect the reduction of impact force. After repairing the construction stapler, you can continue to use it
The instrument in question is distinguished by its versatility, for which it has gained wide popularity. In conclusion, it should be noted that, like any other type of tool, a furniture stapler needs lubrication. The impact mechanism is lubricated with lithol or grease, which reduces friction and therefore increases the service life of the device
After repairing the construction stapler, you can continue to use it. The instrument in question is distinguished by its versatility, for which it has gained wide popularity. In conclusion, it should be noted that, like any other type of tool, a furniture stapler needs lubrication. The impact mechanism is lubricated with lithol or grease, which reduces friction and therefore increases the service life of the device.
Publications on the topic
Glass cutting - types of glass cutters and features of their use
Choosing pruners with a ratcheting mechanism, how to sharpen and repair the tool
How to use a foam gun - device, types, selection and repair
Reversible screwdriver and purpose of the tool
How does a mechanical device work and the principle of its operation?
The tool in question is activated by applying physical effort. That is why this device is also called a manual stapler. Its design and operating principle differs from that of a stationery device. Construction tools develop a lot of force, which is necessary for fastening or securing materials. According to the design of the drive mechanism, products are divided into two types - with a coil spring and a leaf spring. The main structural elements of a construction stapler:
- Housing - often made of steel, inside which working parts and mechanisms are located. The body has a recess for your hand, which allows you to hold the device during use.
- Handle - connects to the impact mechanism, charging the spring and then firing the staple. It is this handle that the user must exert physical force on to operate the tool.
- The impact mechanism is the basis of the tool, since it is through this device that the staple is fired. The impact mechanism consists of a spring, a hammer, a shock absorber and a striker. The striker acts on the staple, pushing it out and driving it into the material. An integral element of the impact mechanism is also an adjusting screw, through which the force on the bracket is adjusted
- The compartment for installing fasteners is a special channel into which staple cartridges are installed. The ramming mechanism plays an important role in the design of the compartment. This is a special device that pushes the magazine with staples towards the striker as they are used
- Tip - hole through which staples are fed for driving them
- The latch is not the main element of the device, which is intended for transporting the tool. It fixes the handle in an inoperative state, thereby preventing accidental impact on it
A detailed diagram of the structure of a construction stapler is shown in the photo below.
Externally, all mechanical staplers have the same design, but the internal working mechanisms differ in design. The main difference is in the design of the impact mechanism, which is implemented using a conventional coiled and leaf or spring spring. How they differ from each other is described in detail.
- A coil spring staple driver is a common type of stapler that falls under the category of household tools. Their main disadvantage is that they have a large load and recoil force. Long-term use causes physical fatigue in the hands, so the tool is not intended for prolonged use.
The principle of operation of such a stapler is that the handle engages with the striker, thereby moving it upward, overcoming the resistance of the spring. The more the spring is compressed, the stronger the impact on the bracket. When the striker reaches the maximum upper position, it jumps off the handle mount, and thereby it moves downward at high speed, hitting the bracket with the striker. The staple, under the influence of the striker, shoots out of the tip, entering the material. You need to know the operating principle of a construction stapler in order to be able to eliminate its breakdowns when they occur.
- Staple hammer with leaf spring - these staplers belong to the category of professional tools. They are characterized by smooth operation, increased service life, and also higher cost compared to household type staplers. However, this does not mean at all that such a stapler is intended exclusively for professional use. If you plan to use the tool frequently, it is better to take a device with a leaf spring.
The principle of their operation is similar to devices that consist of a coiled spring. When you press the handle, the flat striker moves with simultaneous deformation of the combat plate. As soon as the striker reaches the maximum upper position, it will return to its original position with instantaneous speed. This is achieved due to the fact that the plate tends to take its original position. The hammer, returning downwards, impacts the firing pin, and the latter, in turn, strikes the bracket. Such devices are also equipped with force regulators. They have a more complex design, which is reflected in their cost.
The difference in price between these tools is significant, as is the service life. Before you buy a mechanical stapler for driving staples, you should answer the questions - what is the tool for and how often do you plan to use it.
This is interesting!
You can distinguish a stapler with a coil spring from a device with a plate externally by such a characteristic feature as the location of the adjusting screw. On devices of the first type, the screw is located on top, and on devices of the second type, the adjusting washer is located on the handle.
The problem with staples that keep getting stuck
This problem stems from the same area as in the previous case. Even though the striker of the impact mechanism fits into the slot, if it is even slightly bent, staples will constantly get stuck between it and the guide wall of the casing. At first, it will work normally every other time, and then it will become impossible for it to work at all due to the fact that the staples that become clogged over and over again will deform it more and more. In these cases, it can be stated that the stapler is broken, and how to fix it should be described in more detail.
First of all, you should prepare the necessary tools. What you will need to completely disassemble the stapler:
- a regular screwdriver;
- metal file;
- pliers;
- hammer;
- vice (required).
When everything is prepared, you can start disassembling. There is nothing complicated about this and you shouldn’t be afraid that you won’t be able to assemble it later. You simply won't be able to do it any other way. For repair you need:
- Open the magazine and remove the remaining staples.
- Turn out the adjusting screw completely.
- Remove the released spring through the hole at the top.
- Now disassemble the body. The casing parts are held in place with pins. They have molded caps on one side and locking washers on the other. They must be pulled out so that each pin can freely come out of its hole.
For repairs, it will be enough to remove two pins from the impact mechanism side.
- Afterwards, the entire stapler device appears before you in all its glory. It is necessary to remove the impact mechanism and examine it.
- Regardless of whether the firing pin is bent, the firing pin is flattened, or there is a bend in the place where it comes into contact with the rocker arm of the spring charging lever, you will have to clamp it in a vice. If the striker is deformed, use pliers to return it to its original even shape. If the firing pin is broken, we grind off the irregularities with a file.
- When the defect is corrected, we proceed to assembly in the reverse order.
- Don't forget to lubricate the impact mechanism with oil. It is advisable to use sewing machine oil.
It happens that the stop on the impact mechanism against which the spring rests may break off. In this case, only welding will help, and it is not a fact that the tool will last for a long time in this case. As a result, the welded stop will still fall off and you will have to buy a new stapler.
When the tool is completely assembled, we check it, at the same time adjusting the spring. If everything is fine, you are great. If not, it means that something was “missed” somewhere. You will have to disassemble everything and check the evenness of the parts of the impact mechanism more carefully. Therefore, it is better to do everything efficiently the first time and check it ten times.
Stapling Types
Not everyone knows that office staplers differ depending on how they fasten sheets. Most office workers are familiar with the common closed-type stitching options. This type of stationery stapler bends the edges of the staples inward. This is considered the most reliable way to bind paper. It is also the most common.
There is also an open type. In this case, the staples are bent outward. This method is preferable to use in cases where only temporary stitching of sheets is necessary. Papers fastened in this way can be easily separated, and the marks are practically invisible.
Sometimes in offices they use a special stationery stapler with straight staples. It is necessary in situations where it is necessary to attach paper (some kind of announcement or document) to a special board with a soft surface. It can be made, for example, from cork.
Dimensions of staples for office staplers
Each stapler has a specific staple size. It all depends on the number of sheets that need to be stitched.
The most common staples for a stapler are “10”. Most other staples that differ from the “10” standard have two numbers in the name. The first is the number, and the second is the length of the pointed leg of the staple.
Most staples for office staplers have the same length of the leg, but the size may differ. Therefore, before you buy staples for a stapler (their prices are usually low), you need to carefully read their size on the packaging of the device.
The smallest office staple has a size of “21” - a length of 7 mm, while in the traditional “10” it is 9 mm. The largest office staple is “24”, and the length of its legs can be either 6 mm or 8 mm. So you need to be very careful when buying.
Read also: What types of steel are there?
The most common staples for staplers (8 mm leg length): “24/8”, “26/8”. With a leg length of 6 mm – “24/6”, “26/6”.
How to choose a device: advice from professionals
To choose the optimal stapler, you need to solve the following problems for yourself:
- frequency of use of the tool: every day or from time to time;
- places of use: indoors, outdoors. Is there electricity there?
- Do you need precision driving of equipment;
- materials you plan to work with.
Depending on the purpose and working conditions, choose the type of stapler:
- for infrequent work with non-solid materials, a mechanical stapler is suitable;
- If you don't need precision in installing staples and have the ability to swing, then consider choosing an impact stapler. He's light. Attached to the mounting belt;
- for a large amount of work in places where mobility is needed, take a closer look at a cordless tool;
- if you work indoors with an outlet and don’t want to overpay for the battery, buy a stapler with a mains connection;
- If you need a stationary powerful device, don’t hesitate to take a pneumatic tool.
What characteristics to look for when choosing a stapler:
- presence of impact force regulator. A mechanical tool has two types of regulation: minimum and maximum or smooth adjustment. Electric has up to 6 modes. The setting is made using a software switch. The thinner the material, the less the impact force, otherwise dents will form;
- Double punch. Only electric staplers have it. For hard materials, large equipment is used that will not clog immediately. The double strike mechanism itself determines this and works a second time. If there is no such mechanism, then you will not immediately see that the nail heads are not completely hammered in;
- removing fasteners using a stapler. If this function is available, then to remove poorly driven equipment you will not have to do it manually or with a nail puller;
- body material. Structural steel staplers weigh more than plastic ones;
- rubber inserts on the handle. Their presence reduces the recoil of the tool, and the hand gets less tired;
- Battery type: nickel-cadmium suitable for low temperatures. But they have a memory effect, so they discharge quickly. They are used in inexpensive models;
- lithium-ion. They hold a charge longer, but are less resistant to mechanical stress;
- nickel metal hydride. Lightweight and have a long charge life;
Selecting staples for a stapler
When purchasing staples, you should know which staples will fit your stapler. The type of equipment is indicated on the packaging, in the instructions and on the tool body. Staples have characteristics that must be taken into account when choosing:
- form. It can be U-shaped or semicircular. The latter is used for cable installation;
- type of sharpening of ends: sharpened. Hammering such staples requires less effort;
- unsharpened. They jam more often and do not always clog completely;
- height H;
The most common consumable is U-shaped brackets marked “Type 53”. They have found their application in upholstering furniture with textile materials and in joining products made of wood, plywood, chipboard and hardboard. Type 140 staples are in second place in demand. They are shorter and thicker. Due to the increased contact area with the material being joined, the likelihood of material rupture at the point of attachment to the base is reduced. Therefore, they are convenient when working with thin parts: fabrics, PVC film, as well as wood, plywood, chipboard and hardboard. There are two types of semicircular staples.
Types of semicircular staples
| Bracket type | Cable diameter, mm | Thickness, mm | Height, mm |
| S (28) | 4,5 | up to 1.25 | from 6 to 10 |
| L (36) | 6 | 1,25 | from 9 to 11 |
Two characteristics are important for a stapler: shape and size. And you choose the type of sharpening for yourself. By the size of the equipment you can judge the purpose of the stapler.
Examples of types of staples and nails for staplers
| Equipment type | Description | thickness W, mm | width L, mm | height H, mm |
| Type 13 (H/19/37) | Flat metal staples | 0,7 | 10,6 | 6–14 |
| Type 53 (A/3/530) | Thin metal staples | 0,75 | 11,4 | 4–18 |
| Type 140 (G/4/11) | Thin metal staples | 1,25 | 10,6 | 6–14 |
| Type 48 | Nails | 2,8 | 1,65 | 14–25 |
Types of construction staplers
There are several main types of devices that differ not only in their technical characteristics, but also in the specifics of the tasks performed.
Manual or mechanical
The simplest and most convenient to use is a manual or, as it is commonly called, a mechanical stapler. It has relatively small dimensions, light weight and low cost. To work with the device, you have to exert a lot of physical effort, since in order for the parts to be fastened, you need to press a special handle with a built-in spring. It is the main element of a manual stapler, through which various pieces of furniture are stitched together.
This type of device is most suitable for performing simple everyday tasks of reupholstering furniture at home. It is very difficult to operate the tool for a long time, since frequent pressure on the handle with a spring can quickly get tired, and it takes a lot of time to complete large volumes of work. Thus , this type of tool will be good for minor jobs where you need to fasten soft upholstery fabric to non-hard wood.
Electric
If professional upholstery is required , specialists always use an electric stapler. This type of tool is perfect for quickly performing large-volume work. The furniture stapler operates exclusively from the mains by connecting it to an outlet or from an attached battery. And, although no effort is required to operate this device, it does have some other disadvantages.
So, for example, an electric stapler has a relatively low degree of penetrative impact and has a low rate of fire. Moreover, this type of device, compared to mechanical staplers, fails very quickly due to frequent overheating. Modern tools have a built-in indicator showing how many staples are left inside the device , which is very convenient during operation.
Pneumatic
Pneumatic devices are considered the most powerful and most efficient. They are used in mass furniture production. The pneumatic tool is characterized by durability, reliability, high stitching speed and practicality. To use this type of device, a compressor is always required, since the basic principle of operation is based on the supply of compressed air at very high pressure. A pneumatic stapler is capable of performing enormous amounts of work in the shortest possible time.
This tool is used not only for reupholstering furniture, but also in other repair or construction areas. However, for home use, a manual furniture stapler is ideal.
How to fix a stapler yourself
Despite such diversity, the operation of this tool is based largely on one principle. Regardless of the design or purpose, the shooting of staples is carried out using a shock-return mechanism. True, it is activated in different ways - manually, electric current or compressed air - but this is not of fundamental importance in this case.
In addition, a common unit for all staplers is the clip - a box into which consumables are placed before starting work. Most often, staples are used here, but there may be other options, such as nails. Inside this box there is a pusher equipped with a spring. On one side there is a thrust plate, on the other there is a lock.
The impact-return device in the stapler is a plate that acts as a striker. It is precisely in accordance with its size that you need to select staples. The choice of the latter is also quite large. This applies not only to size, but also to shape, as well as the materials from which consumables are made. This plate is attached to the striker. The shape of the latter varies depending on the design of the instrument. On the reverse side of the plate there is a spring, the force of which can be adjusted using the appropriate screw. To reduce shock loads, the design also includes a shock absorber - most often a polyurethane gasket installed in the housing.
This scheme is common to all staplers. However, the control of the tool differs depending on its type. For example, in a mechanical stapler, you can shoot the staple by pressing the lever attached to the body. On its reverse side there is a rocker arm, which, after physical impact, fits into the groove of the striker. In an electric tool, the function of the latter is performed by the solenoid of the electromagnet. Here, in order to shoot the staple, you just need to press the start button without making any effort. After this, the contacts will close, and electric current will begin to flow to the electromagnet coil. This, in turn, leads to a shot. In a pneumatic tool, the hammer is the piston of the pneumatic cylinder. After pressing the start button, a mechanical effect is exerted on the pneumatic distributor. From there, compressed air enters the cylinder, and then the staple is shot off.
With prolonged or careless use, the stapler may break. Of course, if a serious breakdown occurs in an electric or pneumatic tool, then it is better not to undertake repairs without having the proper knowledge. In such situations, it is recommended to take the tool to a specialized workshop. However, most often minor breakdowns occur. These are the ones you can try to eliminate with your own hands. One of these common problems is shooting off 2 or more staples at once. There could be two possible reasons for this.
The first is the deformed guide surface of the impact device body. To fix the problem, you need to use a hammer or pliers to return it to its original shape. The second reason is the bevel of the end surface of the striker to the side. To eliminate this defect, first remove the impact device casing. This must be done carefully so as not to break anything. Next, disconnect the striker and take it out. After this, we arm ourselves with a small file and bring the end surface of the striker to the correct shape. You can also take sandpaper here. The main condition is no bulges. The end surface must be flat.
If the tool does not respond when the lever or trigger is pressed, there is a problem with the interaction between the firing pin and the return spring. In mechanical staplers, the cause of failure will be a broken support plate. To eliminate this problem, you can use a screw with two nuts instead of one upper rivet that secures the firing pin to the firing pin. Next you need to do one more simple manipulation. In particular, we need to shorten the spring, the guideline here is the distance from the screw to the support plate. If such a problem occurs in an electric or pneumatic stapler, then you should look for the reason for the lack of electricity supply to the magnet coil or compressed air into the cylinder cavity, respectively.
How to use a stapler
Refueling
In order to load the stapler with staples (i.e. load the staple gun), you must first move away the spring intended for pressing them. The staples themselves are placed in a special groove, in which, in fact, they need to be placed. After this, the spring is put in place. The tool is completely ready for use.
Video: how to thread a stapler with staples
Now you know how to insert staples into a stapler, we can proceed directly to work.
Shot
In order to fix the necessary element, you should firmly attach the device to the place where you plan to hammer the bracket. After this, without lifting the device from the surface, you must press the trigger button (lever). If these manipulations are successful, you will hear a characteristic sound and see a staple inserted into the material.
Tips and tricks
In order to protect yourself when working with a construction stapler, you should follow some rules:
- If you use a mechanical model of the device, it is necessary to adjust the screw regulator. This operation should be performed on a piece of rough material by rotating the screw from minimum to maximum. If the staple goes in all the way from the first shot, you can start working on the “finishing” part. Otherwise, re-adjustment is required;
- In order to drive the staples at the same distance, you should first mark the necessary places with a pencil or ballpoint pen;
- Hold the material with your free hand so that when firing it does not move from the pre-designated place;
- Keep track of the number of staples in the “store” so as not to be left without a single fastening element at the most inopportune moment;
- After finishing work, secure the handle with the safety catch to prevent spontaneous or accidental firing.
In addition to all the above tips, you may also need help repairing this construction tool, since the stapler, like any other equipment, tends to break.
Repair
The most common cause of stapler failure is a breakdown of the impact mechanism . However, in order to get to it, you must first disassemble the tool. This can be done by performing a number of simple operations:
- Remove the adjusting screw;
- Remove the spring;
- Remove the protection cover;
- Remove the pins;
- Remove the lock washers.
If the list of actions does not make it clear to you how to disassemble the stapler, then you can see this in the video below.
After performing all the above manipulations, you will be able to see the drummer, which, for the most part, fails due to the exhaustion of its resource.
In order to repair this element, you should remove it, place it in a vice and, using an ordinary file, give the striker its original shape.
That's it, the repair is completed, and the instrument is again in full combat readiness.
Tips on why the stapler does not work and how to fix it:
- If your tool does not finish (does not finish) the staples, then try tightening the spring, it may have weakened;
- If a construction stapler bends the staples, try adjusting the spring tension bolt (relax or tighten, experiment). Another probable cause of malfunction is a mismatch between the type of staples and the structure of the material - for chipboard and plywood it is recommended to buy staples made of hardened steel;
- If the staples do not come out of the stapler, but bend and get stuck inside, perhaps the striker (tongue) that pushes them has become rounded and needs to be sharpened;
- If the mechanism itself works, but the staple does not fire, it is possible that the staple does not grip, or the firing pin has worn out. Try filing the firing pin and turning the damper with the other side.
Watch the video to see how to repair a staple gun with your own hands.
Video: do-it-yourself stapler repair
How to disassemble a furniture stapler, what to do if it jams. What could be the reason, what to do if the construction stapler does not fire staples:
The real-time video shows step by step how to disassemble the stapler, what could be the cause of the breakdown and how to fix it yourself, as well as how to assemble the stapler.
Device repair
First of all, you need to remove the housing and remove the clip from the gutter. This way you can see that there are staples stuck at the exit that are interfering with its normal functioning. This is usually the main cause of failure.
In order for the stapler to start working properly, you need to remove all stuck staples. This can be done using tweezers or a thin screwdriver. The main thing is not to damage the groove itself, the spring and the pusher. After this, you can remember how to assemble a stationery stapler. It is necessary to reinsert the spring if you removed it, install the housing and press the upper part to the lower part so that they are locked.
Hi all. There were 2 problems with the construction stapler: 1. The firing pin lever 2 was slipping. Staples didn’t always pop out
The stapler is almost new, about 200 staples filled.
1. I solved the first problem this way: I disassembled the stapler and sawed down the firing pin body with a file (marked in the photo).2. The second problem was solved this way: there is liquid oil in a can (with graphite). I won’t tell you the exact name, I only have a photo of it. So I immediately rubbed the entire staple magazine with this oil, as well as the staple block. Now the staples always pop out. You'll probably have to carry this oil with you))).
Comments 9
Sometimes I also lubricate the stapler. Stayer companies. Still alive. I probably hit 10,000 staples with them at most.
I would throw it away if the new one works like that)) I have the same type, but I’ve never had any problems, I haven’t smeared anything, I haven’t taken it apart
It is advisable to lubricate. Works easier
again dust sticks to the lubricant, here you also need moderate lubrication and not static lubrication))
Yes, there are few places where dust can get in. And there are not such small details that dust can cause harm. I think so. And everything doesn’t last forever. It’s more convenient to work after lubrication. And the reach force is greater) I lubricate the entire tool. As an option, runway silicone grease dries out, leaving a slippery layer. But not so durable...
Yes, the gates too, only lubricating with silicone and VD is allowed, but as for the dust, as long as I’ve been living, I don’t understand where the money goes and where the dust comes from)) I don’t use it often for periods, until I had enough strength without lubrication)) maybe I’ll try the thread when
It's not for long. It’s easier to buy a normal stapler, with a leaf spring. They last quite a long time, and these cheap ones are designed for 500 staples.
I’ve been using it for about 5 years now, if not 7. Everything is fine, but like the whole instrument I have to lubricate it periodically
It's not for long. It’s easier to buy a normal stapler, with a leaf spring. They last quite a long time, and these cheap ones are designed for 500 staples.
Come on
Z.Y. I don't want to offend anyone, don't take it to heart)))
Z.Z.Y. But I personally don’t use lubricant, or on the staples))) because I mainly attach fabric materials to a rigid substrate, and oil on the fabric, even just a little bit, will be visible and the presentation will not be the same...
There are different types of furniture staplers.
Stapling hammers
These devices hammer the staples in with forceful blows. Compared to manual analogues, the performance of this model is much higher. This tool is convenient for performing the following work:
- Fastening insulating material.
- Installation of roofing felt.
Important! In a word, a staple hammer is indispensable where, first of all, fast rather than delicately precise work is required.
Construction cable staplers
This tool is used for installing cables with a voltage load of 50 V. The maximum cable diameter is 7.5 mm. These staplers are used when performing the following work:
- Cable fixation.
- Laying an electrical network.
- Installation of communication lines.
Classic model
This hand-operated tool has become a true classic. After the release lever is pressed, the staple is driven into the material. A special category is hybrid models, with which you can perform several types of described operations.
Important! You can also classify all modifications into professional and household. Professional models are distinguished by:
- Convenience.
- Long service life.
- No plastic parts.
They have only one drawback: a relatively high price.
A real clerk
Recent Entries
Categories
Hashtags
We are surrounded by staples, they are used to fasten a cash receipt and a sales receipt written by hand, a stack of bills for an apartment, a candidate’s resume of a couple of sheets. Staples all around.
It really infuriates me when you try to punch three pieces of paper and the staples get stuck inside the stapler or bend on the paper.
Let's figure out why this happens.
- The stapler is faulty. For example, the output hole of the staple head is deformed, then the staples get stuck inside.
- The stapler contains the wrong size staples. The secret is in the same staple head - it is calibrated for a specific size. If there are smaller staples, they will fly through several pieces and get wrinkled inside. If more, they will get stuck at the exit. Although, there is always another option. If you are very strong, the staples will not get stuck, but the exit hole will break.
- You are trying to punch through more sheets than the stapler and staples are designed to handle.
- You bought cheap staples. A low price does not appear out of the blue. This means that the manufacturer saved at some stage of production.
In this article I won’t focus on staplers (we’ll get to them later), but on staples. Let's take a closer look at where and what we were missing, how to get honestly working staples and what to look for when purchasing.
In the photo: above, this is what the packaging and contents look like when the manufacturer saves on everything. In the lower part, brackets with different coatings: painted, uncoated, copper-plated and galvanized.
Making staples is a simple cutting and bending process. In a good way, they are made from uncut metal wire. This means that it is the same diameter along its entire length and all staples in the block will be even. However, the price will drop significantly if the wire is made of aluminum rather than iron. Aluminum is cheaper, but it is also softer, which means it bends and breaks more easily. Good staples are made of steel, and excellent ones are made of stainless steel. Good to know: all staples with a leg height greater than 10mm are made of steel.
To protect the staples from environmental influences and for beauty, they are coated with something. Here is a list of commonly used coatings:
- Painting is simply paint and serves purely decorative purposes.
- Galvanizing is the cheapest coating method and protects against rust. Over time, the staples become a greenish-red color.
- Copper plating is a protective and decorative coating, which is why the staples are pink or red in color. Protects against rust.
- Nickel plating is a cool plating method that makes the brackets look chrome-plated and will not rust for a long time.
It is logical that the type of coating does not affect the price. But we don’t save on nerves, right?
The staples should not fall apart when you take them out of the box. Moreover, the block must withstand a fall from a height of one and a half meters and not fall apart. To do this, the staples are glued. The amount of glue should be such that the staples do not spread throughout the box, otherwise there will be a mess inside. If the glue is applied unevenly, they will get stuck and bend inside the stapler. The same thing applies if there is a lot of glue, but I have never met such a generous manufacturer.
Read also: Connecting a magnetic starter via a push-button post diagram
When purchasing, pay attention to whether there is an inscription on the box that the staples are sharpened or sharpened. The legs of the staples are sharpened from the outside or inside. This tiny adjustment makes it easier to pierce the paper and reduces the chance of the staples bending. Of course, unless you decide to get into the Guinness Book of Records and punch one hundred sheets with staples No. 10.
Selection of bracket size:
Usually, staples are purchased along with a new stapler. Or to one that has just been stolen from someone else’s table, repainted and with the numbers changed. Therefore, we look at what number of staples the stapler is designed for, and based on this, we buy staples. It happens that nothing is indicated on the stapler, that’s how the Chinese are. Then we turn on the logic mode, if the stapler is small, then 90% there are 10 staples, if the stapler is medium or large, then staples 24/6, or take it with you to the store. I did this when I needed to buy a faucet for a mixer. I turned off the water in the apartment, unscrewed the faucet and went to the market to pick it up. Profit!
One day, I will write about staplers in detail, but I will give some information right now. Before purchasing, decide what you need the stapler for. For use at home or everyday work in the office, with a small number of sheets, “number 10” is ideal. It punches up to 12-16 sheets (we are considering all the available options for purchase, sold on every corner), is small in size and does not take up space. Just what you need! For regular work with documents and a decent amount of paper, for example in the accounting department or secretariat, a more powerful companion is suitable - the number 24 stapler. Typically, such staplers punch up to 30 sheets, this is indicated on the packaging (we do not consider special perverted cases). Yes, 24/6 staplers are larger sizes. Yes, they take up more space. But they are also more reliable, designed for intensive work and active use in a 24 to 7 format. Such staplers use staples number 24/6 and 26/6, if indicated on the package.
Damn it, they kept it a secret behind seven seals. I scoured the Internet, looked through the available catalogs of manufacturers that I could reach, but there was very little information. But why?
Here are some versions:
- "Classical" sounds like this. The first number is the bracket type. To keep things simple, we called it a conventional unit. Supposedly, it includes the width of the staple, the cross-sectional size and the steel grade of the wire. This is the most popular version, found on almost all office resources.
Versions for the curious, clerks and deep immersion in the topic:
- OK. There is another version. I'll call it "mixed". Information of this kind is less common, but still. According to this version, the first digit of the fraction is tied to the American wire thickness marking system (American Wire Gauge (AWG)). In it, the lower the value, the thicker the wire. Smart guy mode activated: wire is made by drawing. It is pulled through the decreasing holes of the die to the desired diameter. The number indicates the number of pulls. AWG gauges indicate not only the dimensions (diameter, cross-section) of the wires, but also the sizes of rods, rods, tubes, and the same wire for staples.
- And here is the version from the manufacturer KW-Trio (Taiwan) (information from the official website). In staples with fractions, such as 24/6, the value in the numerator (24) determines the number of staples per inch. The lower the number of staples per inch, the thicker the wire from which the staple is made. Actually, that’s right, I went to the warehouse and looked. Here is a photo.
Staples of different numbers, different manufacturers as an example
Glory to the hares, the second digit in the fraction does not raise any questions - the length of the leg is in mm. When choosing a staple for fastening, know in advance the thickness of the booklet you are going to punch. To do this, you need to press it down a little + take a margin of 3-4 mm for bending the bracket.
Voice from the audience: - What about staples No. 10? Answer: - No way. According to the dictionary. Just remember - these are the smallest office staples. It's not true, No. 21 exists, but it's a mythical beast like Pikachu. In reality, no one saw him. And if he did, he was on drugs. Why they are called that, why the hell they don’t have a fractional number, I don’t know, there is no information. I think the manufacturers don’t know either, they’re just acting out of old memory.
For reference:
And here is a table of correspondence between the markings of staples and the number of sheets being fastened.
Correspondence of staple numbers to the number of sheets being punched
Just two main thoughts. First, all staples are good, choose the right ones for the situation. The second is to buy cheap staples - save pennies, but lose rubles. I am not a fan of buying staples from the same manufacturer as the stapler. Check it in practice, staples don’t cost crazy money, experiment. Over time, brands you trust will emerge. When choosing staples, pay attention to the packaging. Quality of workmanship: printing pictures, gluing and design will say a lot even before purchase.
Also, the packaging must indicate:
Example of proper staple packing
I'm not saying you shouldn't buy cheap braces. I'm just warning you, don't expect a miracle. If you use a stapler once a year, then it doesn’t matter what staples are loaded into it. Yes, there is a chance that you will punch two leaves on the third try, well, never mind, there are a thousand in the box. Buy aluminum, without sharpening and coating, from an unknown manufacturer, with the expectation that 30% will be spent on defects - not a big loss. But if your productivity is a little higher, you work with documents regularly, and their appearance and neatness matters. Welcome to the club!
Video
A furniture stapler has successfully replaced a regular hammer and nails in many areas of activity. Its use allows you to connect materials of the same or different hardness to each other, for example, wood, plywood, plastic, polyethylene film, fabric. With regular use, the tool may begin to work poorly or even break down, but many breakdowns can be easily repaired with your own hands. To do this, you need to familiarize yourself with the design of the staple gun, its frequent malfunctions and how to eliminate them, and also stock up on plumbing tools. Only in fairly rare cases will repairs require the involvement of service center specialists.
Types and sizes of staples
Most consumers associate staples with U-shaped products, but their types are more varied. They can be classified as follows:
By form:
According to the material:
- steel:
- galvanized;
- stainless;
- copper;
- aluminum.
According to technological capabilities:
In addition to different types, staples differ in size, shape and material. To select the right fastener for a specific model, you need to read the information on the sticker.
If there is none, the stapler needs to be brought to the store, and any sales consultant will select fasteners for it. Information can also be found on the Internet. Each manufacturer publishes data on models and technical information about them on their website.
Fastener dimensions
The regulated fastening parameters are:
The height of the fastening element must correspond to the thickness of the element being attached. The thicker the element, the higher the bracket size should be. The thickness is selected for aesthetic reasons. If the fastener is located outside in an unclosed state, then the bracket will be less noticeable with a minimum thickness.
The length is selected depending on the material being attached. If it is quite thin, like plastic film, then the length should be maximum. And for dense materials, a medium size is sufficient.
Device repair
If you had a regular pocket or small desktop stapler, then if it breaks, it is best to buy a new one. But there are problems that everyone can fix on their own.
First of all, you need to remove the housing and remove the clip from the gutter. This way you can see that there are staples stuck at the exit that are interfering with its normal functioning. This is usually the main cause of failure.
In order for the stapler to start working properly, you need to remove all stuck staples. This can be done using tweezers or a thin screwdriver. The main thing is not to damage the groove itself, the spring and the pusher. After this, you can remember how to assemble a stationery stapler. It is necessary to reinsert the spring if you removed it, install the housing and press the upper part to the lower part so that they are locked.
What did you do relatively recently when you needed to change the upholstery of upholstered furniture or attach glassine to the frame of a house under construction? They took a hammer in one hand, nails in the other, and then “baled” them for a long time and tediously, and sometimes even on their fingers.
Today, few people want to perform such simple operations in the antediluvian way, especially with a large volume of work. After all, there is a stapler for this - a mechanical spring-action staple gun. Well, if the tool suddenly fails, do not rush to throw it away - repairs can be quite simple. Working with a stapler is a pleasure - load a block of staples into the magazine, put the gun to the right place, press lever - after a moment the material is securely attached to the base. When I needed to insulate the attic room of a country house with Izolon (polyethylene foam) 10 mm thick, I couldn’t be happier – the stapler made my task so much easier. I attached about 70 m 2 of material to the roof slopes in a matter of hours. However, when there was very little left before the completion of the work, the tool began to “fool” - I press the lever, and instead of a bracket there is only an imprint of the striker plate. I checked the charger - the magazine was full. I began to figure out what was going on (photo 1...6). I unloaded the magazine, unscrewed the adjusting screw, and then removed the spring of the impact mechanism. After that, I removed the protective covers of the pistol body, first freeing the pins from the locking split washers, and got close to the firing pin. The cause of the malfunction immediately became clear - the thrust platform of the striker body had worn out, ensuring the interaction of the striking mechanism with the rocker arm of the trigger device. To make this more clear to those readers who have encountered a similar problem, but have not yet understood its causes, I will try to briefly explain the principle of operation staple gun (see figure).
Typical design of a stapler - staple gun
Not so long ago, upholstery work was performed exclusively using a hammer and nails. This mainly concerned the production of furniture. But recently a special device has been developed that helps to carry out fastening in a more convenient way - this is a construction stapler.
If an upholstered chair or sofa is turned over, you will notice that the upholstery is attached to special tightening elements, that is, staples. Both the hammer and nails are a thing of the past, and now upholstery can be constructed without injuring your fingers and much faster than before. The design is more convenient for work, but it can also fail, like any tool.
Then the owner of the stapler is faced with the question of repairing the device.
Working with a mechanical stapler
To learn how to carry out repair work using a construction stapler, you need to know about the basic rules of this process.
Charging the device
Before you start, for example, upholstering a sofa, it’s worth learning how to charge a stapler. This is done step by step according to the following algorithm:
- Installing the device on the fuse.
- A folding flap at the rear of the stapler reveals a compartment for staples.
- Pulling the rod with the spring out of the compartment.
- Installing staples with the upper bent part towards the handle of the stapler.
- Releasing the rod to clamp them.
- Slam the sash until it clicks and start working.
Some models have a different mechanism and therefore many people think about how to refill them. There is nothing complicated here either, just remove the special chute that appears when you press the button. The staples are installed into it with their sharp ends down. Afterwards the filled element is inserted back.
The process of charging a mechanical stapler with staples
We attach the staples to the base
After clarifying the charging instructions, it will not be amiss to find out how to use the stapler during direct work.
This is done like this:
- Prepare materials for fixation and the instrument itself.
- Mark the line along which the staples will be attached. This makes it easier to install fasteners exactly in the place where you plan.
- The stapler is applied to the desired place quite firmly.
- Without lifting the device from the surface, press the lever.
- After this, if everything is done correctly, a characteristic sound will be heard, and the bracket will be securely attached to the base.
Staple fixation process
What is a furniture stapler
A furniture stapler is a tool that secures or fastens parts using special staples. There are many other names for the device, such as a staple gun, staple gun, tacker, nailer, hammer.
Benefits of use
Thanks to the device, the material is quickly sewn together, and the appearance of the product is quite aesthetic. This is the basic principle of the drummer's operation.
The stapler has undeniable advantages when using:
No need for much physical effort
This is important when working in an unstable position, and thanks to the precise transmission of the impact, the likelihood of damaging the workpiece is minimal. Since all the tacker's sharp consumables are hidden inside the box, this ensures a high degree of safety when working with it.
Operations with the device are carried out with one hand, which allows, if necessary, to support the product with the second hand. The tool is comfortable to work in hard-to-reach and inconvenient places. The device does not require special skills to use. There is no vibration or noise when using it. Compared to working with a hammer, installation with a stapler is much faster. The device is multifunctional; consumables can be not only staples, but also nails and self-tapping screws. With proper use, the device will have a long service life. It is easy to maintain.
Before you start working with the device, you should know in what cases it is used.
How to insert staples into a construction stapler
The most commonly used construction mechanical stapler. Threading staples into it is a process quite similar to using a stationery device. To insert glued staples, you need to pull out the spring in the lower section. Next, carefully place them in the open connector and secure it by inserting the spring back all the way.
After completing the installation of the brackets, you need to check the operation of the device.
Today, a stapler, along with a hole punch and a binder, has become an integral attribute of every office, as well as a workshop (if it concerns the construction type). It is not difficult even for a child to select staples for any of these devices, as well as to thread them. The most important thing is to clearly know the size and type of staples used and not to neglect safety rules.
Staples for a stapler are a consumable material for a tool that is used to fasten parts. They are made of wire and usually have the shape of the letter P. When purchasing any stapler, a small amount of staples is included with it. And when they run out, many home craftsmen, having come to a hardware store, are confused by the variety of types of staples offered to them.