Windows operating systems
03/29/201944754 1 comment
A printer is a popular peripheral device that is widely used in offices, enterprises, government agencies and at home due to its ability to instantly print any documents. It is quite easy to use and does not require any special skills from the owner. However, sometimes owners of office equipment have problems setting it up.
Manual installation
The easiest way to add a local printer to your computer is to manually install its drivers.
Before starting all actions, you must break the physical connection between the printing device and the PC created by the USB cable.
If you have a Windows operating system installed, then the procedure should be as follows:
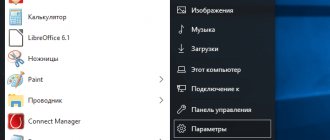
1. Go to the “Devices and Printers” section. To do this, click the "Start" button and select "Devices and Printers" on the right.
If you have Win10 installed, then the procedure for logging into the “Control Panel” is described in this subsection of this article.
2. In the window that opens, look for the button to add a new printer. Depending on the version of your Windows, its name may differ slightly.
3. Click on the “Install a printer” button at the top left. In the next window, select “Add a local printer.”
4. We do not make any changes in the port selection window. Leave the LPT port and click “Next”.
5. In the window that opens on the left, select the manufacturer of your device. After which, a selection of models will be available on the right. Among them you should find the desired model.
If your device model is not in the list on the left, then click the “Windows Update” button to download the missing devices.
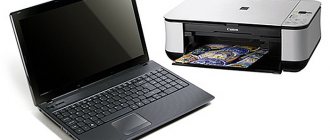
How to connect a Canon printer to a laptop
Connecting your Canon printer to a computer or music book a few years ago was not considered an easy task. In the previous one, we had to create a special port and connect to it, make sure that we have all the necessary drivers, and we configured everything correctly, and then sit and wait for our operating system to allow us to print.
Now, fortunately, this whole procedure has become much easier and clearer. If we are going to connect our printer directly to the computer, or want to create a new network connection to the printer, then with the development of modern technology everything can be done much faster and easier. First of all, you need the printer to be useful near the computer. It is very important that your printer is positioned in such a way, relative to the computer, that the cable can easily reach the port. Before you begin the procedure of connecting the printer to your computer, you need to install the necessary software that came with the printer. This will make the connection much easier.
How to connect a Canon printer to a laptop If there is no software, do not worry. Windows can automatically detect a printer connected to your computer. Before connecting the printer to your computer, install the software that came with the printer (to make the connection process easier). If there is no software, don't worry. Windows can automatically detect the printer connected to your computer. Follow the Windows instructions to install the printer. Windows will automatically detect the new printer and install the necessary software. Check if the printer is installed correctly. Open Control Panel. Select "Devices and Printers." Find your connected printer in the list.
How to connect a Canon printer to a laptop If you cannot install the printer, download the latest version of drivers for your printer model from the manufacturer’s website - this will solve the problem with installing the printer.
Place the printer near your computer. Make sure that the printer is located at such a distance from the computer that the cable can easily reach the port. Before connecting the printer to your computer, install the software that came with the printer (to make the connection process easier). If there is no software, don't worry. Mac OS can automatically detect the printer connected to your computer. Connect the printer to your computer using a USB cable. Connect directly to the USB port, not to a USB hub. Make sure the printer is plugged into an electrical outlet and turned on.
Follow the Mac OS instructions to install the printer. Mac OS will automatically detect the new printer and install the necessary software. Check if the printer is installed correctly. Open the Apple menu. Select Printers and Scanners. Find your connected printer in the list.
If you don’t know how to connect a laptop to a Canon printer, download the latest version of drivers for your printer model from the manufacturer’s website - this will solve the problem with installing the printer. To install a printer that can be accessed by any computer on the network, go to the first subsection. To provide network access to a printer connected to a Windows computer, go to the second subsection. To provide network access to a printer connected to a computer running Mac OS, go to the third subsection. Check your printer's network connections. Many new wireless printers have Ethernet ports. If your printer is not one of these, you will need to either connect it to your computer and share it on the network, or connect it to a print server (the small device through which you connect to the network and to which you need to connect the printer's USB cable).
Place your computer where it can receive a wireless network signal. The printer must be able to receive and send signals to the wireless router. If you are connecting your printer via Ethernet, you must connect it to your router. This means positioning the printer so that it can be easily connected to the router. Turn on the printer. Follow the onscreen instructions to connect the printer to your network.
For more information about network settings, read the instructions that came with your printer.
If you don't have instructions, look for one on the printer manufacturer's website. Some printers must be connected directly to the computer to be connected to a wireless network; Other printers allow you to set up a wireless network connection directly on the printer itself. If your printer supports a wireless network, find the network through the interface menu. After that, enter the password to gain access to the wireless network. We also carry out: refilling and repair HP printer error 49
Downloading drivers
If the option described above cannot be implemented, then you should try downloading directly through the official website of the product manufacturer.
Do not download drivers from third-party resources, no matter how reliable they may be. There is always a threat of infecting your laptop with viruses or malware.
Depending on the manufacturer of your printing device, use the links below:
- HP
- Canon
- Dell
- Epson
- Lexmark
- Samsung
- Xerox
- Brother
But it will be more convenient and faster to do this using our driver selection service.
We will look at downloading drivers directly using Canon devices as an example.
1. Follow the link https://software.canon-europe.com/.
2. Next, you need to find your device by the exact name of its model. Enter its name in the search bar.
3. The manufacturer’s official website suggests choosing different software versions for the Windows system.
As a rule, your OS version will be detected automatically, of which you will be notified with the message “Operating system detected”. You should not change these default selections. All that remains is to select the driver language you need from the list to the left.
4. Click on the “DOWNLOAD” button.
You can find the downloaded file in the “Downloads” section of your browser. To enter this section, press the key combination CTRL+J.
Windows Update
Windows updates can also help install drivers on the printer when there is no disk for it. Modern operating systems of the Windows family, such as Windows 7,8,10, have a built-in base with drivers not only for printing devices, but also for other equipment.
If your device model is new or not very popular, then there may not be drivers in the Windows base. In this case, it is necessary to perform a forced update through the Windows Update service. See the instructions below for how to quickly and easily do this.
Procedure for Win10. Click to view.
1. Open the control panel of your personal computer. Regardless of the device, everything is the same for both if Windows 10 is installed. Right-click on the “Start” button and select “Run” from the drop-down menu.
2. In the window that opens, type “Control”.
3. In Control Panel, open the "Devices and Printers" section.
4. Find your PC among devices.
5. Open the menu by right-clicking and select “Windows Update.”
6. Click on “Check for updates”. If the system finds any update packages, install them.
Instructions for Win7. Click to see.
Actions to update through the “Update” service for the seven.
1. Click “Start” and enter “update” in the search bar. Select "Check for updates".
2. Check for updates and install those found.
After rebooting the PC, Windows should “see” the new device and install the newly downloaded drivers. If this does not happen, then perhaps the driver is not in the Microsoft database. We recommend using other connection methods. They can be found below on the page.
Connecting a printer via Wi-Fi
If you're not used to counting money and don't like fiddling with ever-tangling wires, then you've probably bought yourself a Wi-Fi-enabled printer. To connect it, do everything as in the instructions below:
- Connect the printer to electricity and make sure it is within range of Wi-Fi coverage (at least in the same apartment as the router). Also make sure that the Wi-Fi router itself is turned on.
- Click on the Wi-Fi turn on button on your printer. The location of this button varies depending on the printer model (some models have it on the back and some have it on the front). This button is indicated either by the words “Wi-Fi” or by a distinctive logo.
Press the Wi-Fi button on the printer
- Now take your laptop and go to the menu "Devices and Printers" via context menu "Start".
Click on “Devices and Printers”
- Find your printer in the list, the icon of which will be labeled with its model, and right-click on it. Then left-click on "Use as default". Ready.
Right-click on the icon with the name of the printer, left-click on “Set as default”
This is the simplest connection method, but it has one significant drawback. If you don't turn off the printer after use, another person may connect to it and print unnecessary documents, wasting your ink and paper. It’s even worse if it’s your neighbor who decides to print out a few offensive words addressed to you. If you are not ready to accept the possibility of such an outcome, then you need to connect the printer by entering the SSID password. To implement this method, your printer must have an LCD display.
- Go to your printer settings. They are usually depicted as an icon of a key with a screwdriver or other similar logos.
Go to the printer settings by pointing your finger on the LCD display on the icon with the image of a key
- Select an item "Wi-Fi Settings". The interface of such printers is created mainly in English.
Select “Wi-Fi Settings”
- Go to the menu "Wi-Fi Setup".
Go to the “Wi-Fi Setup” menu
- Open menu "Wi-Fi Setup Wizard". After this, a search will be made for networks available in the coverage area. Select your network from their list.
Open the “Wi-Fi Setup Wizard” menu
- After selecting your network, you will need to enter a password. An SSID password is a password that you once entered to set up Wi-Fi and forgot about it. I'll have to remember. Confirm your actions by pressing the “Done” button with your finger.
Enter the password for our Wi-Fi network, press the “Done” button with your finger
- Once you enter the correct password, the Wi-Fi indicator on the printer panel will turn green. This will mean that you did everything right.
The green Wi-Fi indicator on the printer panel means that the steps have been completed correctly
Video - How to connect a printer to a laptop via Wi-Fi
Automatic installation
For the Windows operating system family, it is possible to automatically download drivers for any device connected to a personal computer. When you make certain settings, all the necessary files will be downloaded to your computer themselves.
To do this, you need to do a few simple steps:
1. Go to the “Devices and Printers” section (how to do this is described in the same article above). Among the devices, select your PC or laptop. Right-click on it. Find "Device Installation Options".
2. Oh and save.
Stage 1 – Selecting a connection method and setting up synchronization
Modern printers support two ways to connect to a computer:
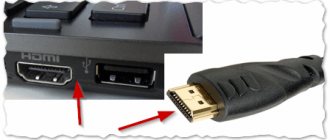
- Wired . Using a cable, the gadget is connected to a PC via a USB port. All the necessary wires are included with the printer;
- Wireless . Connection is possible via Wi-Fi or Bluetooth. This method allows you to easily connect one printer to several computers at once and send documents for printing at a distance of up to 50 meters from the printer (depending on the range of the Wi-Fi router or Bluetooth module).
Fig. 2 - Connection methods
Before performing the selected connection method, connect the printer to the electrical outlet using a power outlet and start it up.
To do this, press the “Power” , which is located on top of the case or on the back near the connection ports.
Connecting the cable
If you chose a wired connection option, find a cable in the printer box to connect the device and PC.
It looks like this:
Fig.3 – Printer cable
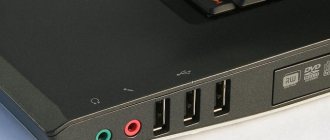
To connect the gadget to a laptop, make sure that the PC has free USB ports. If you don't have them, you can additionally buy a special USB splitter.
As a rule, after connecting the printer wired, the new gadget automatically appears in the “Devices and Printers” on your PC.
You can find this window through the “Control Panel” . Depending on the version of Windows, this window may also be called “Printers and Scanners”.
Fig. 4 – “Printers and Scanners” window in Windows 10
Note! If the name of the model or manufacturer of the new printer does not appear in the list, you need to press the “Add Printer” and wait until the Installation Wizard automatically recognizes the new gadget in the new window. Automatic addition is only available for the wired connection method.
Connecting the printer and computer via Wi-Fi
To implement a wireless method of connecting the printer and computer, you will need a working Wi-Fi access point.
With its help, documents can be sent for printing not only from a computer, but also from a smartphone or any other device.
The first option for wireless synchronization is to use WPS (Wireless Protected Setup) technology.
Both devices must support it and the router must have a corresponding button to activate the function.
Next you need to configure the router through the administrator menu:
- Using any browser, open the address 192.168.0.1 (or 192.168.0.0);
- In a new window you will need to enter the administrator login and password. As a rule, these are admin and admin, but on the bottom cover of the router you can always find out the exact information to enter the settings;
- Turn off MAC filtering and close the settings menu.
- Now press the WPS , which is located on the body of the WiFi router.
After this, the router will begin searching for all gadgets with a built-in WiFi module.
- On your computer, go to the “Devices and Printers” and using the “Add device” , add a new printer to the list of gadgets on your PC.
- In the Settings Wizard, select the “The printer you require is not in the list” .
Fig.5 – Setup Wizard window
- Next, select the adding method “Via TCP / IP address or by host name”:
Fig.6
After the new printer icon appears in the Devices and Printers , you will be able to add documents to the general print queue, despite the fact that the gadget will be directly connected to the router and not to the computer.
If your home router is a budget model and does not support WPS technology, follow these steps to wirelessly connect the printer and PC:
- In the “Devices and Printers” , open the Add a New Device Wizard and among all the methods, click on “Add a Bluetooth or wireless printer” ;
[/su_list]
Fig.7
Important! Make sure your printer and computer are connected to the same Wi-Fi access point. Otherwise, the computer will not see the new device.
Adding a network printer via Wi-Fi
In most offices, you can find an option where one printer is synchronized with several computers at once.
To set up a network connection to a printer that is already set up on another laptop, you need to follow the same steps as for a regular connection using the Add a Bluetooth or Wireless Printer .
The only difference is that another computer must be turned on, which is already synchronized with the printer.
The working network will be configured automatically and you will not have to enter the IP addresses of the devices yourself in the menu for discovering new printers.
How to find out the printer ID
Another working way to download drivers is to use a unique hardware identifier. Each model has its own unique ID. Using this code, you can try to search for suitable software.
Instructions for determining ID:
1. Click "Start" and find the "My Computer" icon. Right-click and select “Management” from the menu. See the picture below.
2. Open the device manager, and on the right, expand the “Other devices” item. If the PC or laptop sees the printer, it will be in the list. Right-click on it and select “Properties” from the list.
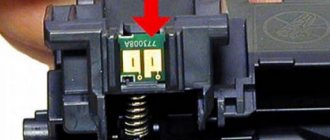
3. In the window that opens, go to the “Information” tab. In the properties from the drop-down list, click on “Hardware ID”.
4. Afterwards you will see the necessary information. Using the received identifier, you can easily find drivers through an online search or on the manufacturer’s website.
HP, Canon printer cannot be installed on Windows 7 or 10. Ways to fix the problem on your own.
Installing a driver from another printer
This option can safely be classified as “exotic”. It would seem how a driver from another model might fit. But if the firmware and software versions of both printers are identical or these devices are representatives of the same series, then this method can also help you.
The next steps are:
- Find out the exact model of the printer connected to your PC or laptop.
- Open the manufacturer’s website, enter the model in the search and in the model description you can find information about the series to which it belongs.
- Find out what other models belong to this series.
- Install drivers for any printer in the series on your computer using any of the methods described above.
- Try printing any document.